How to Draw Harley Quinn
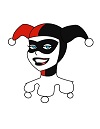
Use the video and step-by-step drawing instructions below to learn how to draw Harley Quinn from Batman: The Animated Series. A new drawing tutorial is uploaded every week, so stay tooned!
Intro: Start off with a pencil sketch. In the beginning stages, don’t press down too hard. Use light, smooth strokes for sketching.
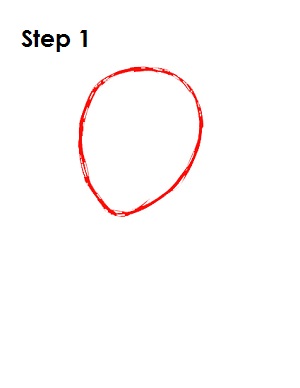
Step 1: Start by drawing an egg shape that points down in the middle of the page. It doesn’t have to be perfect. It’s just a basic guide for Harley Quinn’s head.
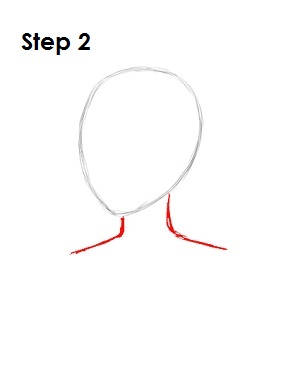
Step 2: Draw two curved lines underneath Harley Quinn's head as guides for her neck and shoulders.
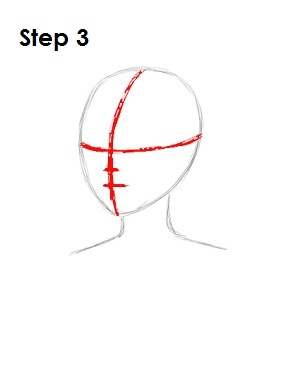
Step 3: Next, draw two intersecting lines across the egg shape, one vertical and one horizontal. Bend the lines so they follow the contour of the shape. Draw two smaller lines in between the horizontal construction line and the bottom of the egg. These will be construction lines that will help you draw Harley Quinn’s facial features later on.
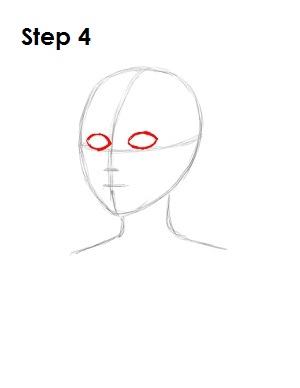
Step 4: On top of the horizontal construction line and on either side of the vertical construction line, draw two shapes that resemble footballs for Harley Quinn's eyes. The shape on the left should be a bit drawn smaller because of perspective.
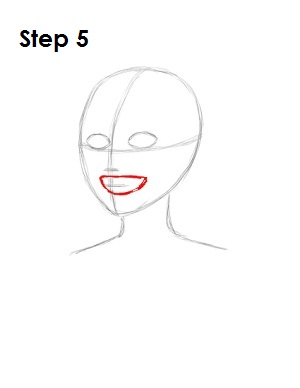
Step 5: On top of the lowest of the horizontal lines, draw a guide for Harley Quinn's mouth. The shape is similar to a half circle or the letter D on its side.
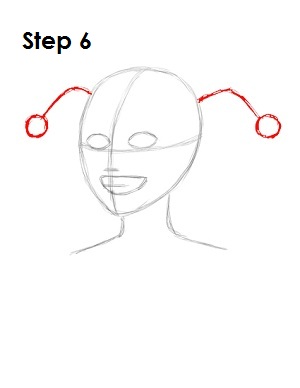
Step 6: Draw two lines that bend down on either side of Harley Quinn's head. At the end of each line, draw a small circle. This will be a guide for her jester hat.
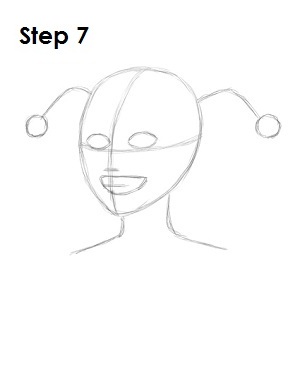
Step 7: That’s it for the initial sketch! You have the basic shape for Batman's Harley Quinn, so now go in and tighten your drawing. From this point on, press harder with your pencil in order to get darker lines and a more defined sketch.
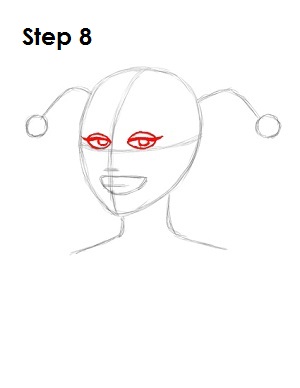
Step 8: Darken in the shape of Harley Quinn's eyes. Draw a thick curved line in the middle of each eye to represent her long eyelashes. Inside each eye draw a half circle for Harley Quinn's pupils.
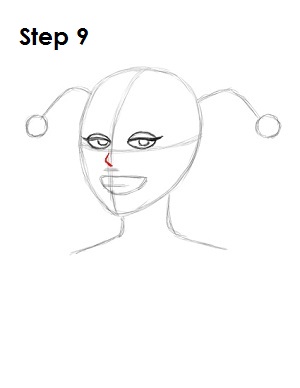
Step 9: Right above the smallest horizontal line, draw Harley Quinn's nose as an angled line similar to a less than sign: <.
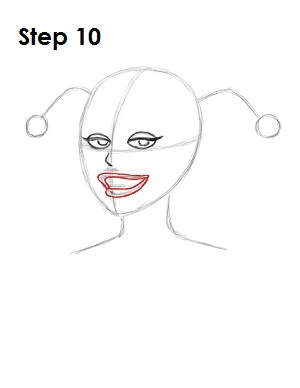
Step 10: Use the initial line as a guide to draw Harley Quinn's lips. Simply follow the line around, curving it more and making it thicker along the middle.
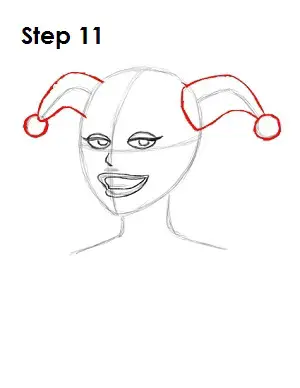
Step 11: Draw the pointy ends of Harley Quinn's jester hat using the initial lines as guides. Make the shapes thicker at the base and narrower the closer they get to the balls.
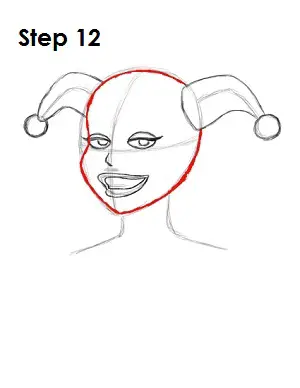
Step 12: Use the original egg shape as a guide to draw the rest of Harley Quinn's head. Be sure to dip the line in toward her eye a bit to form her cheekbone.
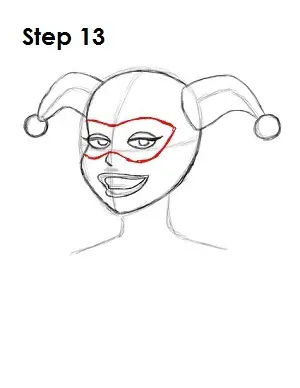
Step 13: Draw the mask over Harley Quinn's eyes. Simply draw a line that surrounds both of her eyes and make sure to dip in the middle right between her eyes.
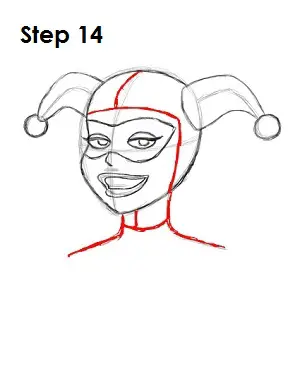
Step 14: Draw the rest of Harley Quinn's costume. First draw a line across her forehead that then dips down the right side of her head. Draw another curved vertical line above that one. Now darken her neck and shoulders and draw a couple more lines on her neck for the rest of the costume.
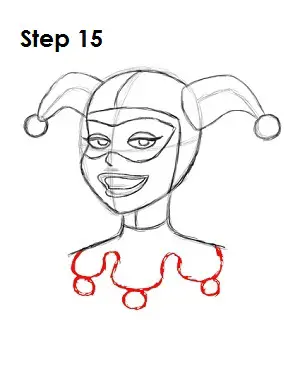
Step 15 (optional): If you like, you can draw more detail to her costume by drawing three curved lines under Harley Quinn's shoulders. Below each curve draw a small circle.
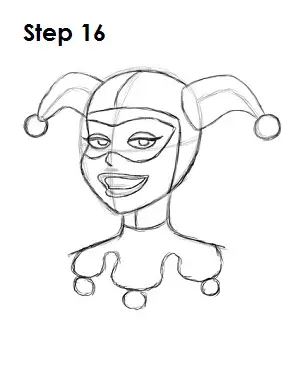
Step 16: That’s it! You now have a nice sketch of Harley Quinn from Batman: The Animated Series. You can stop at this quick drawing for a rough, sketchy look or go for a more finished look by continuing to the step below.
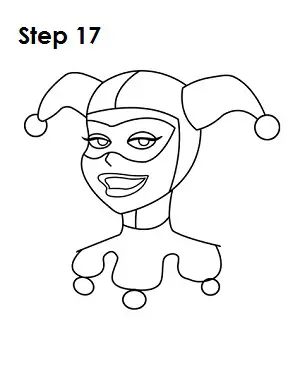
Step 17: For a more finished, inked look, carefully draw over the final sketch lines with a pen or marker. Wait for the ink to dry, and then get rid of every pencil mark with an eraser. You now have a finished inked drawing of Harley Quinn! You can stop here or go to the final step to complete your Harley Quinn drawing.
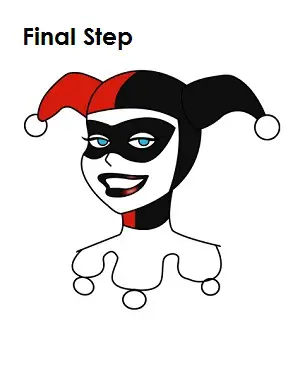
Final Step: For a completely finished Harley Quinn drawing, you have to color it. You can use markers, color pencils or even crayons! Color the right side of Harley Quinn's costume and her mask black. Her lips are also black, but add a tiny bit of red to represent shine. The left side of her costume is red, and her eyes are light blue. That’s it! You now have a completed drawing of Harley Quinn from Batman: The Animated Series.


