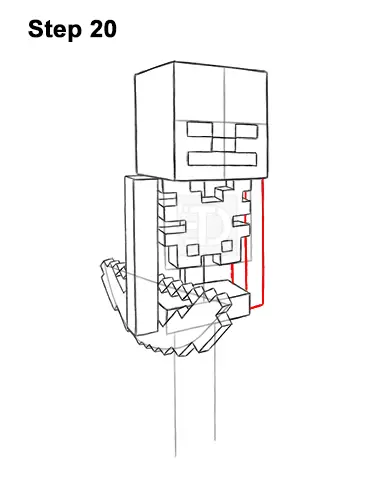
Step 20: Darken the line on the right to create the Skeleton's other arm. Add a couple more line on the left to make the arm thicker. A big part of the arm will be behind the chest shape so don't overlap it.
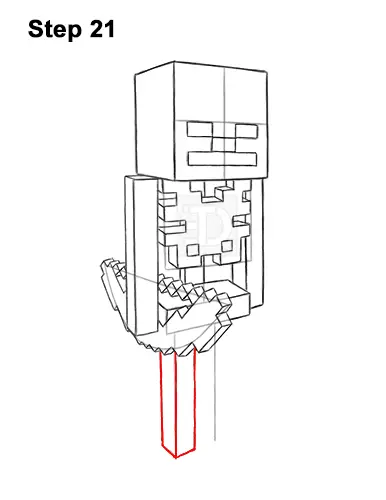
Step 21: Darken the shape under the body on the left side for the Minecraft Skeleton's first leg. Add a couple of shorter, vertical lines on the sides to make the shape thicker. Close off the shape at the bottom by using two short sloping lines.
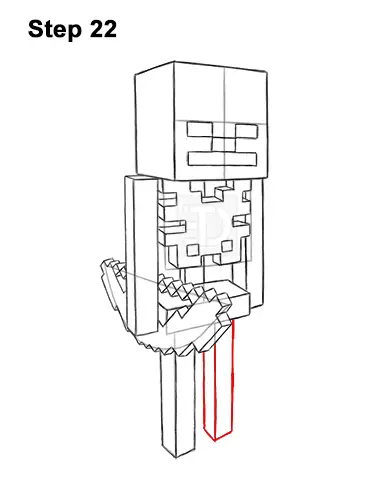
Step 22: Use the last line under the body as a guide to draw the Skeleton's other leg the same way. Darken the guide and then add two shorter lines on the sides to make the shape of the leg thicker. Close off the shape at the bottom using short, sloping lines.
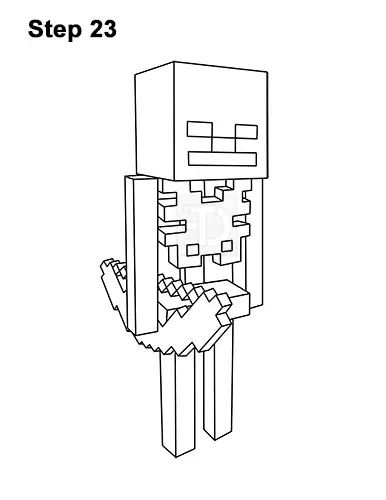
Step 23: Go over the final sketch lines with a pen, marker or any other type of permanent ink. Take your time and be careful when you ink to avoid any accidents. After the ink dries, get rid of every pencil mark with an eraser for a cleaner drawing of a Minecraft Skeleton.
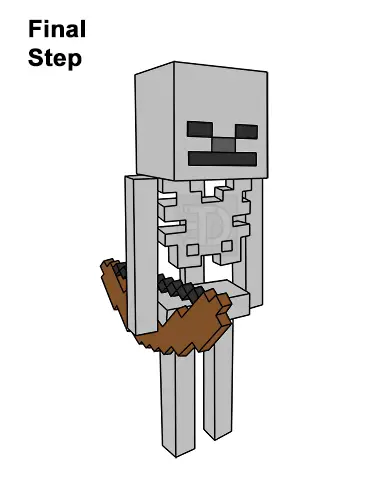
Final Step: Color your drawing using colored pencils, markers or crayons! Use gray for the whole body. Use a slightly darker gray for the nose. Use black for the eyes, mouth and the for the string on the bow. Color the bow brown.
That's it! You know how a finished drawing of a Skeleton from Minecraft.
Thanks for visiting! Subscribe to the EasyDrawingTutorials YouTube Channel for a new tutorial every Sunday.
To learn how to draw animals, visit How2DrawAnimals.com.
RELATED TUTORIALS
 |
 |
 |


