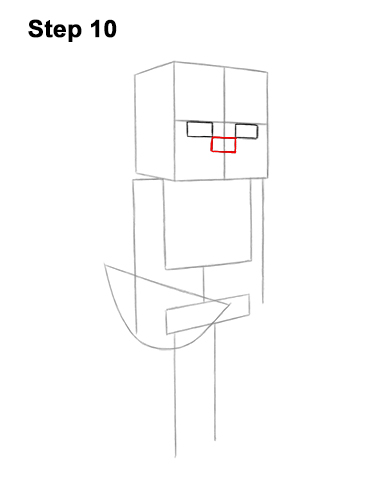
Step 10: Below the eye, in the middle, draw another small rectangle for the Skeleton's nose. This rectangle should be roughly the same size as one of the eyes.
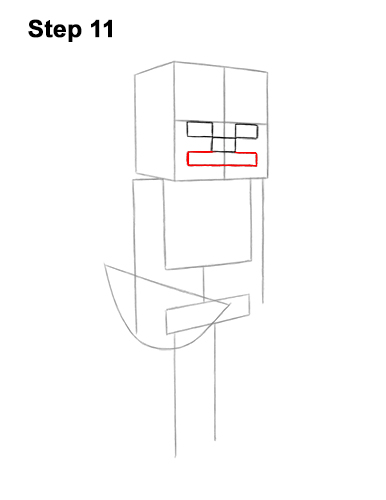
Step 11: Under the nose, draw a thin, long rectangle as for the Minecraft Skeleton's mouth. The sides of the mouth should extend as far out as the eyes. Leave a gap under the mouth that's about the same thickness as the mouth itself.
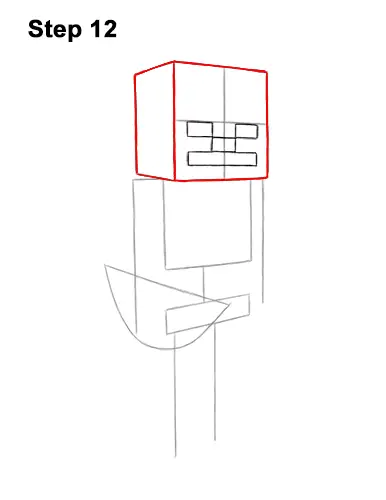
Step 12: Darken the first few lines to create the shape of the Skeleton's head. Don't forget the line inside the head on the left (not the construction lines).
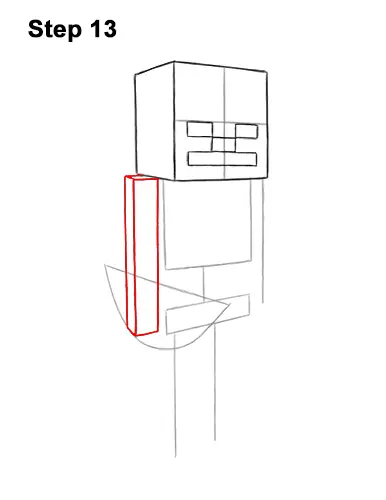
Step 13: Use the vertical line on the left side of the body as a guide to draw the Skeleton's first arm. Darken the line and then draw two more vertical lines parallel to the first one to make the shape of the arm thicker. The line on the left should be closer to the line in the middle than the line on the right. Close off the shape at the top and bottom by drawing a few short lines.
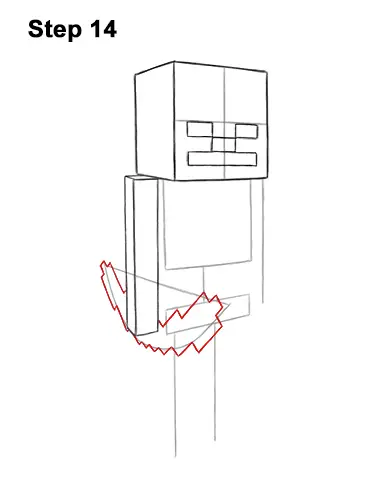
Step 14: Use the initial curved shape under the arm as a guide to draw the Skeleton's bow. Draw the bottom edge of the bow first. Draw a series of angled lines along the basic curved path of the line to create the blocky lower edge of the bow. This can be a difficult shape, so sketch lightly at first to get the angled line right. The top edge of the bow should also be made up of angled lines but it should be smaller because a big part of it will be hiding behind the arm.


