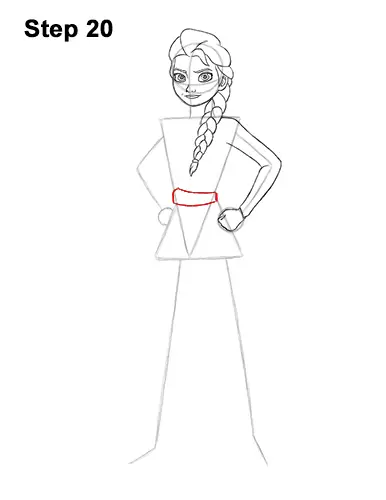
Step 20: Draw Elsa's belt about halfway along the torso about where the two torso shapes meet. The top, left side of the belt should be pointy and the bottom should be curved.
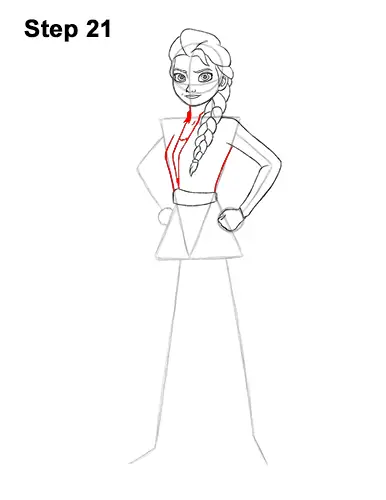
Step 21: Darken the sides of the initial triangle guide to create the shape of the torso. Draw two long lines form Elsa's neck to the belt for the dress opening. Curve the lines near the top for the chest. Inside the V-shaped opening of the dress, draw a curved line for the inside of the dress.
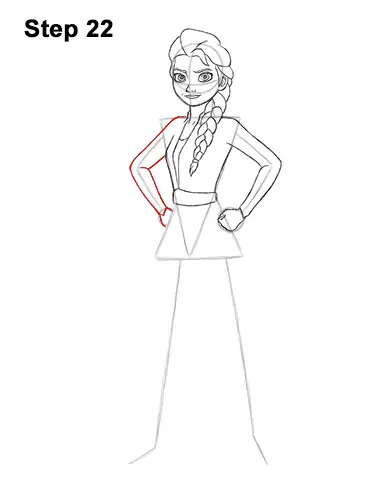
Step 22: Draw the shape of Queen Elsa's the other arm around the angled guide on the left. The top of this arm should curve toward the neck so that the shoulder isn't too pointy. Make the wrist thin. Use the circle as a guide to draw the fist but don't draw the bottom because the dress will be blocking the knuckles.
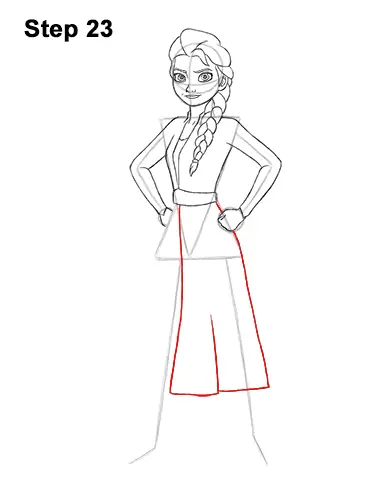
Step 23: Draw a long, vertical line along the right side of the torso and leg guide for the side of Elsa's dress. Near the bottom of the leg guide, draw a horizontal line for the bottom of the dress. Then draw a vertical line near the left leg guide that meets the belt at the top for the middle opening of the dress. At the bottom of the shape you just created, draw a vertical line for a pleat on the dress.
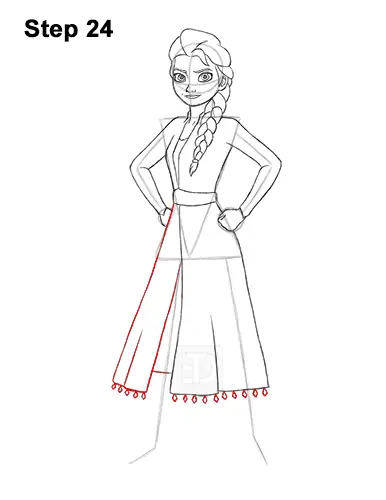
Step 24: On the left side, draw a similar shape, only narrower, for the rest of Queen Elsa's dress. This side of the dress should slope to the left. Add a pleat at the bottom too. Along the lower edge of the dress, draw a row of small diamonds for extra detail.


