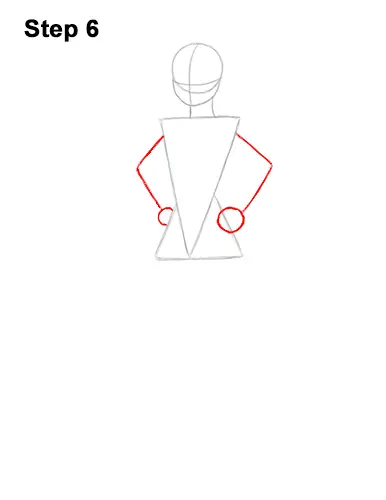
Step 6: Draw a long, angled line on either side of the torso as guides for the arms. Pay attention to the length of these lines in relation to the torso. At the end of each line, draw a small circle as guides for Queen Elsa's hands. The circle on the left shouldn't overlap the shape of the torso.
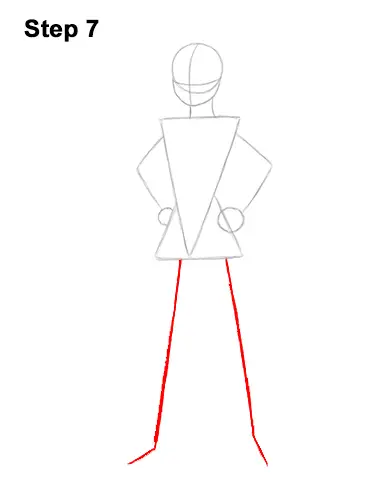
Step 7: Under the torso, draw two long vertical lines as guides for Elsa's legs. The lines should drift apart at the bottom for a more powerful stance. Bend the lines at the bottom as guides for the feet. Notice how long these lines are in relation to the body.
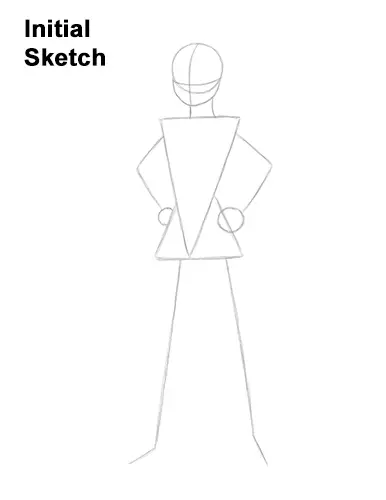
That's it for the guides! For the next steps, use darker lines for a more finished drawing.
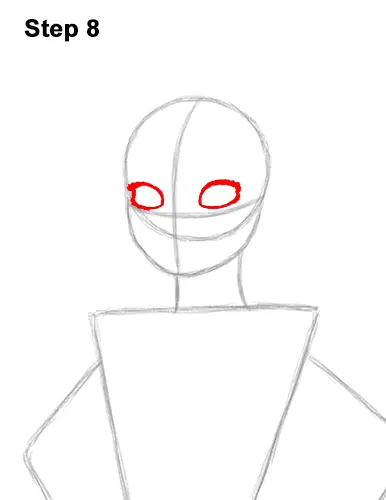
Step 8: Draw Elsa's eyes inside the head using the construction lines as guides. First lightly sketch two small ovals directly on top of the horizontal line and on either side of the vertical line. When you get the shapes and their positions right, darken the lines.
Draw a thicker line on the top part of each eye for Elsa's eyelashes. Add a few smaller strokes along the top part of the line to emphasize each individual eyelash. Make the bottom line of the eyes thicker too, but not as thick as the top line. The eye on the left should be a bit narrower than the one on the right because of the way the head is turned.
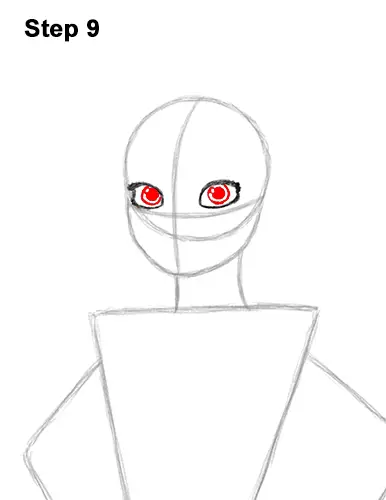
Step 9: Inside each eye, draw a circle for the irises. Pay attention to the placement of this circle. Inside each iris, off to the side, draw a tiny circle to represent highlights. In the middle of each iris, draw a big dot for Elsa's pupils.


