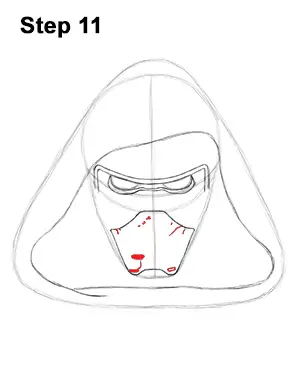
Step 11: Add some detail to the lower portion of Kylo Ren's helmet. Draw a few oval-like shapes near the bottom for the helmet's openings. And add a few lines near the top to represent the cracks and wear of the helmet.
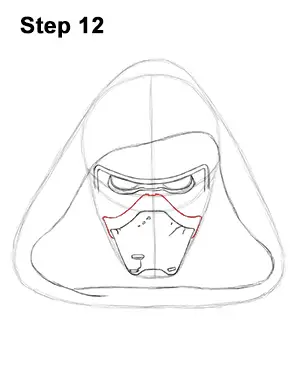
Step 12: Draw another curved line above the mouth cover of Kylo Ren's helmet. This line should parallel the top portion of the shape created in the last step and should be very close to the eyes.
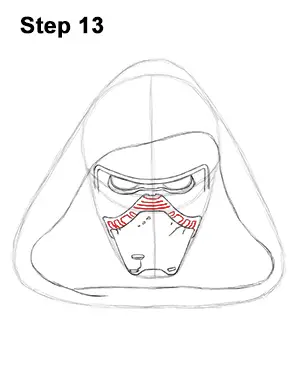
Step 13: Add four small horizontal lines on the top portion of the shape you created in the previous step. On each side of the shape, draw four small shapes similar to squares.
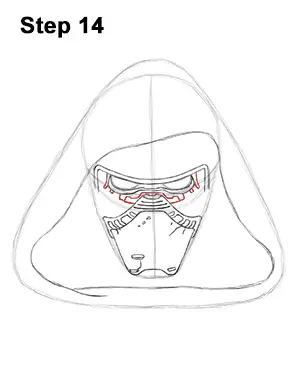
Step 14: Kylo Ren's helmet has a series of metallic parts on the top section. These shapes are a bit tricky to draw, so they're divided into a few steps. Use a series of curved lines on the sides and bottom of the eyes for the first portion of these metallic bits. Use the image above for further reference.
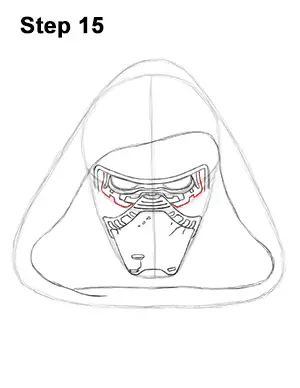
Step 15: Add another line around the eyes for the continuation of the metallic section of Kylo Ren's helmet. This line starts at the sides and ends on the middle section of the helmet.


