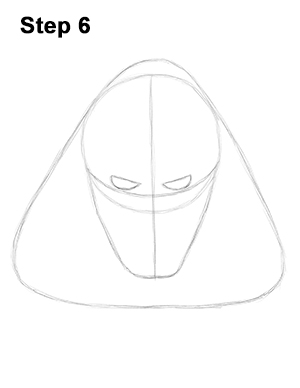
Step 6: That’s it for the initial sketch! You have the basic head shape for Kylo Ren from Star Wars: The Force Awakens. Now go in and tighten your drawing. From this point on, press harder with your pencil in order to get darker lines and a more defined sketch.
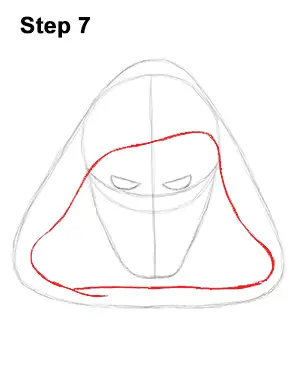
Step 7: Draw a wavy line inside the triangle-like like shape for the hood's opening. To draw this shape, first draw a wavy line with a diagonal orientation above Kylo Ren's eyes. Then continue drawing the wavy sides of the lines by using the initial triangle-like shape as a guide. Finish the hood's opening by adding the bottom part of the shape.
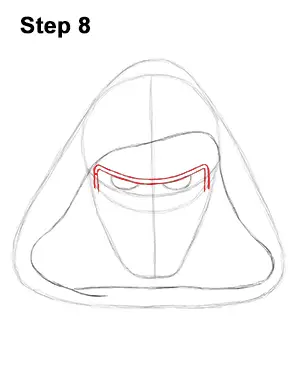
Step 8: Kylo Ren's helmet has a number of metallic rows across the forehead. Draw the first row as a couple of curved lines that are right above the eyes. The sides of these lines should bend down and end on the bottom edge of the main circle.
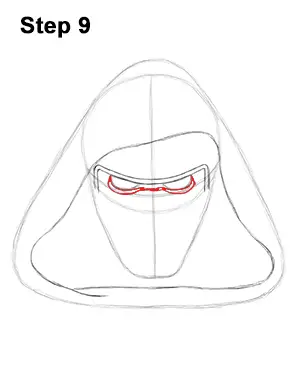
Step 9: Use the initial half-circles as guides to draw the shape of the eyes on Kylo Ren's helmet. The eye opening on the helmet is actually just one shape. Follow the path of the half-circles using a line to connect both shapes and turning it into a single shape. Add another curved line under eyes to make the shape more three-dimensional.
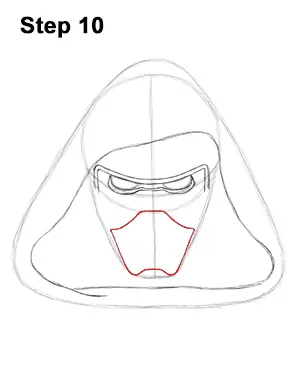
Step 10: Use the initial bottom arc as a guide to draw the bottom portion of Kylo Ren's helmet that covers his mouth and nose. This top of this shape should be flat and right on the bottom edge of the main circle. The sides should then extend outward and follow the path of the initial arc. There should be two small bumps on the lower corners of this shape.


