How to Draw Bowser Jr.
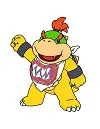
Use the video and step-by-step drawing instructions below to learn how to draw Bowser Jr. from Super Mario Brothers. A new drawing tutorial is uploaded every week, so stay tooned!
Intro: Start off with a pencil sketch. In the beginning stages, don’t press down too hard. Use light, smooth strokes for sketching.
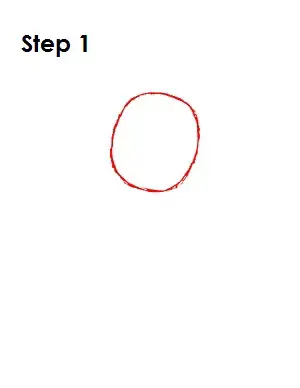
Step 1: Start by drawing a circle that is slightly slender on the sides, almost like an oval. It doesn’t have to be perfect. It will just be a guide for the Bowser Jr.’s head.
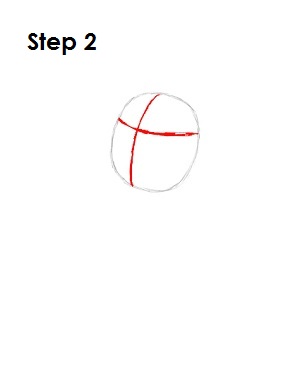
Step 2: Inside the head draw two intersecting lines, one vertical and one horizontal. Bend the lines slightly to conform to the round shape. The horizontal line should be close to the top of the circle, and the vertical line should be near the left side of the circle. These are guides to help you place Bowser Jr.'s facial features later on.
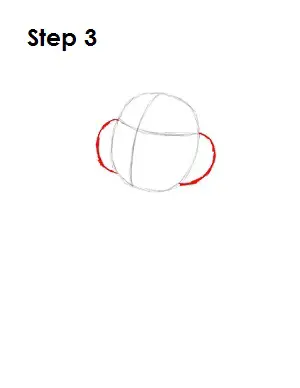
Step 3: Draw a curved line on either side of the circle, directly below the ends of the horizontal construction line. The lines resemble the letter C. These will be Bowser Jr.'s cheeks.
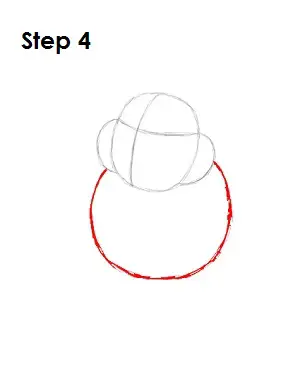
Step 4: Below Bowser Jr.'s head draw a big circle for the body. Don’t draw the top part of the circle because the head is in the way.
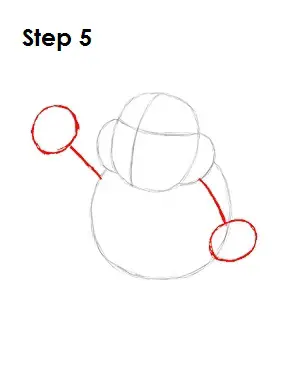
Step 5: On the left side of the body draw a diagonal line with a circle at the end of it. Draw a similar line and circle on the right side of his body right below the cheek. These are guide for Bowser Jr.'s arms and hands.
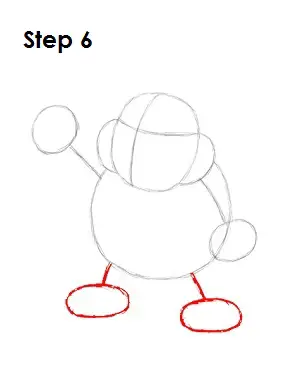
Step 6: Below Bowser Jr.'s body, draw two short, diagonal lines each with a small oval at the end. These are guides for his feet.
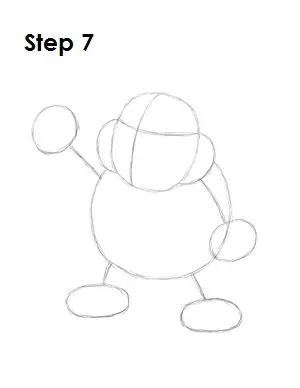
Step 7: That’s it for the initial sketch! You have the basic Bowser Jr. shape, so now go in and tighten your drawing. From this point on, press harder with your pencil in order to get darker lines and a more defined sketch.
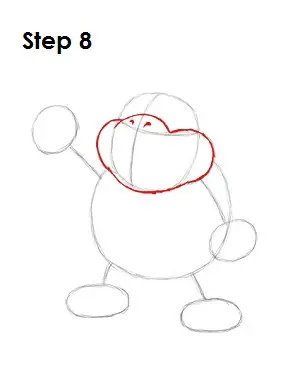
Step 8: Draw the lower part of Bowser Jr.'s face by using the initial lines as guides. Curve the top part to give him his nose and add two little drop-like shapes for his nostrils.
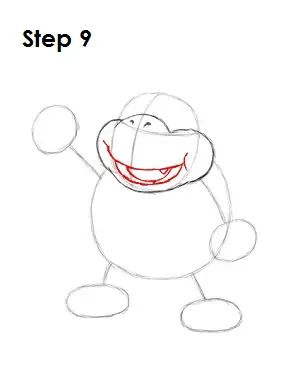
Step 9: Below Bowser Jr.'s nose, draw his mouth. The shape of the mouth is similar to a crescent moon on its side. Inside the mouth on the top side, draw a triangle for his single tooth. Also draw a curved line inside for his tongue.
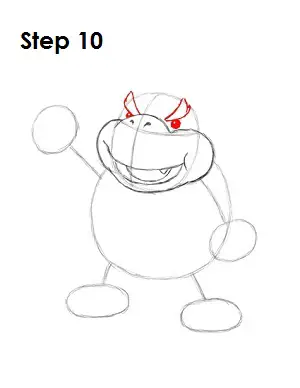
Step 10: Above his muzzle draw two small circles and shade them in to create his eyes. Leave a tiny bit unshaded to represent glare. Above Bowser Jr.'s eyes, draw two thick curved shapes with jagged edges as his eyebrows.
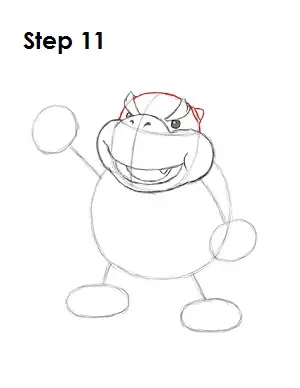
Step 11: Darken the rest of Bowser Jr.'s head using the original circle as a guide. On the right side of his head draw a small triangle with a base under it to represent his tiny horn. His eyebrow and turned head hide the horn on the left, so don’t draw that one.
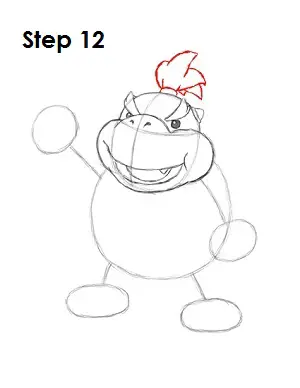
Step 12: Above Bowser Jr.'s head, draw a rectangle-like shape for the ring that holds his hair. The hair itself is above it. Draw the hair using a series of curved lines that come to a point at the end. About four curved points work.
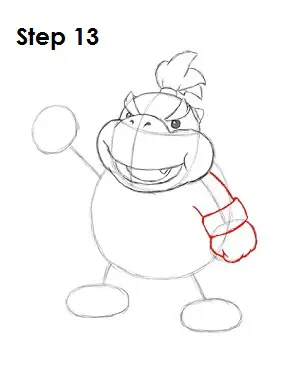
Step 13: Using the initial line and circle as a guide, draw the right arm. Thicken up the arm and add a rectangle-like shape at the top of the small circle for his bracelet. Use the circle as a guide to draw his clenched fist. A few curved line create Bowser Jr.'s knuckles.
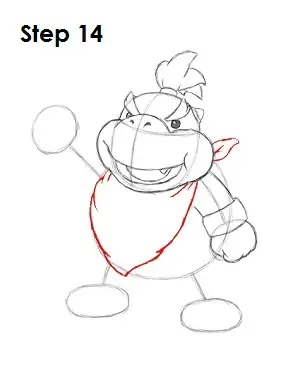
Step 14: Draw Bowser Jr.'s bib or bandana below his face, draping over his chest. The shape is similar to an upside-down triangle that bulges out slightly at the sides. Add a few lines within it to symbolize the wrinkled fabric. On the side of the right cheek draw a shape to represent the knot of his bib. You can add the drawing of the mouth that appears on the bib now if you don’t plan on coloring your drawing. Go to the final step to get the shape right. If you’re going to color you’re drawing, add the mouth later with colors.
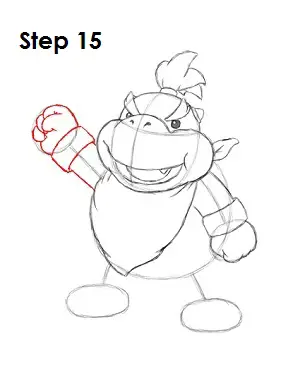
Step 15: Use the initial line and circle to draw the left arm and hand the same way you did the right. Don’t forget to add Bowser Jr.'s bracelet. A few curved lines make up his fingers and claws. Use the image above as further reference to draw his fist.
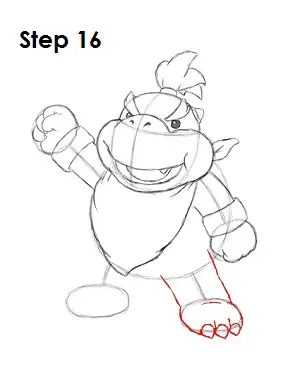
Step 16: Draw the right leg much like you drew Bowser Jr.'s arms and hands. Thicken up the line to create the base of the leg and then use the oval as a guide to create the feet. Add three pointy triangle-like shapes at the end of Bowser Jr.'s feet for his claws.
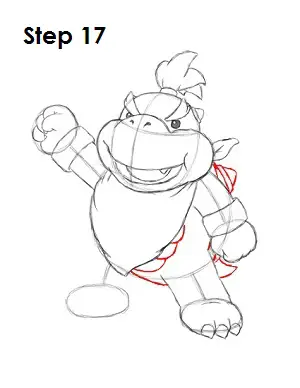
Step 17: Using the initial circle, draw the rest of Bowser Jr.'s body. A few curved lines under his bib create his chest plate. A curvy triangle below the right hand creates his tail. And a series of lines between the knot of his bib and the upper part of the right arm create his shell. Add a triangle as a spike on his shell.
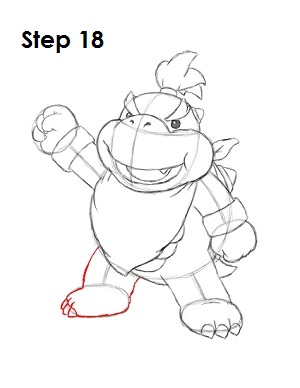
Step 18: Finally, draw the left leg using the same technique you used for the right leg. Don’t forget Bowser Jr.'s claws!
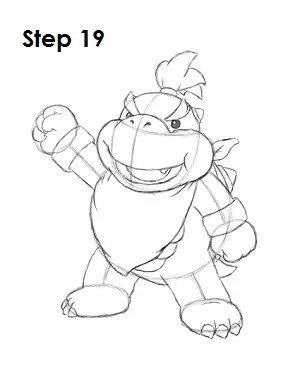
Step 19: That’s it! You now have a nice sketch of Bowser Jr. You can stop at this quick drawing for a rough, sketchy look, or continue to the step below to go for a more finished look.
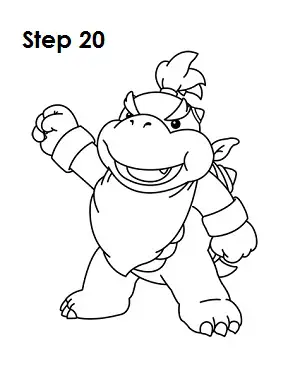
Step 20: For a more finished, inked look, carefully draw over the final sketch lines with a pen or marker. Wait for any ink to dry, and then erase your pencil marks. You now have a finished inked drawing of Bowser Jr.! You can stop here or go to the final step to complete your Bowser Jr. drawing in its entirety.
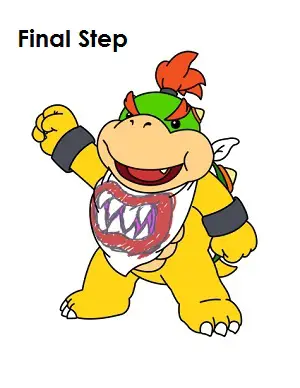
Final Step: For a completely finished Bowser Jr. drawing, you have to color it. You can use anything you want: markers, color pencils or even crayons! Color his hair and eyebrows red and his head yellow-green. His muzzle and chest plate are light brown. Bowser Jr.'s tongue is pink, and the inside of his mouth is brown. His skin is yellow and his bracelets are gray. The back of his shell is green, and his spikes are light yellow with orange bases. Draw the mouth on the bib using gray for the outline and teeth. Then color the surrounding mouth red and the bits between the teeth pink. Be messy with the drawing; it doesn’t have to be perfect. That’s it! You now have a completed drawing of a Bowser Jr. from the Super Mario Bros. games.


