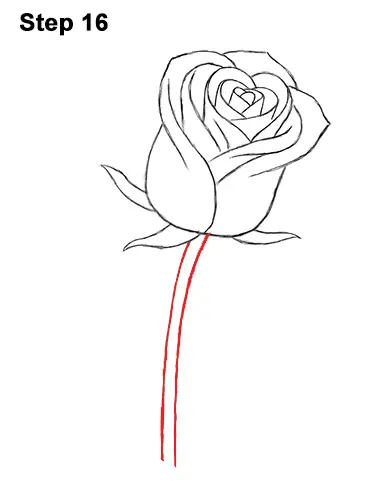
Step 16: Under the rose, draw two long, curved vertical lines for the stem. Don't place the lines too far apart, otherwise the stem will be too thick. You can make them longer for a longer flower stem.
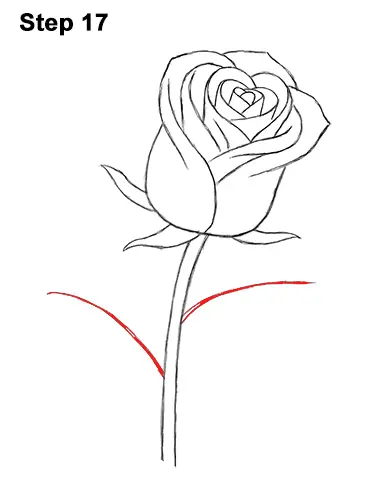
Step 17: On either side of the stem, draw a long, curved line for the base of the rose's leaves. Try not to place the lines directly across from each other. Stagger them a bit for a bit of asymmetry.
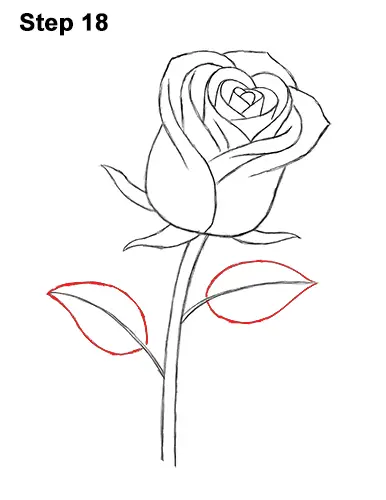
Step 18: Now draw the rose's leaves by first drawing a wavy line at the bottom of the line on the left. Draw a curved line at the top that creates a point on the left side to finish off the first leaf. Draw the other leaf the same way: a wavy line at the bottom and a curved line at the top that come to a point on the right.
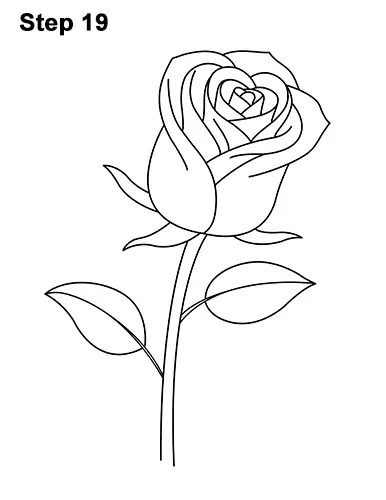
Step 19: Using a pen or marker, carefully go over the lines to make your rose drawing permanent. After inking, get rid of every pencil mark with an eraser.
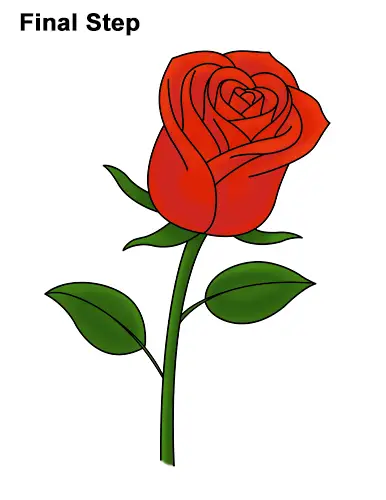
Final Step: Color your rose drawing using color pencils, markers or even crayons! Use red for a classic rose flower. Roses can be a variety of colors like pink, yellow, even white! Color yours however you'd like. Use a bit of dark red between the petals and at the bottom of the rose to create a few shadows. Add some red- orange at the tips for highlights.
You can also just use a single shade of red for easier coloring. Use green for the stem and leaves. You can also use a lighter shade of red for the heart shape in the rose to make it stand out more. Add dark green for the shadows and yellow for the highlights. That's it! You know how a finished drawing of a Red Rose.
Thanks for visiting! Subscribe to the EasyDrawingTutorials YouTube Channel for a new tutorial every Sunday.
To learn how to draw animals, visit How2DrawAnimals.com.
To learn how to draw Manga, visit How2DrawManga.com.
OTHER FUN TUTORIALS
 |
 |
 |
 |
 |


