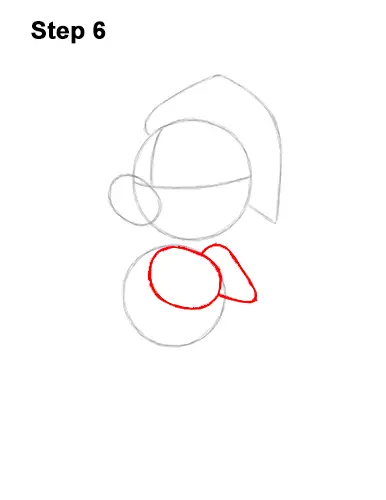
Step 6: Inside the body, along the top edge, draw a smaller circle as a guide for the first hand. Make this circle slightly wider than it is tall. It should take up a big section inside the body circle. Draw a line that starts at the right side of the hand and then angles up to the head as a guide for Mickey Mouse's arm.
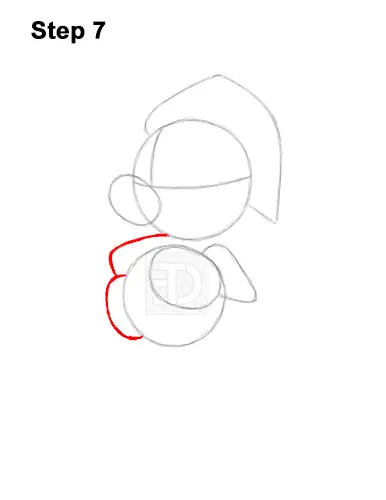
Step 7: On the lower, left side of the body, draw a curved line as a guide for the visible part of Christmas Mickey's other hand. Above the hand, draw a line that curves toward the head as a guide for the other arm.
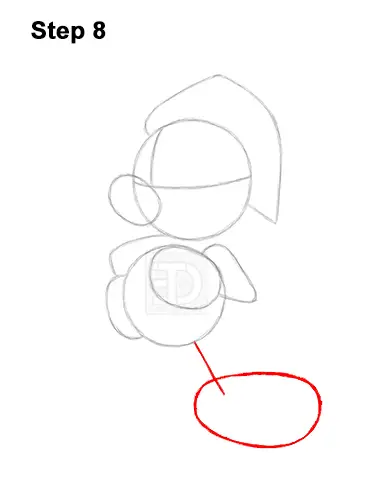
Step 8: On the lower, right side of the body, draw a line that slopes to the right as a guide for the first leg. Under the line, draw a big oval on its side as a guide for Mickey Mouse's first foot. Sketch lightly at first to get the shape right. Notice how big this oval is in relation to this Walt Disney character's body.
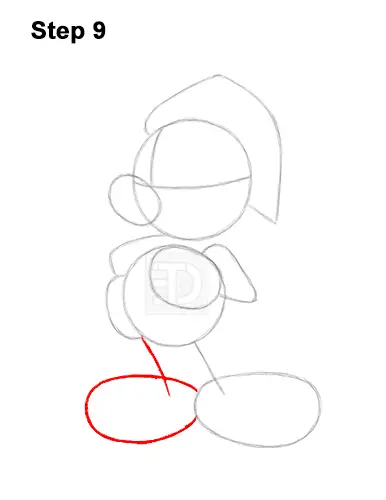
Step 9: To the left, draw another line and oval as a guide for Mickey Mouse's other leg and foot. This line should also slope to the right a bit. Don't overlap the first foot as you draw this oval.
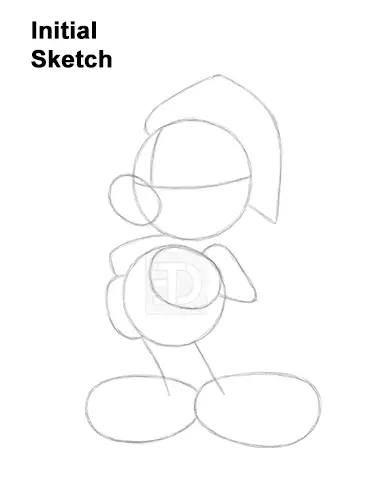
That's it for the guides! For the next steps, use darker lines for a more defined drawing.


