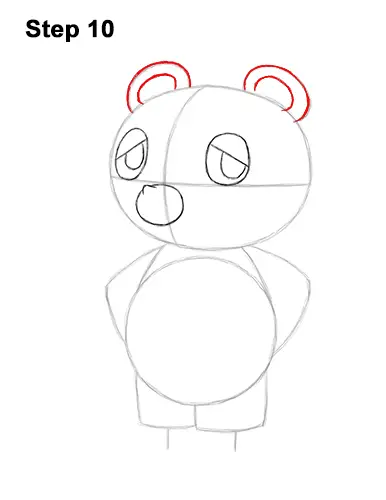
Step 10: Darken the short, wide arcs on top of the head for the ears. Within each shape, draw an even smaller arc for the inner structure of Tom Nook's ears.
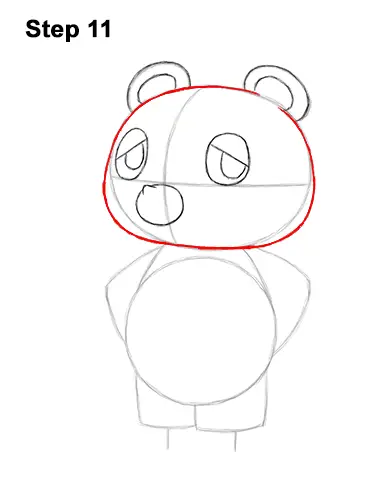
Step 11: Use the first circle as a guide to draw the shape of Tom Nook's head. Darken the shape of the oval but make the bottom part wider. Draw lines that bulge out on the sides of the oval to make the shape wider. Don't make the sides bulge out too much. Make the bottom edge of the head flat.
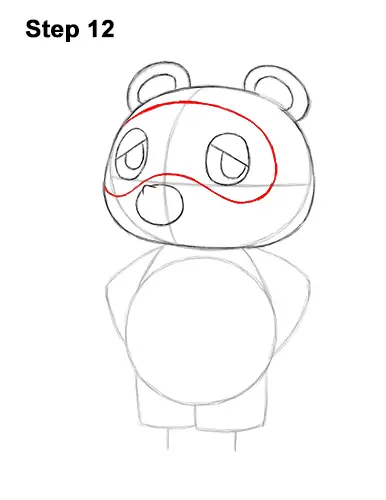
Step 12: Use a series of curved lines to draw the mask-like pattern around Tom Nook's eyes. The line should dip low under the eyes and curve up over the muzzle. Sketch lightly at first. When you get the shape right, darken the line. At the top, follow the curvature of the head to complete the mask. The left side of the mask isn't visible because of how the head is turned. The mask doesn't touch the muzzle or eyes.
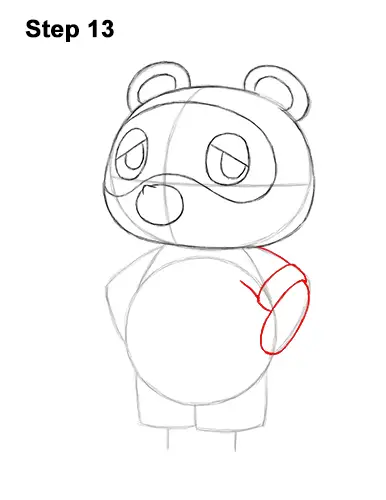
Step 13: Darken the curved line on the right side of Tom Nook's body for the first arm. Curve the bottom part of the line up to create an oval-like shape for the tip of the arm. At the top, draw a couple of curved lines for the shirt's sleeve and cuff.
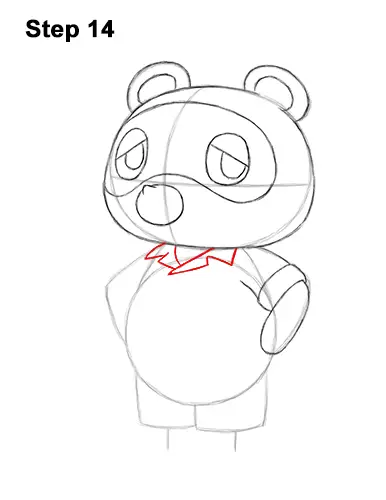
Step 14: Under Tom Nook's head, draw a series of angled lines for the shirt's collar. The left side of the collar is made up of two angled lines, and it should extend toward the guide for Tom Nook's other arm. The right side of the collar should also be made up of two angled lines, but they should be bigger.


