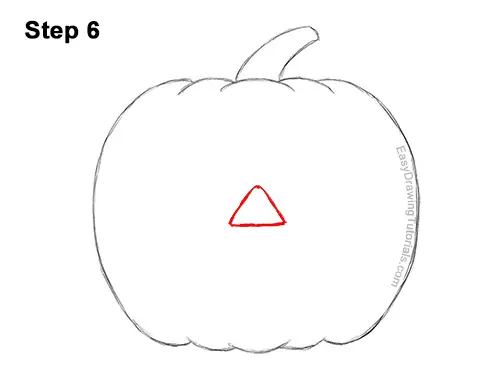
Step 6: Draw the nose as a small triangle directly in the middle of the pumpkin. Leave enough room at the top for the eyes and at the bottom for the mouth.
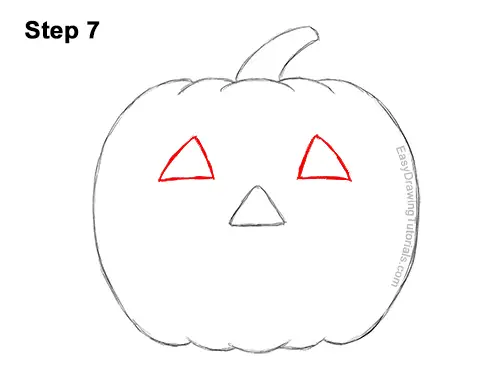
Step 7: Draw the pumpkin's eyes as two more triangles above the nose on either side. You can make the eyes bigger or smaller if you'd like. The same thing goes for the jack-o'-lantern's nose.
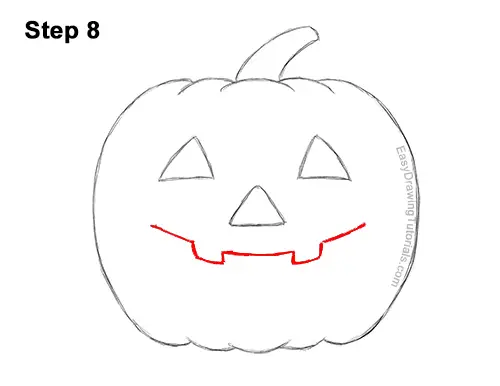
Step 8: Draw the top part of the mouth under the nose using a series of curved lines. Start with the sides of the mouth as short, curved lines, then add the two teeth, which look similar to squares. You can turn the teeth into fangs by making the shapes pointier. Close the section between the jack-o'-lantern's teeth with a curved line.
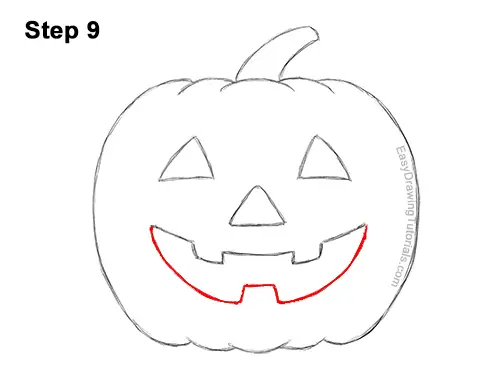
Step 9: Draw the bottom part of the jack-o'-lantern's mouth using more curved lines. Use curved lines for the sides of the mouth and another square-like shape in the middle for the bottom tooth.
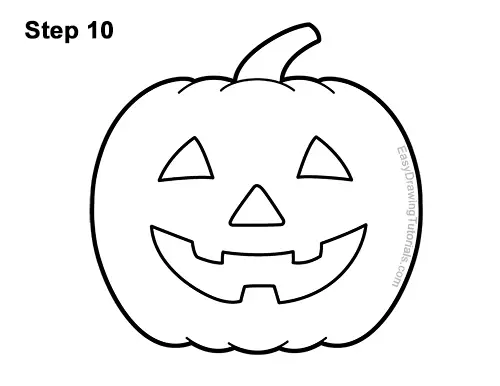
Step 10: Go over the final sketch lines with a pen, marker or any other type of permanent ink. Take your time and be careful when you ink to avoid any accidents. After the ink dries, get rid of every pencil mark with an eraser for a cleaner drawing of a Halloween Pumpkin.
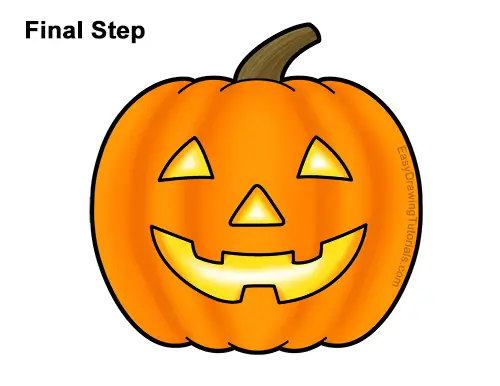
Final Step: Color your jack- o'-lantern any way you want! You can use a mixture of green and brown for the stem. Use light brown and red-orange to connect the top and bottom ridges with curved lines. Use regular orange to cover up the rest of the pumpkin. Continue to add different shades of orange, like yellow-orange, right on top of each other. Push lightly on the pencil at first, then harder to blend all the colors together. You can also color the pumpkin using only orange for a simpler drawing. Add some orange to the sides of the shapes inside. Use some yellow for the jack-o'-lantern's facial features too but leave the middle sections almost blank for a glowing effect.
Thanks for visiting! Subscribe to the How2DrawAnimals YouTube Channel for a new tutorial every week.
To learn how to draw popular cartoon characters, visit EasyDrawingTutorials.com.
RELATED TUTORIALS
 |
 |
 |


