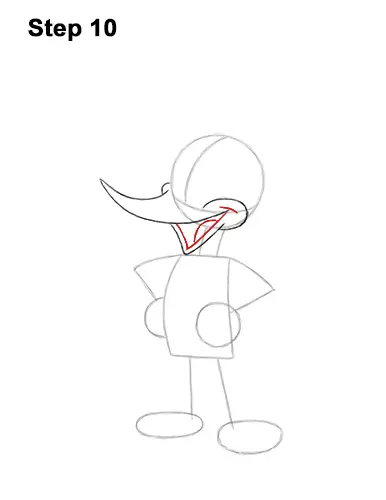
Step 10: Within the lower shape of the beak, draw a smaller V-shaped line for Woody's open mouth. Inside the mouth draw a curved line for the tongue. On the top, right side, draw a short line for a smile line.
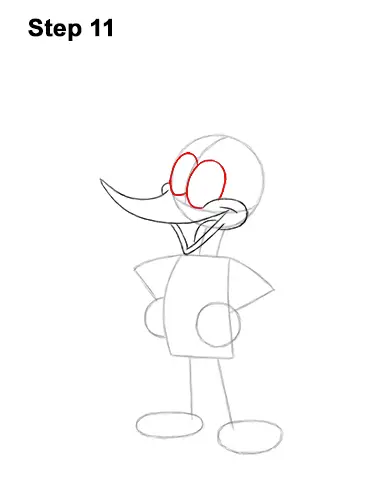
Step 11: On top of the horizontal construction guide, draw two big ovals for Woody Woodpecker's eyes. Place the eyes on either side of the vertical construction guide. Pay attention to how big the eyes are in relation to the head.
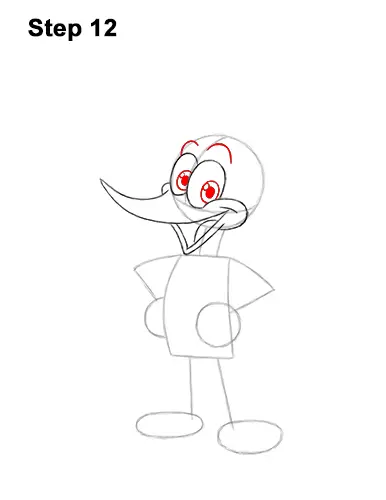
Step 12: Inside each eye draw a small oval for Woody's irises. Inside each iris, draw a smaller oval and shade them in for the pupils. Off to the side of each pupil, draw a tiny circle for highlight. Above each eye, draw a curved line for the brows.
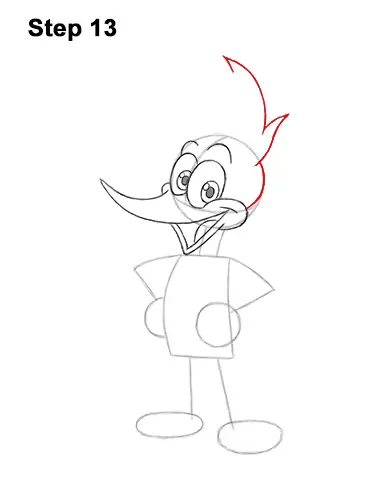
Step 13: Darken the right side of the initial circle for Woody Woodpecker's head. Above that, draw a curved, spike-like shape for the first tuft of hair. Above, draw a long, curved line with a spike at the end for another clump of hair.
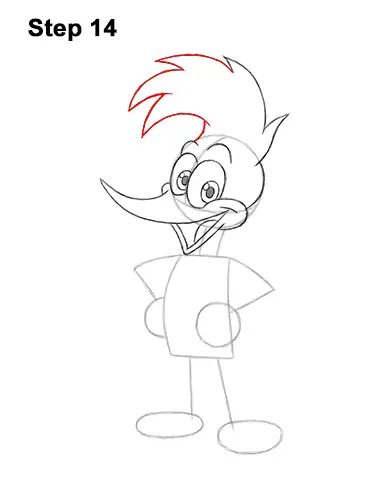
Step 14: Above the eyes, on the right side, draw three curved, spike-like shapes for the front part of Woody's hair. The hair should be very big in relation to the head. The spikes for the hair should curve downward slightly.


