How to Draw Thor
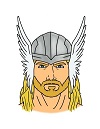
Use the video and step-by-step drawing instructions below to learn how to draw Thor from Marvel Comics. A new drawing tutorial is uploaded every week, so stay tooned!
Intro: Start off with a pencil sketch. In the beginning stages, don’t press down too hard. Use light, smooth strokes for sketching.
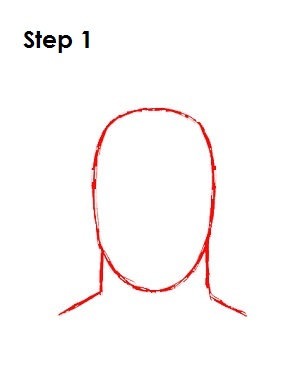
Step 1: Start by drawing an oval in the middle of the page. Below the oval draw two small angled lines on either side. This will be the basic shape for Thor’s head and neck.
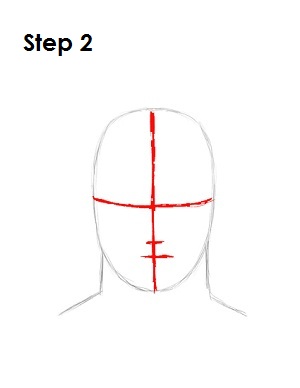
Step 2: Inside the oval draw two intersecting lines, one vertical and one horizontal. Below the horizontal line draw two smaller horizontal lines. These will be construction lines that will help you place Thor’s facial features later on.
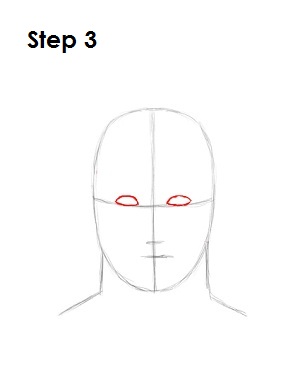
Step 3: Right on top of the horizontal line and on either side of the vertical line, draw Thor's eyes, which resemble two small football shapes.
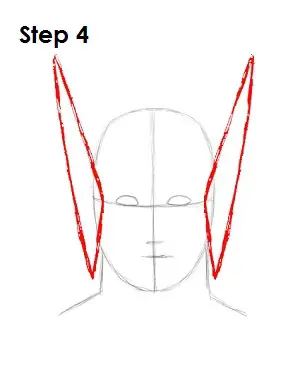
Step 4: At each end of the horizontal construction line and on either side of the head, draw two long triangle-like shapes that will serve as guides for the wings on Thor’s helmet. The size of the triangles determines the size of the wings on Thor's helmet. The longer the triangles, the longer the wings will be.
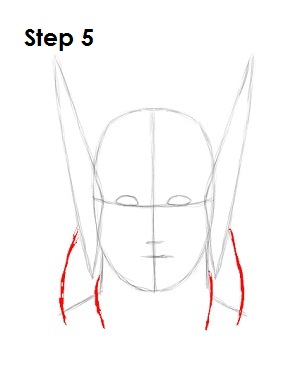
Step 5: On either side of Thor's head, below the triangles, draw two curved lines that extend below his neck as guides for his long hair.
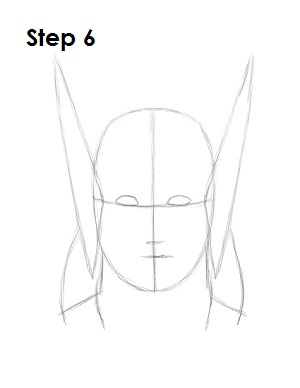
Step 6: That's it for the initial sketch! You have the basic Thor shape, so now go in and tighten your drawing. From this point on, press harder with your pencil in order to get darker lines and a more defined sketch.
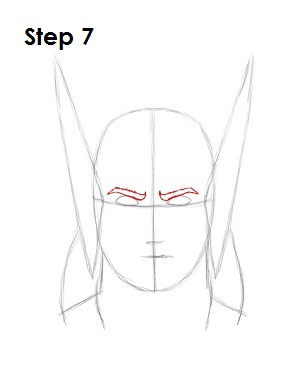
Step 7: Right above each eye, draw Thor's eyebrows. The eyebrows look like thick check marks. Angle them down toward the nose to give Thor a menacing scowl.
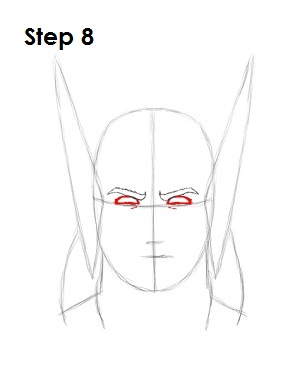
Step 8: Using the initial shapes as guides, darken this Marvel Comics character's eyes all around to represent eyelashes. Bend the bottom part of each eye a little to give him a slight squint and draw a small line below each of Thor's eyes for extra detail.
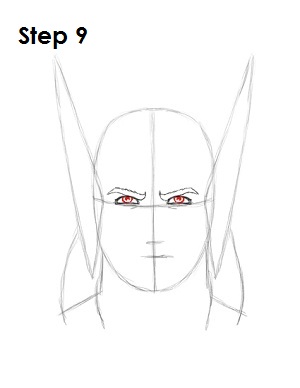
Step 9: Inside each eye, draw a circle to represent Thor's iris. Inside each iris draw a crescent moon and shade it in. This will be his pupil. The bottom parts will represent the glare in Thor's eyes.
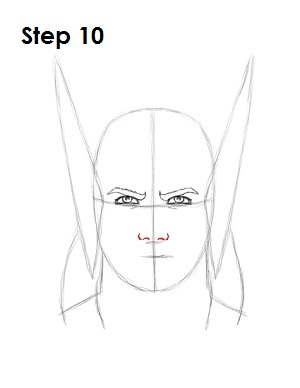
Step 10: Above the small horizontal line, draw two small curves to represent Thor's nostrils, and on either side of them draw two more curves, this time with a vertical orientation to represent the sides of his nose.
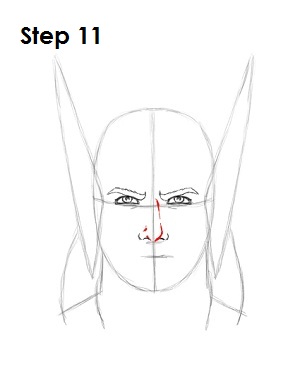
Step 11: Draw the bridge of Thor's nose as a broken vertical line that extends from in between his nostrils up to in between his eyes. Draw a couple more lines for extra detail.
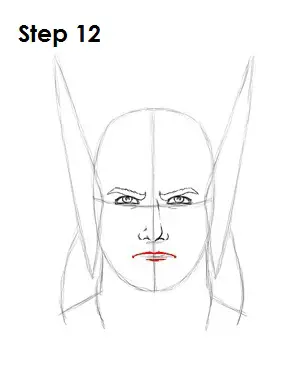
Step 12: Using the lowest of the horizontal lines as a guide for placement, draw Thor's mouth. Bend the line downward to give Thor a slight grimace and draw another small line below it for his bottom lip.
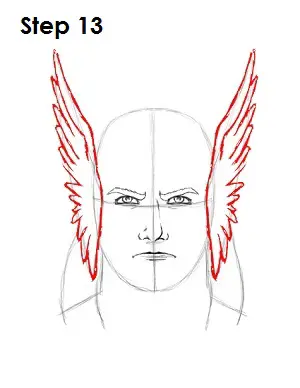
Step 13: Use the initial triangle shapes as guides to draw in the wings on the side of Thor's helmet. Simply add curved lines on the inside of the shape to form wings. The feathers point up on top and gradually change direction and end up pointing down at the bottom. These can be tricky, so use the image above for reference. There are many different variations of Thor’s helmet; this is one of them. You can draw whichever version you prefer.
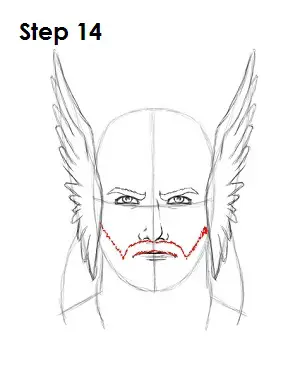
Step 14: There are many different versions of Thor. Sometimes he has a beard, and sometimes he doesn’t. The beard gives him more of a Viking look, so let’s give him a beard. Using quick, short strokes, draw a line under Thor's nose that angles up and extends to the wings on his helmet. Add another fuzzy line above his lip.
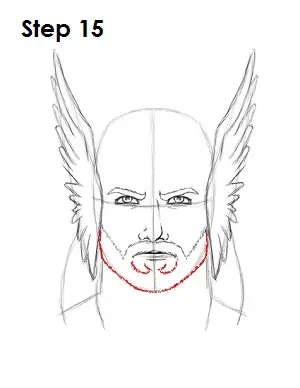
Step 15: Finish up Thor's beard by drawing another fuzzy line and using the bottom part of the main circle as a guide. Square the sides and chin a bit to enhance the shape of the jaw and don’t forget to use quick, short strokes. If you’d rather Thor not have a beard, draw the bottom portion of his jaw without the quick, short strokes to give him a clean-shaven look.
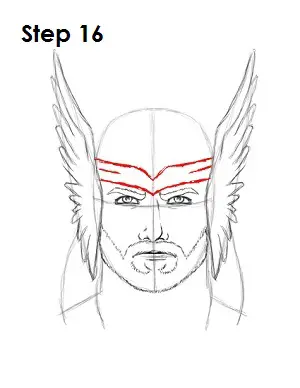
Step 16: There are also different variations of Thor's helmet. This version is similar to the one from the movie. First draw a few lines across Thor's forehead similar to a headband to represent the base of the helmet. Dip the lines to form a V shape between the eyes.
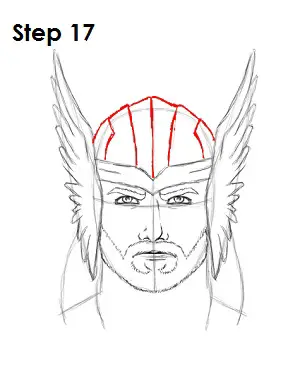
Step 17: Use the top part of the main oval shape to draw the rest of Thor's helmet. Have the helmet come to a point in the middle and draw a few lines for the ridges of the helmet. Use the image above if you need further reference. You can simplify the helmet by not adding the ridges or not adding a helmet at all.
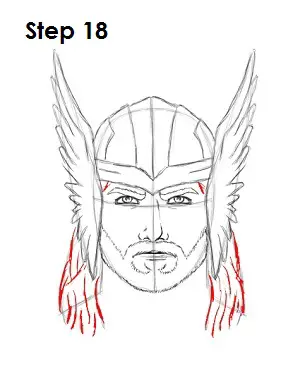
Step 18: Use the lines on the sides as guides to draw Thor's long hair. Follow the basic shape and add more curved lines throughout to add volume to his locks.
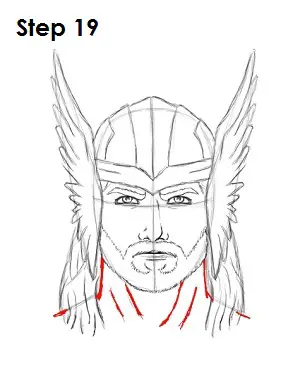
Step 19: Darken the lines to form Thor's neck and upper part of his shoulders. Draw a few lines within the neck for the detail of his muscles.
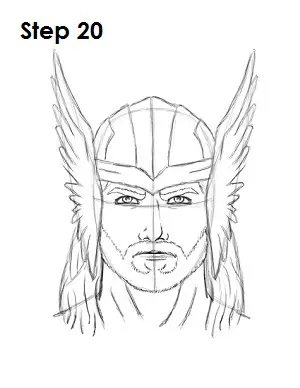
Step 20: That’s it! You now have a nice sketch of Thor from Marvel Comics. You can stop at this quick drawing for a rough, sketchy look or go for a more finished look by continuing to the step below.
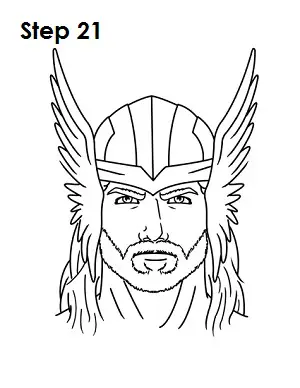
Step 21: For a more finished, inked look, carefully draw over the final sketch lines with a pen or marker. Wait for the ink to dry, and then get rid of every pencil mark with an eraser. You now have a finished inked drawing of Thor! You can stop here or go to the final step to complete your Thor drawing.
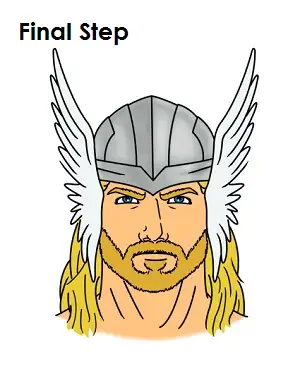
Final Step: For a completely finished Thor drawing, you have to color it. You can use markers, color pencils or even crayons! Color Thor's helmet gray and his eyes blue. His hair, eyebrows and beard are blond, so color them in yellow and add some light brown on top. You can add a little bit of light blue to his wings or leave them white. Finally color his skin peach. If you don’t have peach, improvise! Use yellow-orange or light brown, anything that works. That’s it! You now have a completed drawing of Marvel’s Thor the thunder god.


