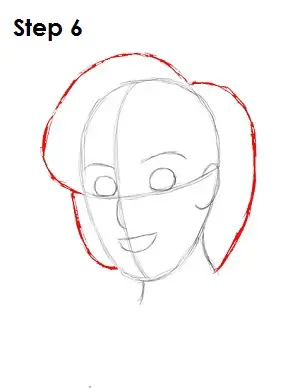
Step 6: Now draw basic guides for Aladdin’s hair. They are just a series of curves around his head. Draw one of the curves beginning on the left side of the horizontal construction line, make it come out to the left and end it on the top right side of Aladdin's head. The other curve begins where the last one left off, and it ends on the bottom of Aladdin's neck. Draw the last curve outside of the left side of Aladdin's head below the first curve.

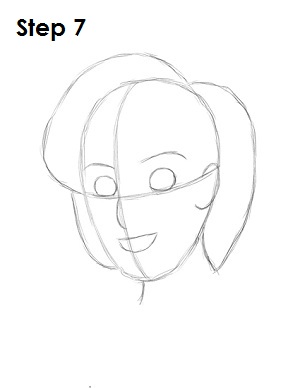
Step 7: That's it for the initial sketch of Aladdin! You have drawn the basic Aladdin shape, so now go in and tighten your drawing. From this point on, press harder with your pencil in order to get darker lines and a more defined sketch.

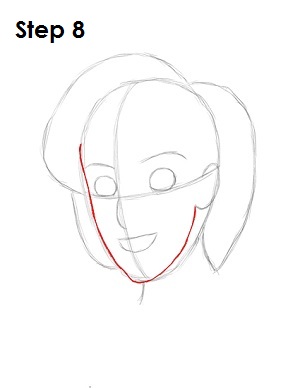
Step 8: Start by giving Aladdin's head more shape by drawing a line that begins above his eyebrow. Dip the line in near Aladdin's eye, draw it down to his chin, curve it up to the left of the main head shape and end it below his ear.

Step 9: Darken in the shape of Aladdin’s eyes and draw the lines thicker on top to simulate eyelashes. Inside each eye, draw two small circles inside each other to represent Aladdin's irises and pupils. Draw an even smaller one on the corner of each to represent glare.

Step 10: Aladdin has thick eyebrows, so use the guides to draw them in extra thick and give them a more angular shape.


