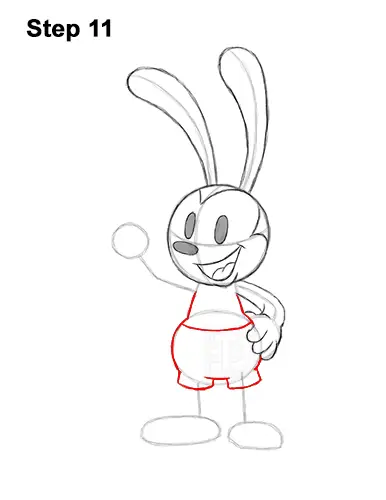
Step 11: Use the shapes in the middle as guides to draw the rest of Oswald's body. Darken the outer edges of the guides to create the shape of the body. At the bottom, draw two small, rectangular shapes around the tops of the guides for the legs to create the shorts. Inside the body, draw a curved, horizontal line for the top edge of the shorts.
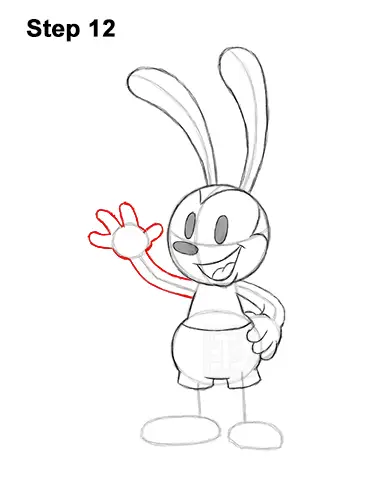
Step 12: Use the shapes on the left side of the body as guides to draw Oswald's other arm and hand. Draw the shape of the arm around the guideline and keep it skinny. Draw a series of small arcs on top of the small circle to create the fingers. The arc on the right side should be small as the thumb and the three other arcs should be a bit taller for the rest of the fingers.
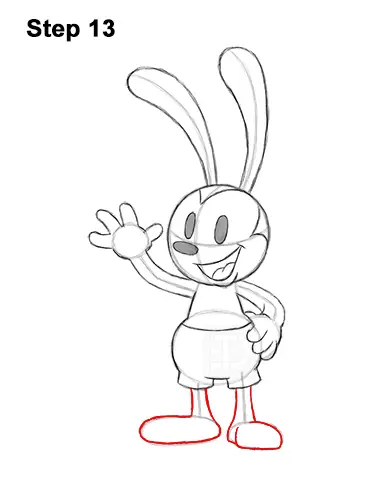
Step 13: Use the shapes and lines under the body as guides to draw Oswald's legs. Draw the shapes of the legs around the vertical lines. Make the legs narrower at the top than at the bottom. Darken the oval-like shapes at the bottom to create the feet. Add a couple of lines inside the foot on the right to emphasize the shape pointing forward.
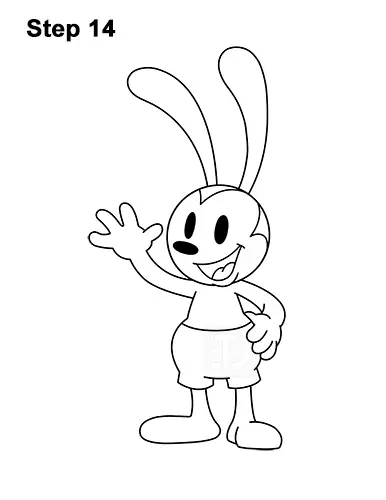
Step 14: Go over the final sketch lines with a pen, marker or any other type of permanent ink. Take your time and be careful when you ink to avoid any accidents. After the ink dries, get rid of every pencil mark with an eraser for a cleaner Oswald drawing.

Final Step: Color your drawing using colored pencils, markers, crayons or anything else! Use black for the body, red for the tongue and blue for the shorts. That's it! You know how a finished drawing of Oswald the Lucky Rabbit.
Thanks for visiting! Subscribe to the EasyDrawingTutorials YouTube Channel for a new tutorial every Sunday.
To learn how to draw animals, visit How2DrawAnimals.com.
To learn how to draw Manga, visit How2DrawManga.com.
RELATED TUTORIALS
 |
 |
 |


