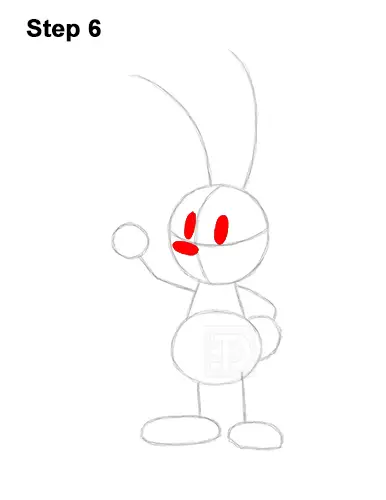
Step 6: Inside the head, on top of the horizontal construction guide, draw two small ovals and shade them in for the eyes. Use the vertical construction guide as a guide to help you determine the space between the eyes. Under the eye on the left, draw another small oval and shade it in for the nose. The oval for the nose should be roughly the same size as the eyes but it should be sideways.
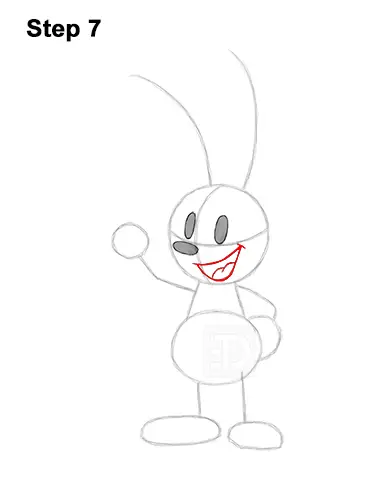
Step 7: Under the horizontal construction guide, draw a couple of curved lines for the shape of the open mouth. The right side of the mouth should be higher than the left. Inside the mouth, draw a couple of curved lines for Oswald's tongue.
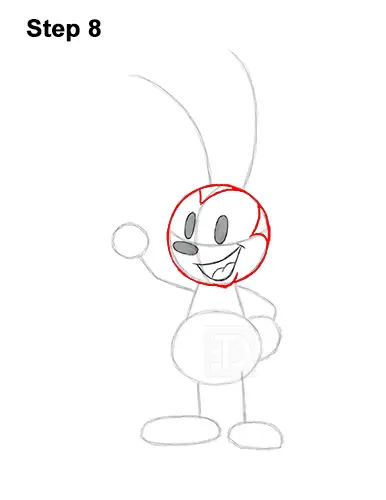
Step 8: Darken the shape of the very first circle to create Oswald's head. Under the mouth, draw a short, curved line for the bottom lip. Above the eyes, draw a couple of curved lines for the pattern inside the head. These lines should be similar to the letter V. On the right side of the head, draw two more short, curved lines for more of the pattern.
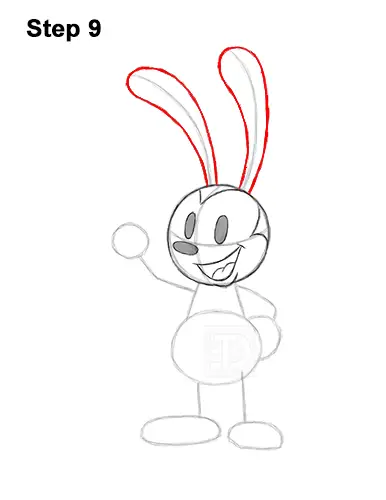
Step 9: Use the lines on top of the head, as guides to draw Oswald's ears. Draw the shape of the ears around the guidelines. Sketch light at first and only darken the lines when you get the shapes right. Tho tops of the ears should be wide and round and the bottoms should be narrow.
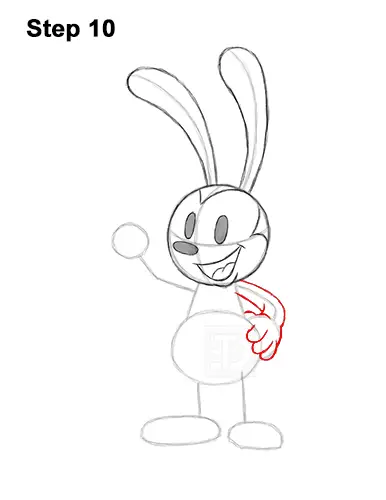
Step 10: Use the shapes on the right side of the body as guides to draw Oswald's arm and had. Draw the shape of the arm around the guide line. Keep the edges of the arm close to the guide so that the shape is thin. At the bottom, draw a series of short, curved lines along the edge of the body for the fingers. Each finger should be similar to a sideways letter U. Darken the top and bottom of the initial arc to create the hand resting on the body.


