Work on the Rest of the Head and Body
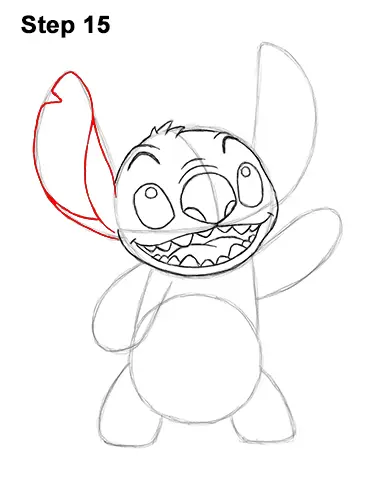
Step 15: Use the big shape on the left side of the head as a guide to draw Stitch's first ear. Follow the basic path of the guide but make the shape curve more as you darken it. At the top of the shape, near the left side, curve the line inward a bit to create a notch on the ear. Inside the shape, near the bottom, add a couple of curved lines for the folded part of the ear.
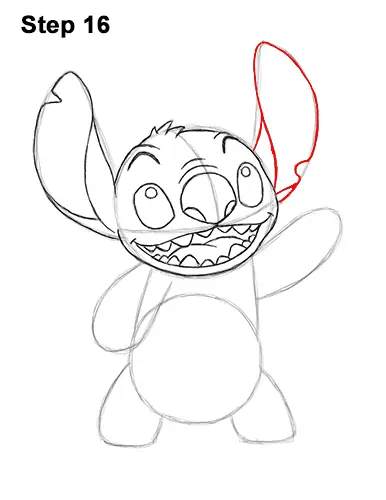
Step 16: Use the shape on the right as a guide to draw the second ear the same way as the first. Make the overall shape wavier as you follow the guide. This ear has a notch on the bottom, right side. The curved lines inside the ear should be shorter because they're being blocked by Stitch's head.
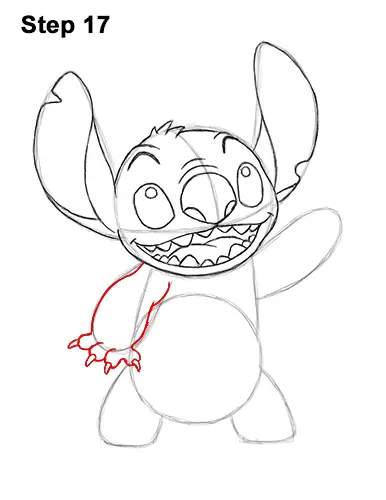
Step 17: Use the curved line on the left side as a guide to create the first arm. Follow the basic path of the guide but make the lines wavier at the top as you darken them. Add a series of short, curved lines along the bottom of the guide for Stitch's fingers. Sketch lightly at first to get the shapes right. Add a total of four fingers. At the end of each finger, draw a small, thin, pointy shape for the claws.
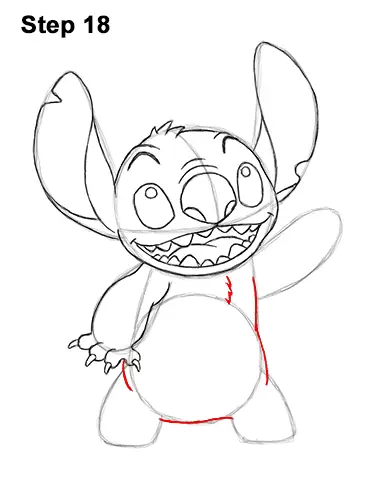
Step 18: Use the shapes under the head as guides to draw the body. Use wavier shapes as you darken the lines. Don't connect the lines for the body where the limbs are. Add a few small, spike-like shapes on the chest for Stitch's fur.
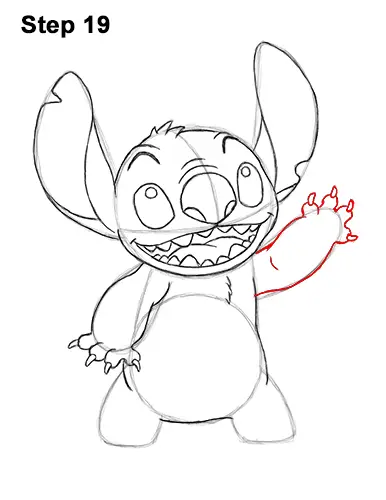
Step 19: Use the curved shape on the right as a guide to draw the other arm. Follow the path of the guide but make the shape wavier as you darken the lines. Along the edge of the guide, draw a series of short, curved lines for the fingers. Stitch has short fingers, so don't make these curved lines too long. At the end of each finger, add a thin, pointy shape for the claws.


