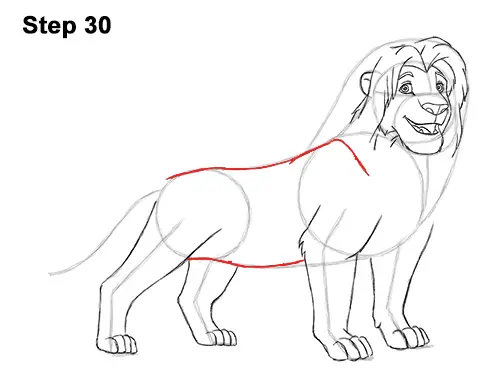
Step 30: Use the remaining lines as guides to draw the rest of Simba's body. Darken the outer edges of the initial guides to create the body.
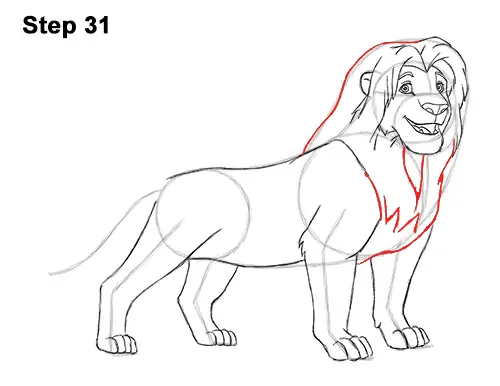
Step 31: Use the initial line around the head as a guide to finish the shape of Simba's mane. Darken the outer edges of the initial guide to create the overall shape of his lion's mane. Extend the line for the mane downward between the front legs. Connect the top part of the first front leg to the mane. Add a couple of long lines under the chin to emphasize the mane's thickness and texture. Draw a W-like shape at the bottom of the mane for extra detail.
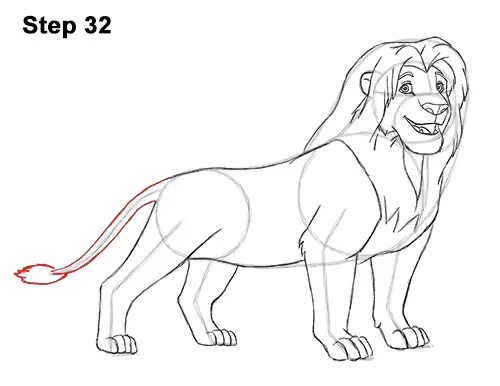
Step 32: Use the line on the left as a guide to draw the tail. Follow the path of the initial guide as you make the shape of the tail thicker. Add a series of quick, short strokes for the clump of fur found at the tip of Simba's tail.
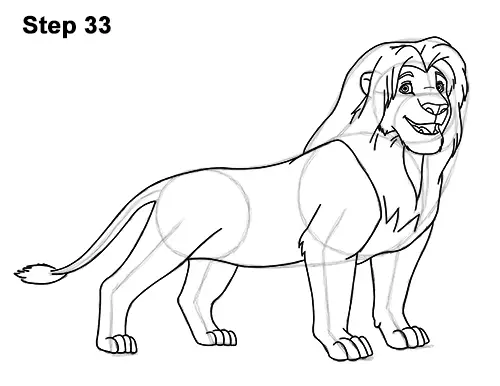
Step 33: For a more finished look, carefully go over the final sketch lines with a pen or marker.
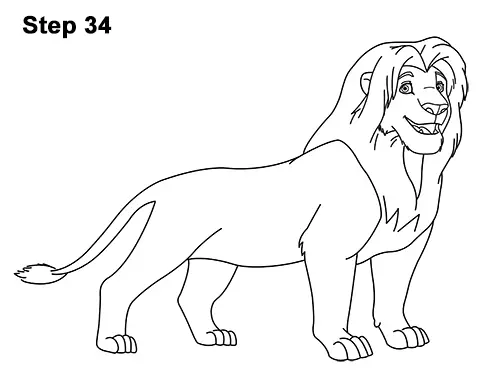
Step 34: After inking, get rid of every pencil mark with an eraser for a cleaner drawing.
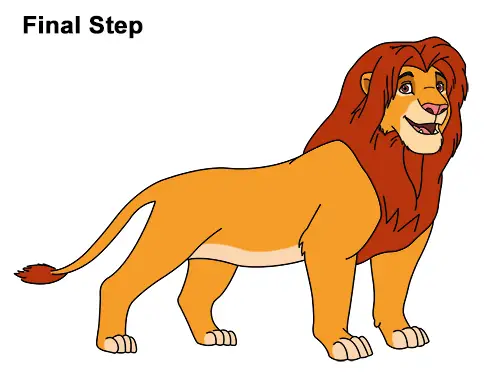
Final Step: Color your drawing of Simba from The Lion King using color pencils, markers or even crayons! Start coloring the mane lightly using red. Then apply light brown right on top. Push hard with your pencil to blend both colors. Use yellow to color the rest of the body except for the muzzle, underside, toes and area around the eyes. Use a bit of light brown directly over the yellow. Don't overlap the muzzle and the other blank sections yet.
Now use peach on the remaining blank sections of the body except above the eyes, nose and inside the mouth. Use black for Simba's eyebrows, brown for inside the mouth and pink for the nose and tongue. Use brown and red for the irises and dark brown for the section above the eyes.
Thanks for visiting! Subscribe to the EasyDrawingTutorials YouTube Channel for a new tutorial every Sunday.
To learn how to draw animals, visit How2DrawAnimals.com.
RELATED TUTORIALS
 |
 |
 |
 |
 |


