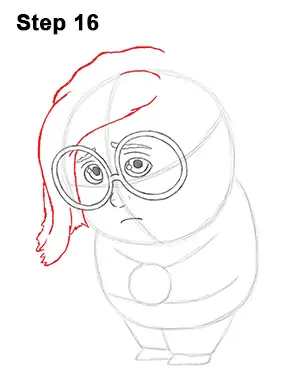
Step 16: Sadness' hair is a bit tricky, so it's divided into two sections. First draw the left side using a series of long curved lines. The bottom part of the hair starts near the top of the original circle, then moves to the left and down her face. Be sure to keep all the lines behind the glasses. The top part of her hair starts above the original circle and moves to the left and down below the face in a wavy line. Add the bottom tips of the hair as short spike-like shapes.
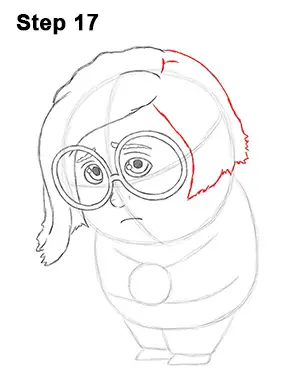
Step 17: Now draw the right side of Sadness' hair using the initial circle as a guide. The line for the right side of the hair starts above the glasses, then curves down to the right of the glasses. Add the bottom part of the hair as short spike-like shapes, then curve the line back up to meet the top of the left side of the hair.
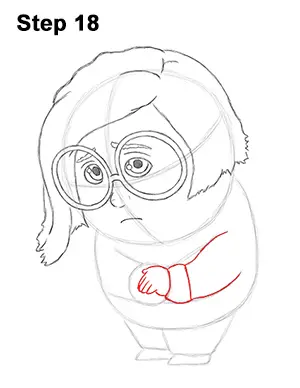
Step 18: Use the shapes inside the body as guides to draw Sadness' right arm. Draw the hand within the initial circle using a series of curved lines for her fingers. Then follow the path of the initial lines to create the arms and add the sweater's cuff at the wrist.
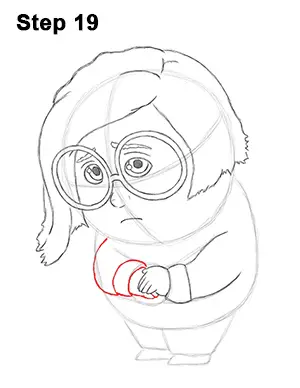
Step 19: Draw Sadness' left arm using the other two lines as a guide and don't forget to add the sweater's cuff at the wrist. Draw her other hand using a series of curved lines for the finger but make sure to not overlap the fingers of the first hand.
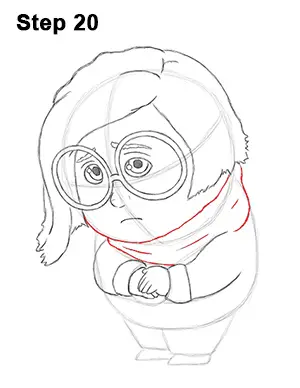
Step 20: Draw the turtle neck-type collar of Sadness' sweater in the section above the arms and below the head. Use a wavy line on the right side of the collar to make it more fluffy. Add a few lines inside the shape for extra detail and darken the line for her face on the left side.


