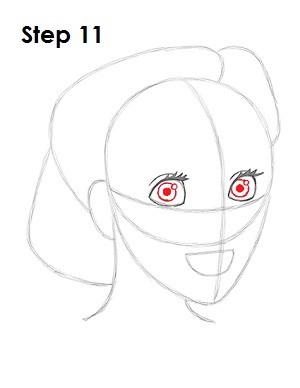
Step 11: Inside each eye, draw a circle for the irises. Inside each iris, in the middle, draw another circle and shade it in for the pupils. Draw a tiny circle inside each of Wendy Darling's eyes, off to the side, to represent glare.
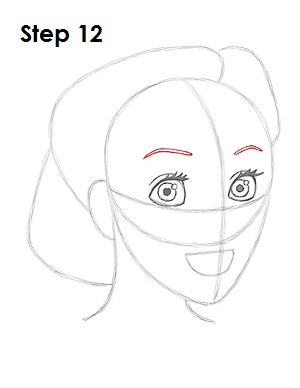
Step 12: Above each eye, draw a curved line for Wendy Darling's eyebrows. The eyebrows should angle a bit near the middle. The eyebrow on the right should be a bit smaller because of perspective.
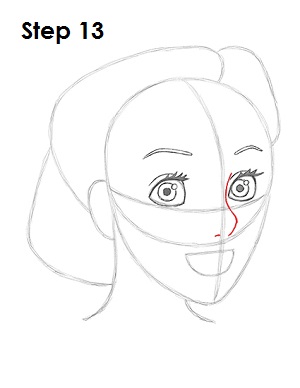
Step 13: Use the construction lines as guides to draw Wendy Darling's nose. The nose consists of a line that starts at the eye on the right then curves to the right, and then down. The line ends on top of the bottom edge of the main circle. Add the nostril as a tiny line on the left side too.
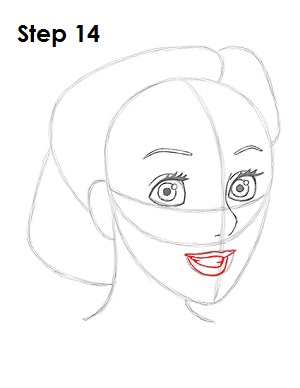
Step 14: Now draw Wendy Darling's lips by using the initial sideways D shape as a guide. The top lip is a thick, wavy shape with the sides coming to a point. The lower lip is a couple of curved lines under the top lip. Draw two short lines inside the shape on the sides for Wendy's teeth.
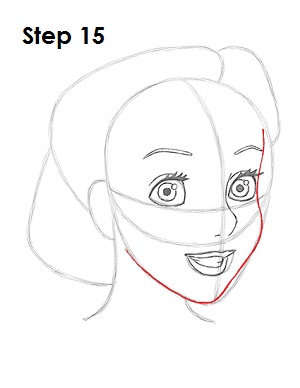
Step 15: Use the initial shapes as guides to draw Wendy Darling's face. Darken the lines as you follow the basic path of the guides to create the side of the face, chin and jaw. Draw the line close to the eye on the right to create the cheekbone.


