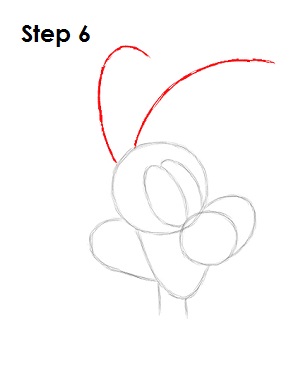
Step 6: On top of the head, draw two curved lines as guides for Roger Rabbit's ears. The line on the left should curve more than the one on the right.
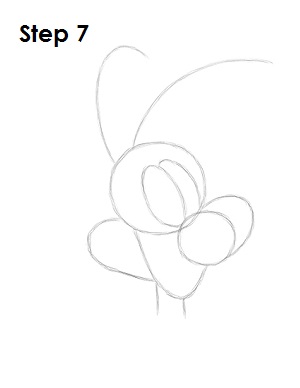
Step 7: That’s it for the initial sketch! You have the basic Roger Rabbit shape. Now go in and tighten your drawing. From this point on, press harder with your pencil in order to get darker lines and a more defined sketch.
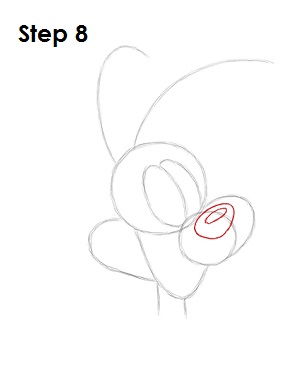
Step 8: Draw Roger Rabbit's nose in the area between the small circle and the guide for the cheek on the right. The shape of the nose should be similar to a flat oval with kind of a rounded point at the bottom. Inside the shape, draw a small flat oval to represent the shine on Roger's nose.
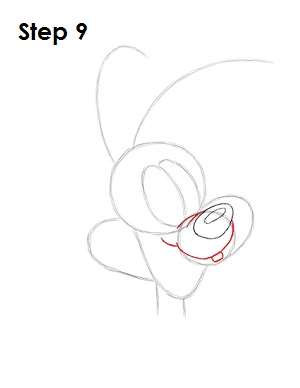
Step 9: Use the small circle as a guide to draw the top part of the mouth or muzzle. Follow the basic path of the circle but make the bottom part come up higher as you darken the line. The bottom line should also stretch farther to the left side. On the bottom part of the muzzle, add a small square-like shape for Roger Rabbit's tooth.
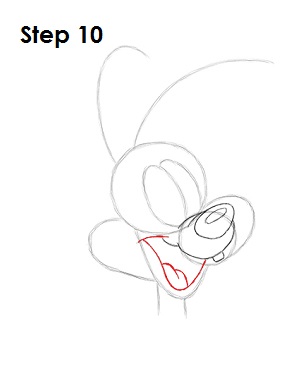
Step 10: Draw the bottom part of Roger Rabbit's mouth by using the initial U-shaped line as a guide. Inside the mouth, at the bottom, draw two small curved lines for the tongue.


