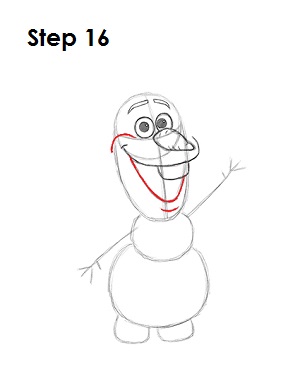
Step 16: Darken the lower part of the D-shape to complete Olaf's mouth. Draw a small line underneath for the lower lip. On the top right side, draw another curved line for his cheek.
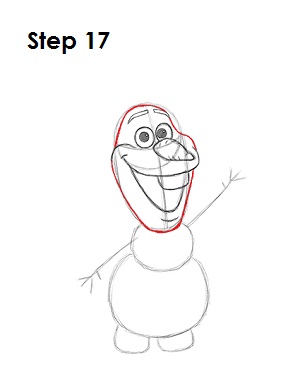
Step 17: Use the initial shapes from steps one and two as guides to complete Olaf's head. Follow the basic path of these shapes but make the top part of the head thinner.
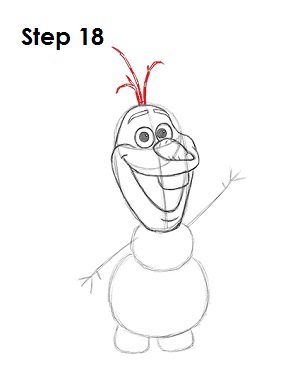
Step 18: On top of Olaf's head, draw three long, thin shapes for the twigs that make up his hair. Make the twigs different sizes with the middle twig being the longest. They should also point in different directions.
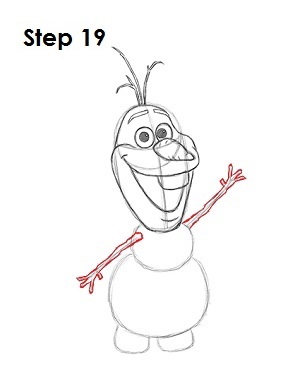
Step 19: Use the initial lines as guides to draw the branches that make up Olaf's arms. Follow the basic path of the guides as you darken the lines and make the branches thicker. The lines should be straight and jagged. Avoid curved lines when drawing the arms. Don't forget to draw Olaf's fingers too!
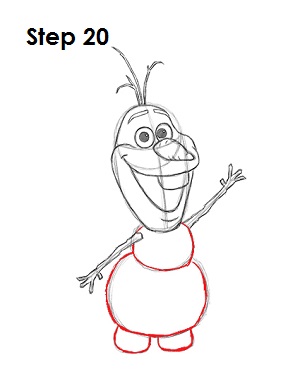
Step 20: Darken the the shapes that make up the rest of Olaf's body and feet. Simply trace the lines that make up these shapes. Give the shapes a more angular look for the feeling of packed snow rather than perfectly spherical snowballs.


