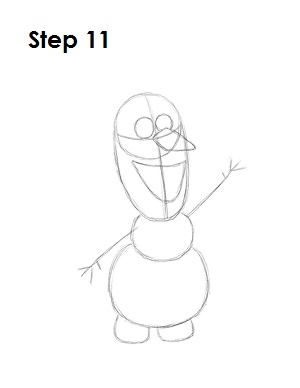
Step 11: That’s it for the initial sketch! You have the basic shape of Olaf, the snowman from Disney's Frozen. Now go in and tighten your drawing. From this point on, press harder with your pencil in order to get darker lines and a more defined sketch.
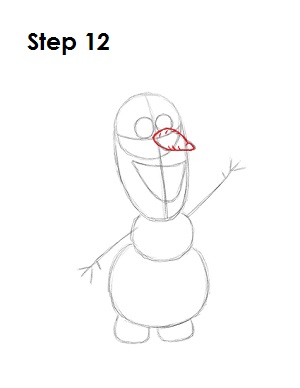
Step 12: Use the initial diamond-like shape as a guide to draw the carrot that makes up Olaf's nose. Follow the basic path of the diamond, but make the lines curvier as you darken them. Draw a few small lines within the shape for the detail of the carrot.
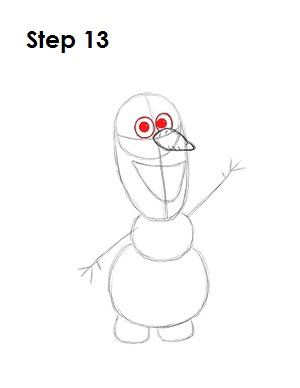
Step 13: Darken the circles above Olaf's nose to create the eyes. Inside each eye, draw a circle for the pupils. Shade the pupils but leave a tiny circle blank to represent the glare in his eyes.
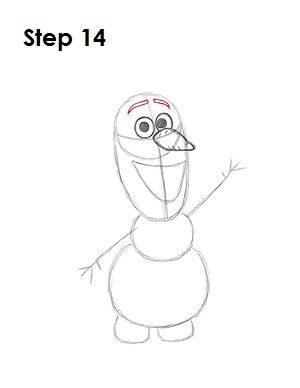
Step 14: Above the eyes, draw two long, thin shapes as guides for Olaf's eyebrows. The eyebrows should be close to the top of the original circle and should be on either side of the vertical construction line.
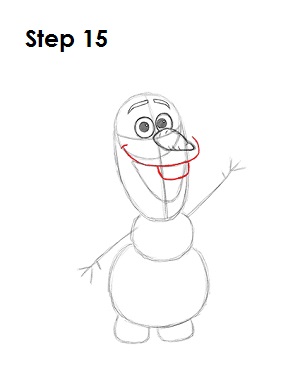
Step 15: Draw the top part of Olaf's mouth as a long arc under the nose. Use the initial D shape as a guide to draw it. The arc starts on the lower left side of the original circle, then curves down toward the top of the D shape and ends on the right side of the head next to the nose. Under the arc, draw rectangle-like shape for Olaf's buck tooth.


