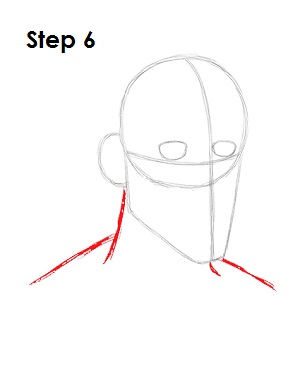
Step 6: Under the head, draw a few curved lines as guides for Tarzan's neck and shoulders.
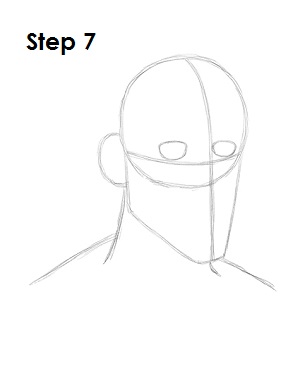
Step 7: That's it for the initial sketch! You have the basic shape of Walt Disney's Tarzan. Now go in and tighten your drawing. From this point on, press harder with your pencil in order to get darker lines and a more defined sketch.
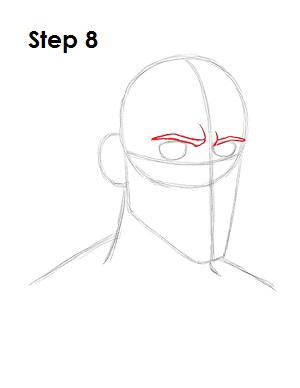
Step 8: Above each eye, draw a long shape for the eyebrows. The shape of Tarzan's eyebrows should graze the top part of the eyes. The eyebrows come to a point at the sides. Between the eyebrows, draw a couple of curved line to indicate Tarzan's furrowed brow.
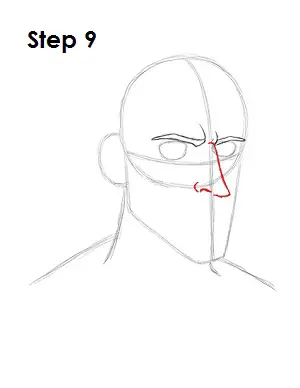
Step 9: Draw Tarzan's nose using the lines as guides for placement. The line for Tarzan's nose begins on the left side of the eye on the right, then comes down below the first circle and curves back up. Draw a couple of curved lines to the left of the nose and below the first circle for the nostril.
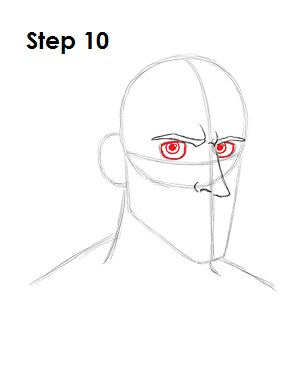
Step 10: Darken the edges of the eyes and make the top part thicker for the eyelashes. Inside each of Tarzan's eyes, draw a small circle for the irises. Inside each iris draw a big dot for the pupils. On the top right side of each iris, draw a tiny circle to represent the glare in Tarzan's eyes.


