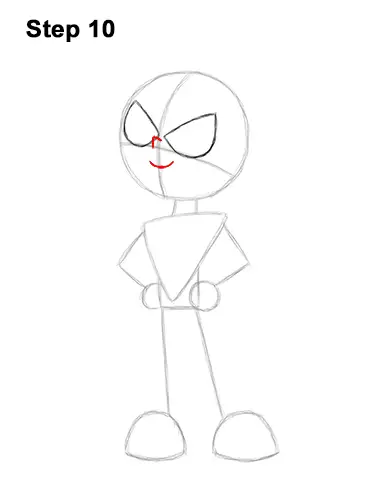
Step 10: Between the eyes, near the left one, draw a tiny, V-shaped line for the nose. Below the nose, draw a short, curved line for Robin's mouth. Use the initial lines as guides for placement.
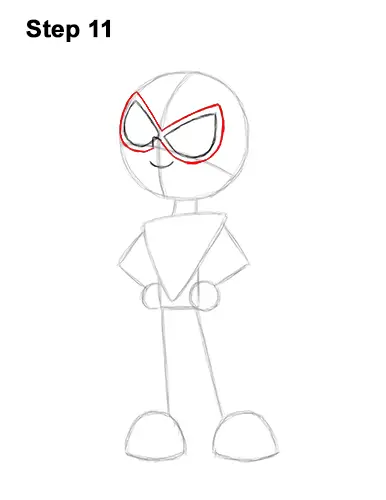
Step 11: Draw a line around both eyes for the mask. Don't overlap the nose. Keep the lines close to the shapes of the eyes to make the mask thin. If you draw this line too far away from the shapes of Robin's eyes, the mask will be too thick and wide.
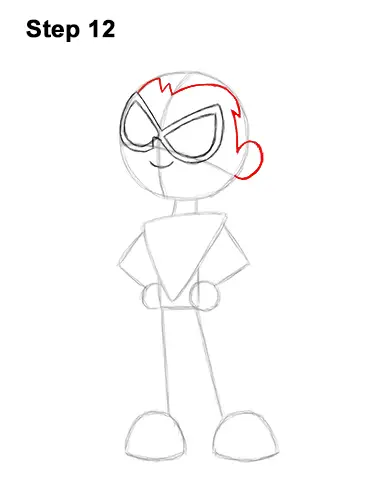
Step 12: On the left side of the head, draw a curved line similar to a backward letter C for Robin's ear. Draw an angled line along the inner edge of the initial circle for the hairline. At the top, dip the line down along the vertical guide for the front part of the hairline. On the front, draw a small, W-shaped line for the widow's peak on this Teen Titans Go! character.
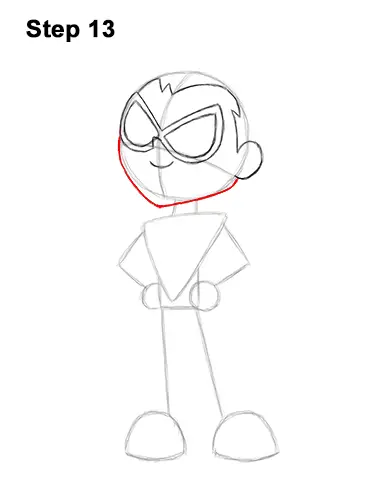
Step 13: Use the bottom half of the initial circle as a guide to draw the rest of Robin's head. Follow the path of the circle but make the lower, right side flatter than the initial shape for the jaw. On the lower, left side, curve the line farther away from the circle to make Robin's head slightly bigger. The bottom of the head should be pointy for the chin.
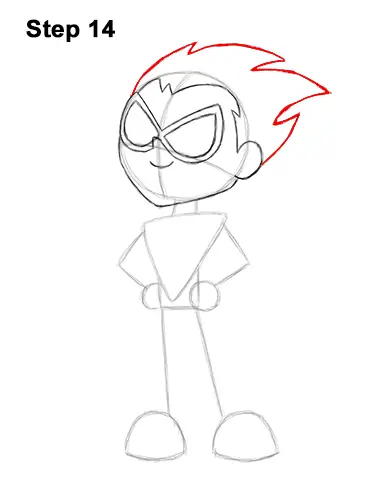
Step 14: Draw a series of tall, angled lines along the top edge of the initial circle for the hair. The first clump of hair above the ear should be thin and pointy. The clump above that should be bigger, thicker and more triangular, like a shark fin. The third clump of Robin's hair should also be big and wide. Sketch lightly at first so you get the shapes right. The final clump at the top should be very thin and pointy. The line should end on the left side of the face.


