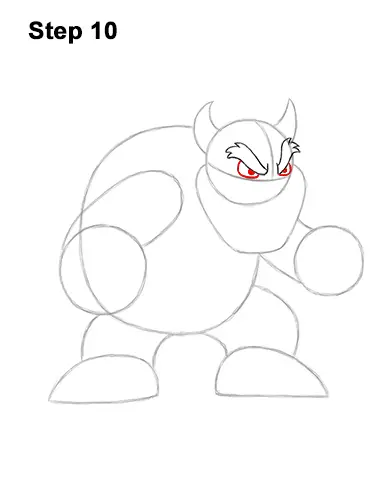
Step 10: Below each eyebrow, draw a small, angled line for the eyes. Bowser's eyes should be similar in shape to triangles. The eye on the right should be a bit smaller. Inside each eye, close to the top edges, draw a big dot for the pupils.
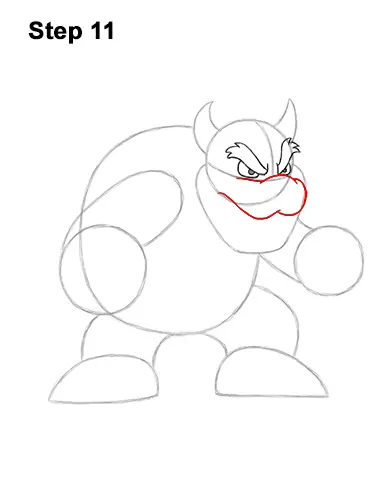
Step 11: Below the eyes, draw a short, curved line for the first part of the muzzle. Use the initial horizontal line as a guide to draw the sides of the top part of the muzzle. Draw a long, curved line for the top part of Bowser's open mouth. Use the initial lines as guides for placement. Add a curved line to the left so that the top part of the open mouth splits in the middle. The left side of the mouth should curve along the edge of the initial circle. The right side of the muzzle should be round.
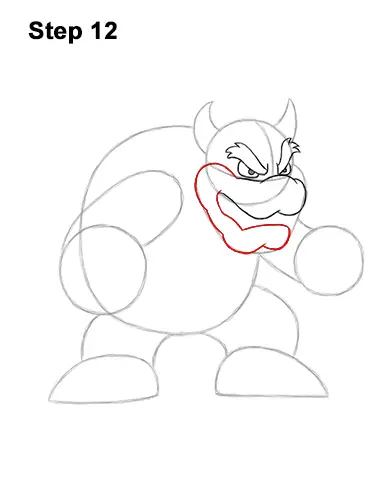
Step 12: Draw a line below the previous shape for the bottom part of the open mouth. Curve the line up and to the left toward the edge of the initial circle to make the shape of Bowser's open mouth longer. Draw two curved lines along the path of the initial guide for the parted chin. Draw a curved line on the left side of the head for the cheek-like part of the top jaw. Use curved lines to darken the initial line on the bottom for the rest of the lower jaw.
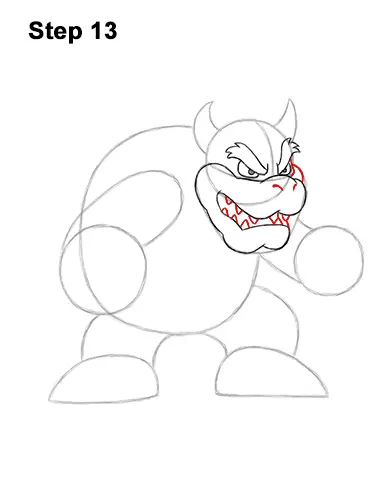
Step 13: Draw a series of small, triangular shapes along the edges of the open mouth for Bowser's teeth. Don't draw too many teeth. Space them out far away so that they don't crowd each other. Between the open mouth, draw a couple of curved lines for the other side of the jaw and for the tongue. Darken the line to the right of the eyes for the other side of Bowser's jaw.
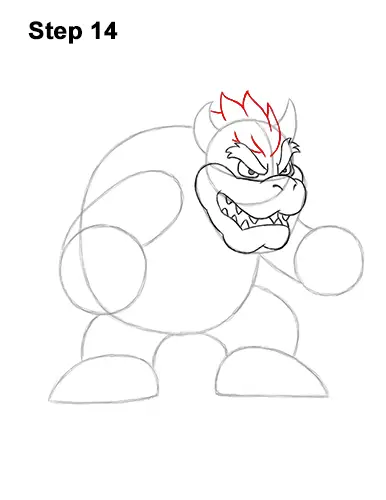
Step 14: Draw a series of curved lines on top of Bowser's head, between the horns, for the hair. The lines should come together at the top to create pointy shapes. Don't draw individual hair strands. Draw big clumps of hair instead. Make the bottoms of the clumps wide. Don't draw too many clumps of hair. Draw a few curved lines above the eyebrows for the base of the clumps.


