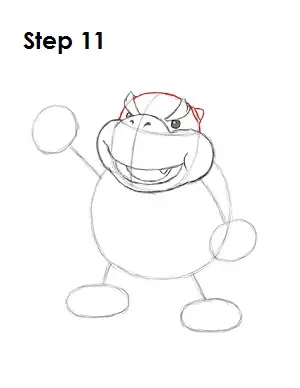
Step 11: Darken the rest of Bowser Jr.'s head using the original circle as a guide. On the right side of his head draw a small triangle with a base under it to represent his tiny horn. His eyebrow and turned head hide the horn on the left, so don’t draw that one.
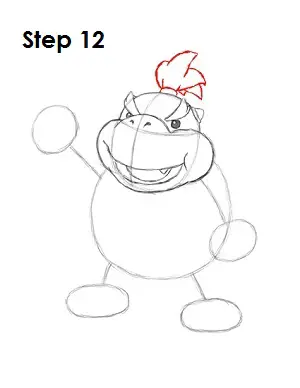
Step 12: Above Bowser Jr.'s head, draw a rectangle-like shape for the ring that holds his hair. The hair itself is above it. Draw the hair using a series of curved lines that come to a point at the end. About four curved points work.
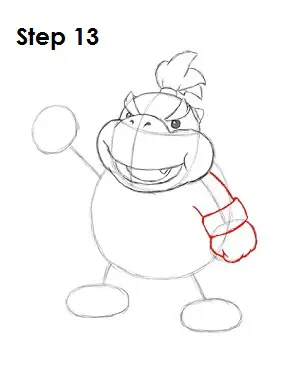
Step 13: Using the initial line and circle as a guide, draw the right arm. Thicken up the arm and add a rectangle-like shape at the top of the small circle for his bracelet. Use the circle as a guide to draw his clenched fist. A few curved line create Bowser Jr.'s knuckles.
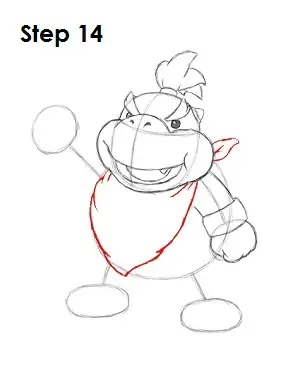
Step 14: Draw Bowser Jr.'s bib or bandana below his face, draping over his chest. The shape is similar to an upside-down triangle that bulges out slightly at the sides. Add a few lines within it to symbolize the wrinkled fabric. On the side of the right cheek draw a shape to represent the knot of his bib. You can add the drawing of the mouth that appears on the bib now if you don’t plan on coloring your drawing. Go to the final step to get the shape right. If you’re going to color you’re drawing, add the mouth later with colors.
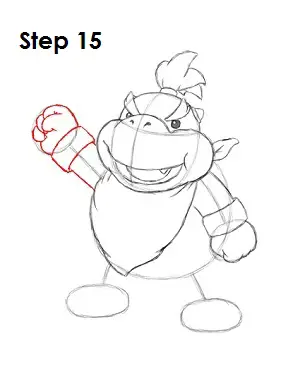
Step 15: Use the initial line and circle to draw the left arm and hand the same way you did the right. Don’t forget to add Bowser Jr.'s bracelet. A few curved lines make up his fingers and claws. Use the image above as further reference to draw his fist.


