How to Draw a Graduation Cap with Diploma VIDEO & Step-by-Step Pictures

Use the videos and step-by-step drawing instructions below to learn how to draw a cartoon Graduation Cap and Diploma. Stay tooned for more tutorials!
Stay tooned for more free drawing lessons by:
- Liking us on Facebook>>
- Subscribing on YouTube.com>>
- Visit How2DrawAnimals.com for free animal drawing tutorials>>
All of the free art lessons on EasyDrawingTutorials.com are good drawing tutorials for beginners and experienced artists alike. The online tutorials are easy to follow; they teach you the how to draw basics while showing you how to draw fun cartoon characters step by step. Each cartoon character has a video drawing tutorial option, as well as step-by-step photos and written text to follow.
RELATED TUTORIALS
 |
 |
 |
To draw this Graduation Cap and Diploma step by step, follow along with the video tutorial below and pause the video after each step to go at your own pace. You may find it easier to follow the step-by-step drawings below. The new lines in each step are shown in red, and each step is explained in the text below the photo, so you'll know exactly what to draw in each step. You may want to open the video in a new tab and use both drawing methods! Take your time and draw at your own pace.
The written step-by-step video tutorial:
Intro: Start off with a pencil sketch. In the beginning stages, don’t press down too hard. Use light, smooth strokes for sketching.
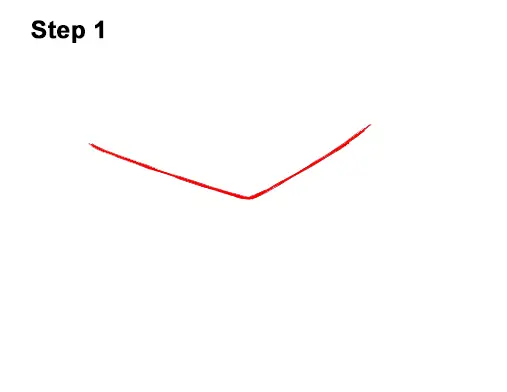
Step 1: Draw an angled line similar in shape to a wide letter V for the front part of the graduation cap. Sketch lightly at first so you can easily erase if you make a mistake. Darken the lines only when you get the shape right.
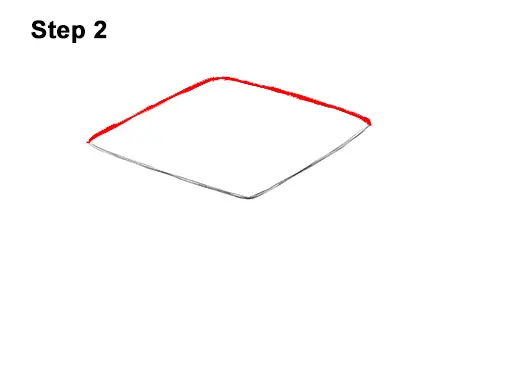
Step 2: At the top, draw another angled line for the back portion of the graduation cap. The resulting shape should be similar to a diamond.
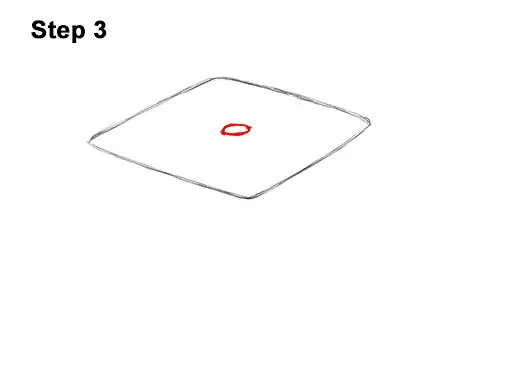
Step 3: In the middle of the diamond shape, draw a small oval where the tassel will be fastened to the mortarboard.
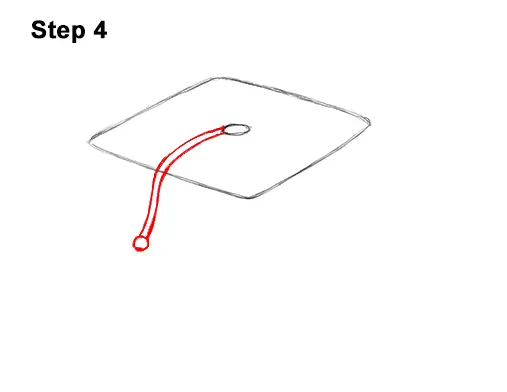
Step 4: From the oval, draw a line that curves over the side of the graduation cap for the first part of the tassel. Draw a second curved line to make the tassel thicker. At the bottom, draw a small circle.
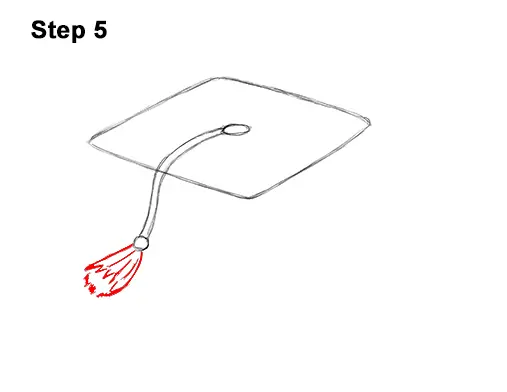
Step 5: To the left of the small circle, draw a couple of sloping lines for the sides of the fringes. At the bottom, draw a series of short strokes for the ends of the fringes. Add a few lines inside the shape of the fringes on the graduation cap's tassel.
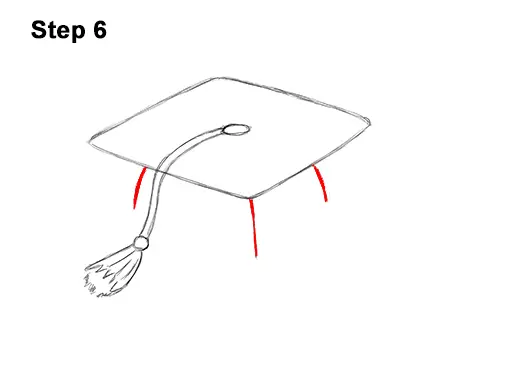
Step 6: Below the diamond shape, on the sides, draw a couple of curved, vertical lines for the actual cap. Don't make these lines too long. In the middle, draw another curved , vertical line for the center of the mortarboard.
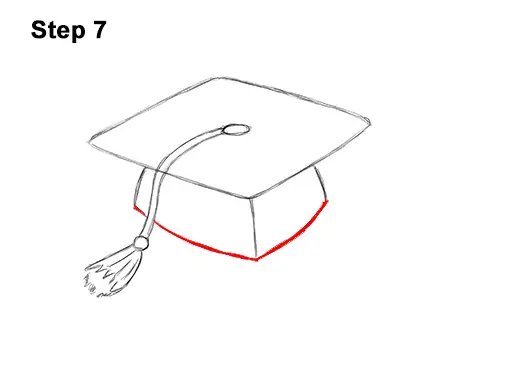
Step 7: Connect the vertical lines to create the bottom edge of the graduation cap. Curve these lines and don't overlap the shape of the tassel on the left.
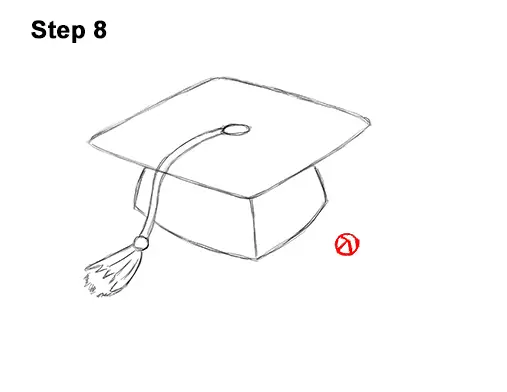
Step 8: To the right, draw a small circle with a few lines inside for the knot on the bow on the diploma.
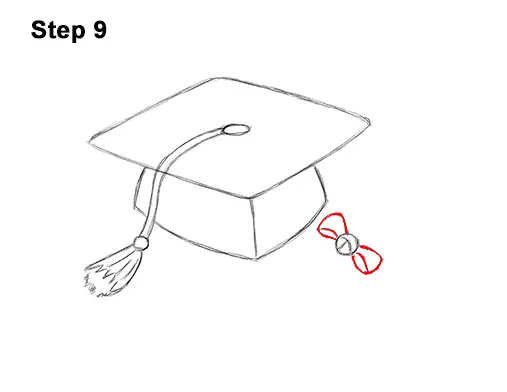
Step 9: On the sides of the knot, draw two triangular shapes for the sides of the bow. Make the edges of the bow curved. Inside each shape, draw a curved line for extra detail.

Step 10: Below the bow, draw two curved, rectangular shapes for the ends of the ribbon that makes up the bow.

Step 11: Below the bow, draw two long, sloping lines for the rolled-up diploma. The second line should start near the middle of the bow. Close off the shape at the bottom using a smaller line.
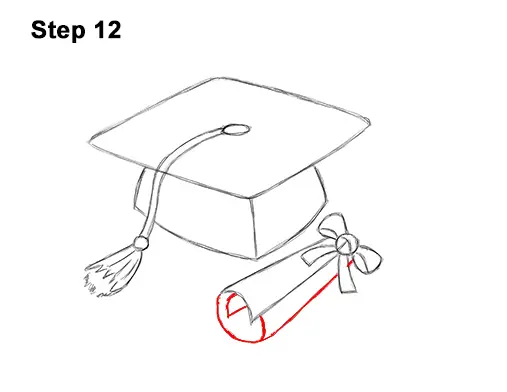
Step 12: Below the previous shape, draw another sloping line for the bottom edge of the diploma. At the bottom, draw a curved line to indicate the diploma being rolled up. Inside the circular shape, draw an angled line for the corner of the rolled up-diploma.
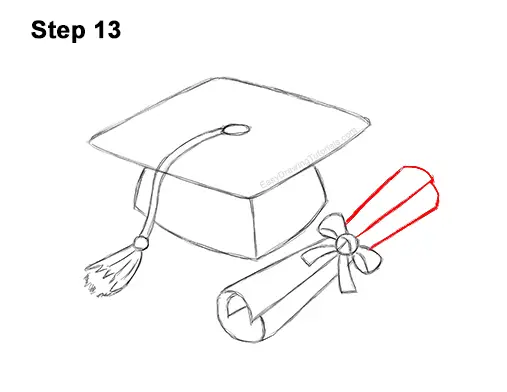
Step 13: Above the bow, draw two more sloping lines for the top part of the rolled -up diploma. The section closest to the bow should be a bit narrower than the top. Draw a line in the middle for the edge of the diploma and close off the shape at the top.

Step 14: Using a pen or marker, carefully go over the lines to make your mortarboard cap and diploma drawing permanent. After inking, get rid of every pencil mark with an eraser.

Final Step: Color your graduation cap and diploma drawing using color pencils, markers or crayons! Use black for the graduation cap. Color lightly at first and slowly build up to the level of darkness you like. Don't overlap the tassel. Use yellow-orange for the tassel and red for the bow. Add a bit of yellow to the diploma.
Thanks for visiting! Subscribe to the EasyDrawingTutorials YouTube Channel for a new tutorial every Sunday.
To learn how to draw animals, visit How2DrawAnimals.com.
RELATED TUTORIALS
 |
 |
 |


