How to Draw Timmy Turner

Use the video and step-by-step drawing instructions below to learn how to draw Timmy Turner from Nickelodeon'sThe Fairly OddParents cartoon. A new cartoon drawing tutorial is uploaded every week, so stay tooned!
Intro: Start off with a pencil sketch. In the beginning stages, don’t press down too hard. Use light, smooth strokes for sketching.
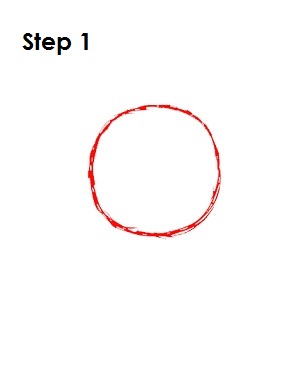
Step 1: Start with a big circle near the top half of the page. It doesn’t have to be perfect. It’s just a guide for Timmy Turner’s head.
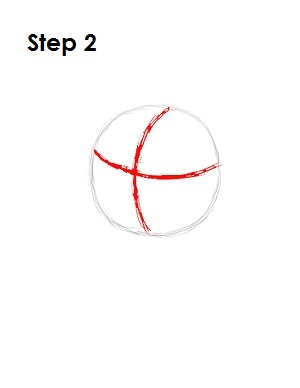
Step 2: Next, draw two intersecting lines across the circle, one vertical and one horizontal. When drawing, bend the lines so that they contour to the shape. These will be construction lines that will help you place Timmy Turner's facial features later on.
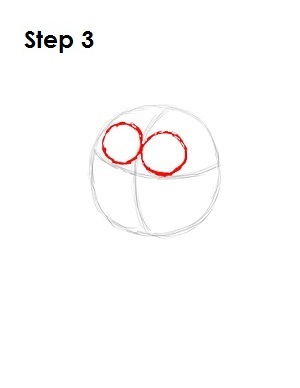
Step 3: Now draw Timmy Turner's eyes by drawing two smaller circles right on top of the horizontal construction line and on either side of the vertical line.
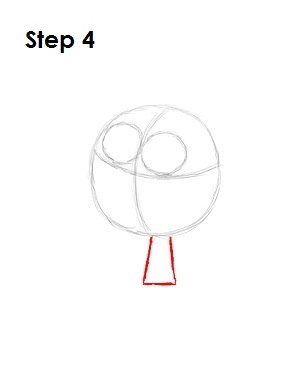
Step 4: Under his head, draw a shape similar to a long rectangle with the top part missing. This will be a guide for Timmy Turner's body.
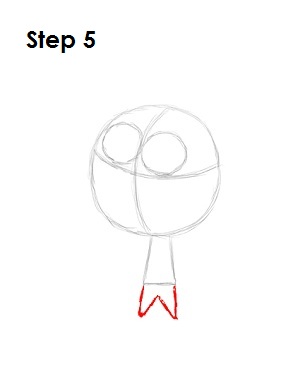
Step 5: Below the rectangle, draw a zig-zagged line similar to the letter W. This will be a guide for Timmy Turner’s legs.
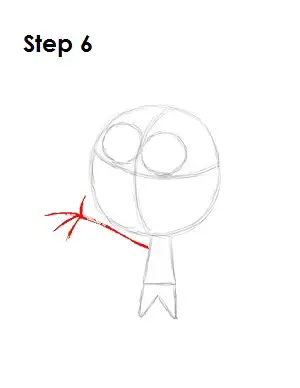
Step 6: Draw a line on the left side of his body near the head. At the end of the line, draw four smaller lines so the end result is similar to a branch. This will be the guide for Timmy Turner's arm.
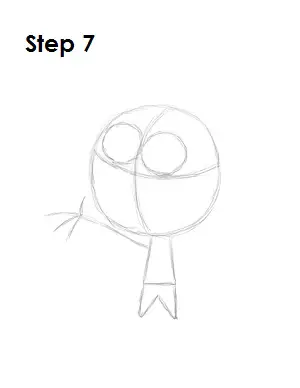
Step 7: That’s it for the initial sketch! You have the basic Timmy Turner shape. Now go in and tighten your drawing. From this point on, press harder with your pencil in order to get darker lines and a more defined sketch.
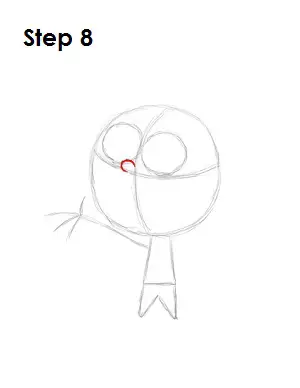
Step 8: Draw Timmy Turner's nose above the area where the two guide lines intersect. The shape looks like a tiny, tilted letter C.
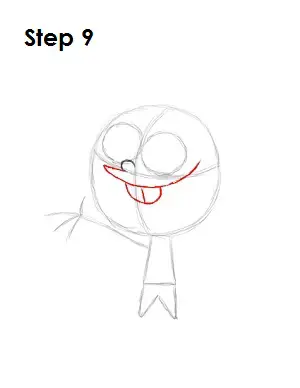
Step 9: Draw the top part of Timmy Turner's mouth as a line that starts below the nose and extends to the left side. Then curve the line to the right side and up ending near the right eye. Below that line draw his buckteeth as a curved line similar to the letter U. Then draw a line through the middle of the letter U to split the teeth.
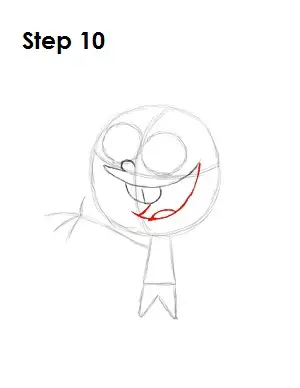
Step 10: To draw the bottom part of this Fairly OddParents character's mouth, draw a line that starts where the other line left off. Curve that line down toward the bottom of the circle and end it near the vertical construction line. Close off Timmy Turner's mouth with another line and a curved line inside as the tongue.
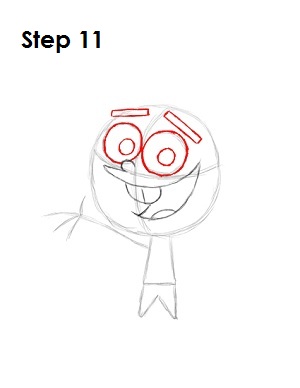
Step 11: Darken the circles for Timmy Turner's eyes and draw a smaller circle inside each as the pupils. Above each eye draw a long rectangular shape for his eyebrows.
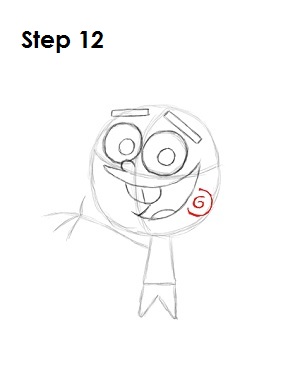
Step 12: On the lower right side of the main circle, near the right side of Timmy Turner's mouth draw his ear. The main part of the ear looks like a backward letter C. Inside the ear draw a swirl similar to the number 6 for extra detail.
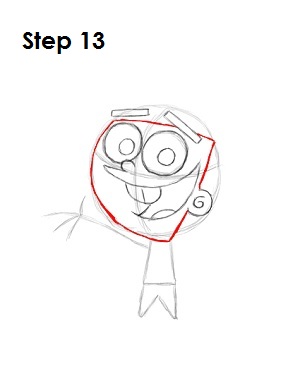
Step 13: Draw Timmy Turner's face by drawing a line above his ear that goes up to the outer edge of the circle. Then continue to draw the line toward the left behind the right eyebrow. After that follow the curvature of the main circle and angle the line back up toward Timmy turner's ear again.
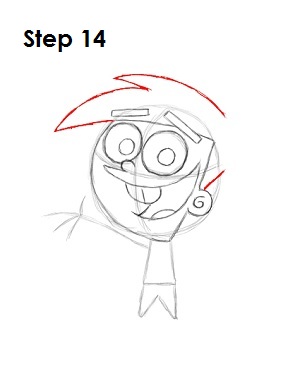
Step 14: Timmy Turner's hair is a couple of jagged lines above the main circle. Draw a smaller line above his ear for the rest of the hair.
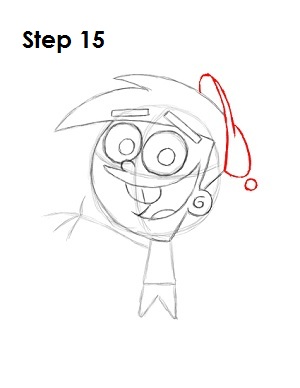
Step 15: Timmy Turner's hat is a little bit tricky. It consists of a series of curved lines that wrap around his hair to form a stylized baseball cap. Use the image above for further reference on how to draw it. Don’t forget the little circle!
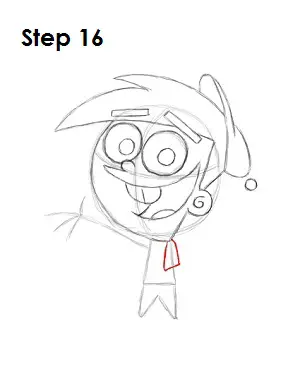
Step 16: Below Timmy Turner's head, draw his shirtsleeve. The shape is similar to an upside-down letter U with a line across the opening.
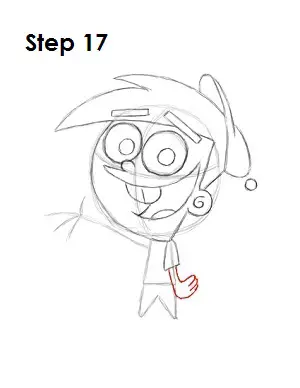
Step 17: Under the shirtsleeve draw this Fairly OddParents character's arm as a couple of vertical lines and draw his hand as a series of curved lines.
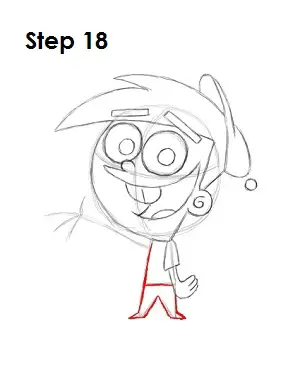
Step 18: Using the initial lines as guides, draw the rest of Timmy Turner's body. Simply darken the lines and add pointy shapes at the bottom to represent his shoes.
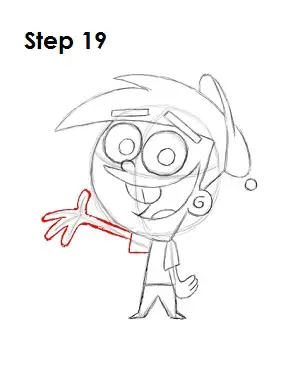
Step 19: Draw the hand on the left side by using the initial shapes as guides. First draw the sleeve and then thicken the lines that make up Timmy Turner's arm, hand and fingers.
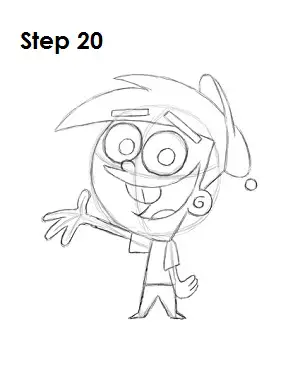
Step 20: That’s it! You now have a nice sketch of Timmy Turner from Nickelodeon's The Fairly OddParents cartoon. You can stop at this quick drawing for a rough, sketchy look, or continue to the step below to go for a more finished look.
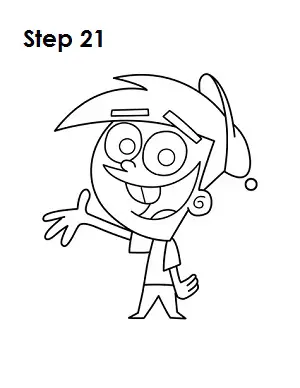
Step 21: For a more finished, inked look of this Fairly OddParents character, carefully draw over the final sketch lines with a pen or marker. Wait for any ink to dry, and then erase your pencil marks. You now have a finished inked drawing of Timmy Turner! You can stop here or go to the final step to complete your Timmy drawing in its entirety.
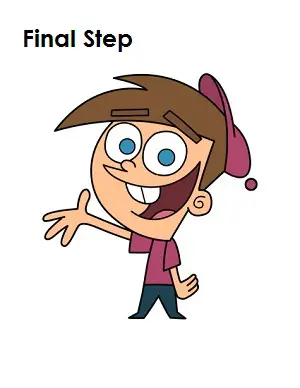
Final Step: For a completely finished Timmy Turner drawing, you have to color it. You can use anything you want: markers, color pencils or even crayons! Color Timmy Turner's cap and shirt a dark pink color. His hair and eyebrows are brown, and his eyes are blue. The inside of his mouth is brown, his tongue is pink and his pants are dark blue. His skin is a peach color. If you don’t have peach, improvise and use light orange or light brown. That’s it! You now have a completed drawing of Timmy Turner from Nickelodeon's The Fairly OddParents cartoon.


