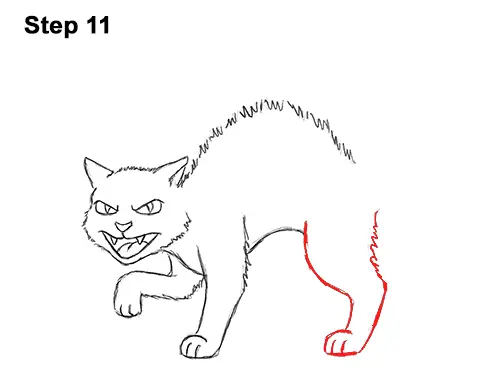
Step 11: Add the hind leg by first drawing a curved line on the lower, right side. Now draw a couple of vertical lines for the middle section of the leg. Add the top part of the leg as a vertical line made up of quick, short strokes. Draw the paw at the bottom as a small arc with a couple of lines inside for the toes.
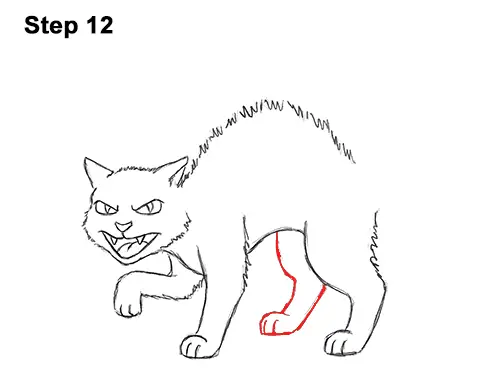
Step 12: On the left side, draw the other hind leg that same way. The first hind leg will block the top, right side of this hind leg, so don't draw that section.
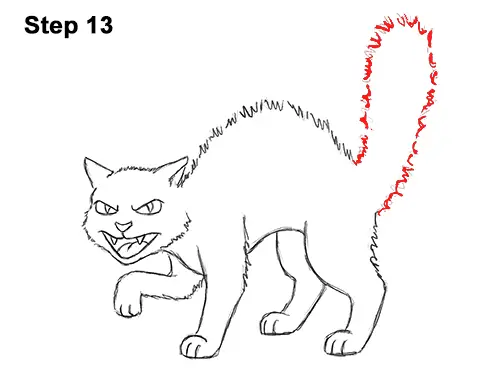
Step 13: On the top, right side of the body, draw a thin, tall arc for the tail. The arc should be made up of quick, short strokes to emphasize the fur standing up. The strokes should have a horizontal orientation on the sides and a vertical orientation at the top.
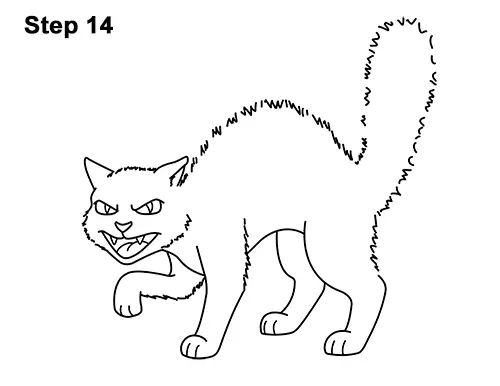
Step 14: Using a pen or marker, carefully go over the lines to make your drawing permanent. After inking, get rid of every pencil mark with an eraser.
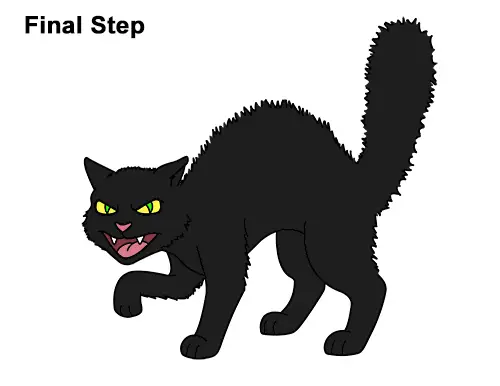
Final Step: Color your drawing using color pencils, markers or even crayons! Use black for the body. Leave a few edges white so that the line work stands out. Push down hard on your pencil to get a rich, dark black. Use yellow and green for the eyes, pink for the nose and tongue, and brown for the inside of the mouth. You can continue adding black until you reach the darkness level that you want.
Thanks for visiting! Subscribe to the EasyDrawingTutorials YouTube Channel for a new tutorial every Sunday.
To learn how to draw animals, visit How2DrawAnimals.com.
RELATED TUTORIALS
 |
 |
 |


