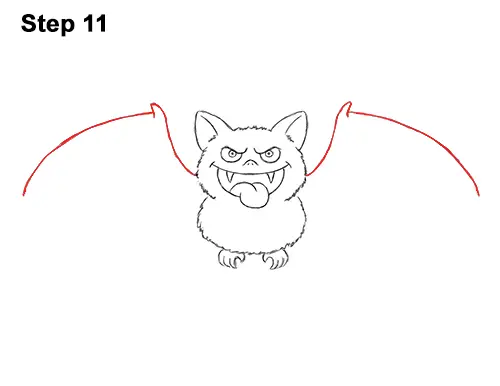
Step 11: To the left of the head, draw a sloping, curved line for the first part of the first wing. To the right of the head, draw a similar curved line for the first part of the second wing. Now draw a longer, curved line on the left side for the second part of the first wing. Draw a similar curved line on the right for the second wing. Try to keep the lines on either side symmetrical. Where each wing bends, at the top, draw a small spike for the bat's thumbs.
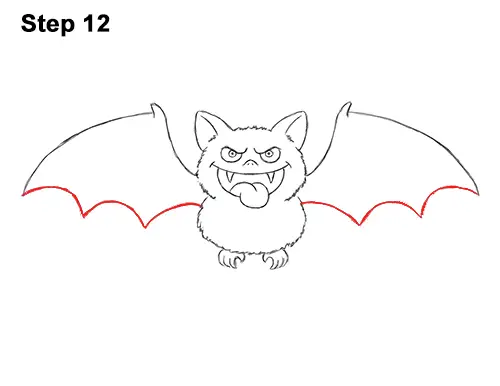
Step 12: Below each wing, draw three wide arcs for the bottom part of the wings. The bat's wings should attach to the body at the gap below the head. If you'd like, you can add another arc to each wing. Remember to try to keep each side symmetrical.
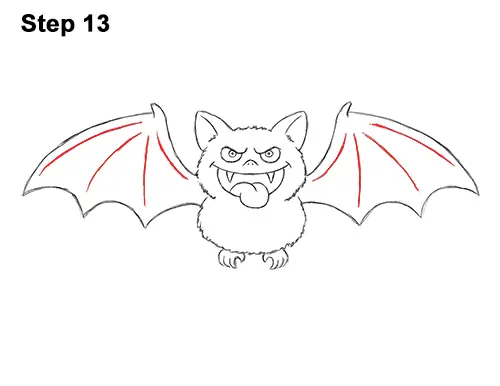
Step 13: Draw a series of long, curved lines inside each wing to give them more structure. These lines represent the arms and digits that the skin is attached to to form the wings. The lines should start at the top where the bat's thumb is, then radiate down to the points at the bottom.
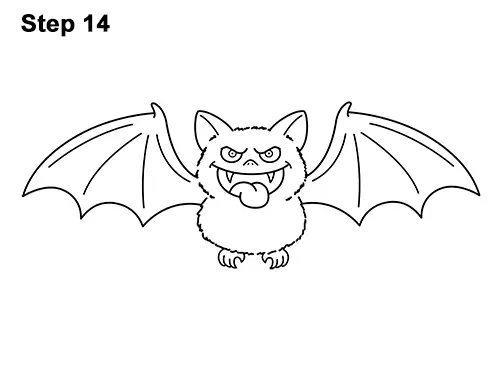
Step 14: Using a pen or marker, carefully go over the lines to make your cartoon bat drawing permanent. After inking, get rid of every pencil mark with an eraser.
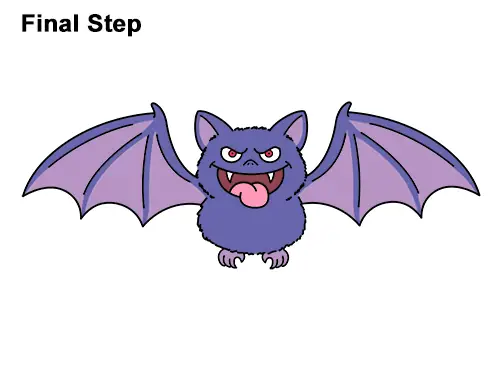
Final Step: Color your cartoon bat drawing using color pencils, markers or even crayons! For this look, first add a base of gray so that the colors that you add on top aren't too bright. On top of the gray, add blue except for the skin on the wings, the feet and ears. Color the skin on the wings, the ears and feet purple or pink.
Continue adding blue and pink to the bat's body until you get the shade that you like. For a simpler drawing, use a single coat of brown, black, or gray on the entire body. Use red for the bat's eyes, brown for the inside of the mouth and pink for the tongue.
Thanks for visiting! Subscribe to the EasyDrawingTutorials YouTube Channel for a new tutorial every Sunday.
To learn how to draw animals, visit How2DrawAnimals.com.
RELATED TUTORIALS
 |
 |
 |


