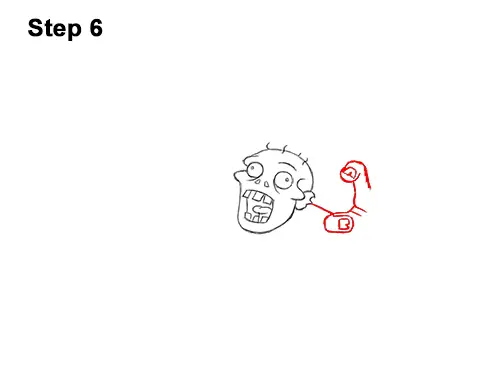
Step 6: To the right, draw a short line for the first part of the hand coming toward the viewer. Draw an almost oval shape for the thumb. Inside the thumb, draw a cracked square for the rotting fingernail. Draw the zombie's first finger as a line that curves to the left. Then add a U-shaped line at the top for the tip of the finger. Finish the finger using a curved line to the right. At the tip, draw a cracked, square-like shape for the broken nail.
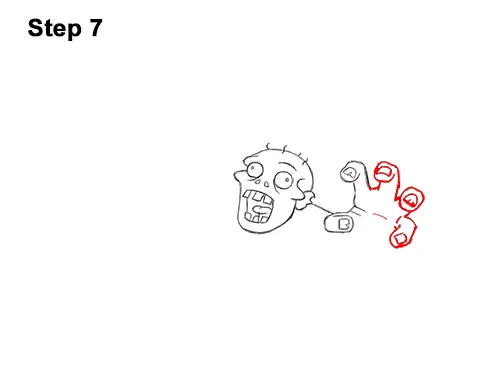
Step 7: To the right, draw a similar shape for the zombie's next finger. The tip of the finger is folded, so draw a U-shaped line at the top. Draw the nail as a broken square-like shape. Because of the angle of the hand, the next finger over is basically a small oval with the broken nail inside. The last finger is made up of a longer line that curves downward more. Add the nail inside the pinky. Draw a few lines in the middle for the creases on the zombie's palm.
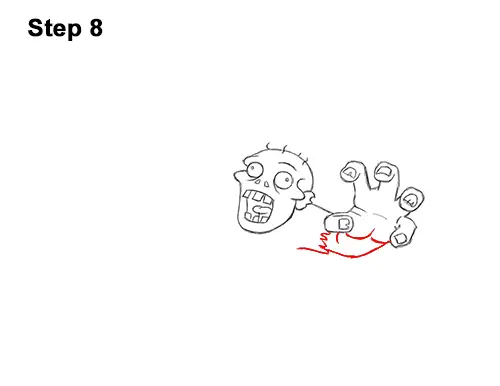
Step 8: Below the fingers, draw two short, curved lines for the bottom of the hand. Then draw a longer curved line for the zombie's arm. At the end, draw a jagged line that then curves to the left for the torn shirt.
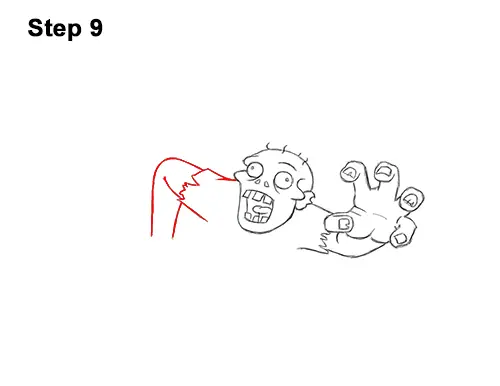
Step 9: To the left of the head, draw a long, angled line for the shirt sleeve. Add some tears to the edge of the sleeve. To the left of the sleeve, draw a line that curves to the left and then downward for the arm. Sketch lightly at first to get the line right. Add another line to the right to make the shape of the zombie's arm thicker.
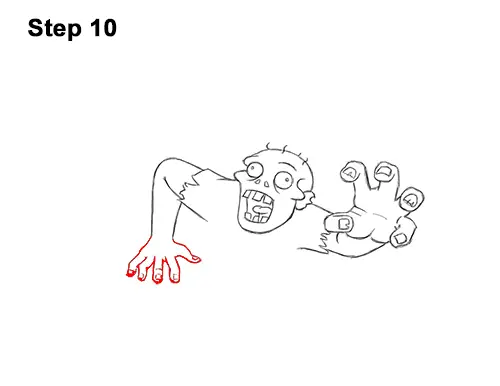
Step 10: At the bottom of the arm, draw a series of thin, long shapes for the zombie's fingers. The shapes of the fingers on the left should slope to the left and the ones on the right to the right. On the right, draw a shorter shape that slopes to the right for the thumb.


