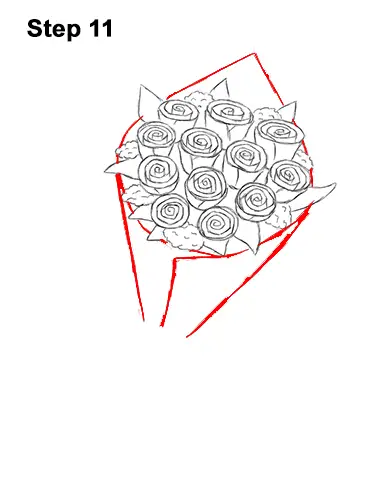
Step 11: At the top, draw a pointy shape for the tip of the sheet that's wrapped around the bouquet of roses. On the right side, draw a curved line for the side of the sheet, but don't overlap the previous shapes. Near the middle, bend the line down to indicate where the sheet is folded. Then add the left side. The bouquet shape under the roses should be wide and then narrower toward the bottom.
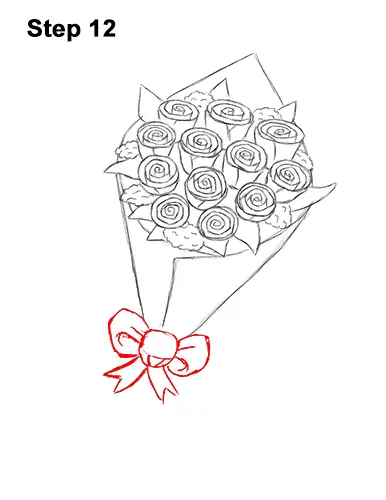
Step 12: At the bottom, draw a big bow that's holding the wrapping sheet together. The bouquet's bow is made up of a circle in the middle with a couple of more square-like shapes on the sides. Draw a few curved lines inside the shape to for the folds on the bow. At the bottom, draw a couple of curved lines with V-shaped tips at the end for the ribbon's loose ends.
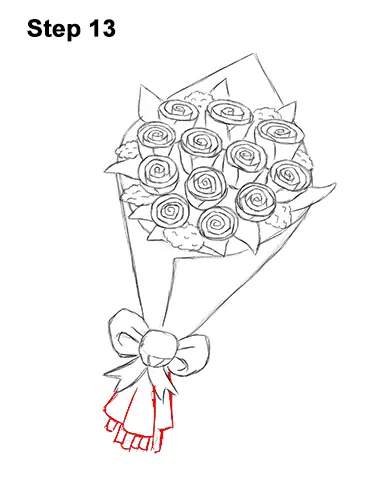
Step 13: Below the bow, draw a few angled lines for the bottom part of the wrapped sheet. At the very bottom, draw a few rectangular shapes for some of the flower stems sticking out.
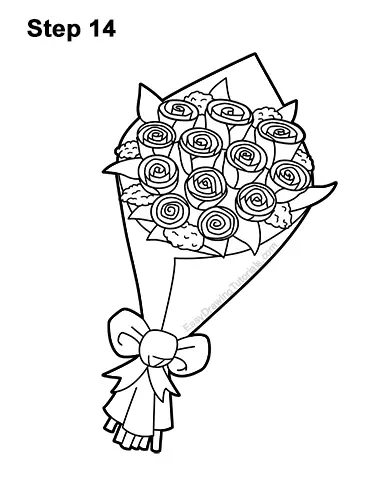
Step 14: Using a pen or marker, carefully go over the final lines to make your flower bouquet drawing permanent. After inking, get rid of every pencil mark with an eraser.
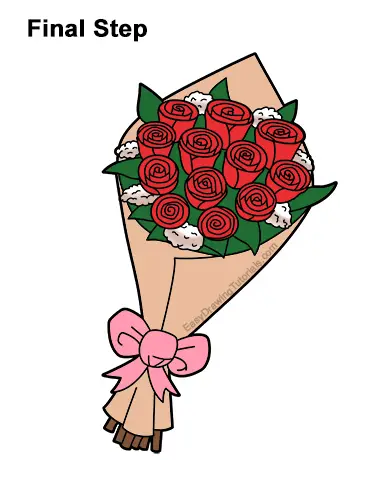
Final Step: Color your drawing of a bouquet of flowers the using color pencils, markers or crayons! Use red for the roses. You can also use a different color for the roses, like pink or yellow. Use green for the leaves. Don't overlap into the other shapes as you color. Use pink for the bow and brown for the stems. Use peach or light brown for the wrapping sheet. Use pink for the bow and brown for the stems of the roses. Add a bit of brown to the white flowers too. Don't forget to pause the video after each step to draw at your own pace.
Thanks for visiting! Subscribe to the EasyDrawingTutorials YouTube Channel for a new tutorial every Sunday.
To learn how to draw animals, visit How2DrawAnimals.com.
RELATED TUTORIALS
 |
 |
 |
 |
 |


