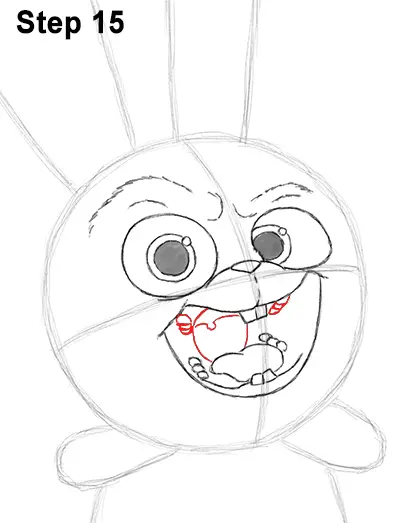
Step 15: Draw two curved lines above the tongue for the back of the throat. Draw a few more curved lines on the top part of the throat for the uvula. Add a row of three small overlapping circles on either side of the throat for Snowball's top molars.
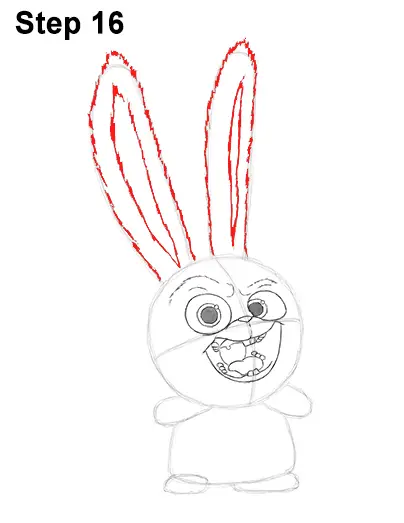
Step 16: Use the long, thin arcs on top of the head as guides to draw Snowball's bunny ears. Use a series of quick, short strokes as you follow the basic path of the guide to create a fuzzy texture for the ears. Make the tip of the ear a bit longer and pointier than the initial arc guide. Draw the ear on the right the same way as the one on the left.
Follow the basic path of the guide while using quick, short strokes and make the top part longer and pointier. Draw the ear opening within the shape of each ear using quick, short strokes too. The shape of Snowball's ear opening should be very similar to the shape of the outer ear itself but thinner. The shape of the opening for the ear on the right should be a lot thinner because of perspective.
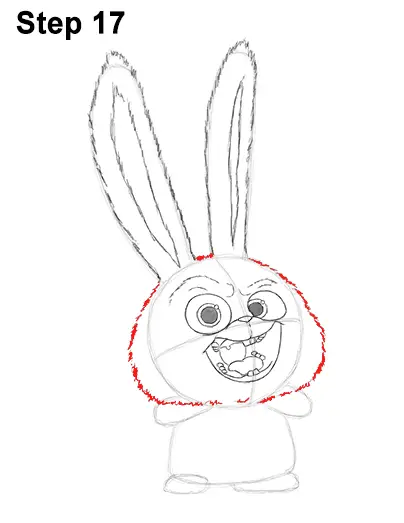
Step 17: Use the initial circle as a guide to draw the shape of Snowball's head. Make the shape of the head wider as you follow the basic path of the circle. Use quick, short strokes as you draw the head to give it a furry texture. Make the other side of the head wider too. The bottom half of the bunny's head should be wider than the top. Take your time as you draw the quick, short strokes to get the fur- like texture right.
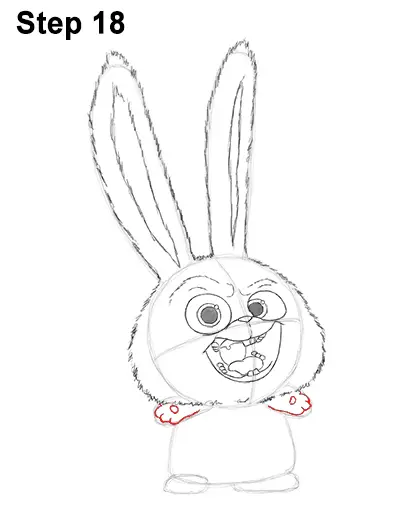
Step 18: Darken the arc on the left create Snowball's arm. Add three small curved lines at the tip to separate the individual fingers. Draw the arm on the right by using the other curved line as a guide. Don't forget the fingers at the tip! Add a small shape similar to a half-circle to each palm for the fleshy pad of skin.
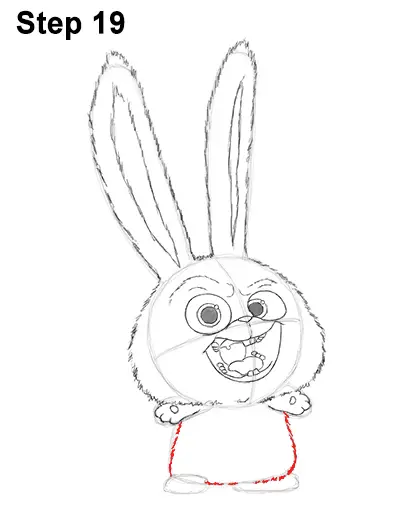
Step 19: Use quick, short strokes as you follow the basic path of the guide under the head to create the shape of the body.


