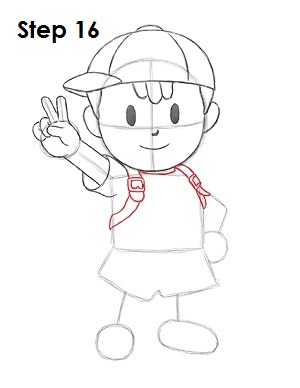
Step 16: Draw Ness's backpack straps coming over the corners of the initial square. The straps are basically two sets of curved parallel lines. Near the middle of each set of lines, draw a small square within another small square for the strap's buckles.
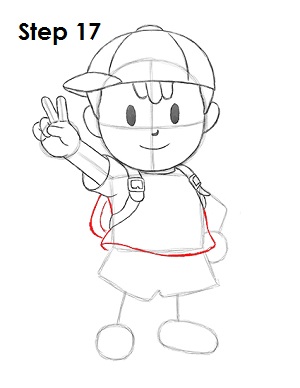
Step 17: Use the rest of the square as a guide to draw Ness's shirt. Follow the basic path of the square but make the line wavier to create the loose-fitting shirt. On the left side of the body, draw a couple of curved lines for Ness's actual backpack.
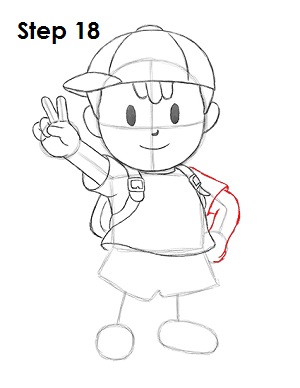
Step 18: Use the line and circle on the right side as a guide to draw Ness's other hand. First draw the sleeve by using a couple of curved lines. Then follow the path of the line as you make the arm thicker. Most of the folded hand is hidden behind the body, but draw the visible portion by using the initial circle as a guide.
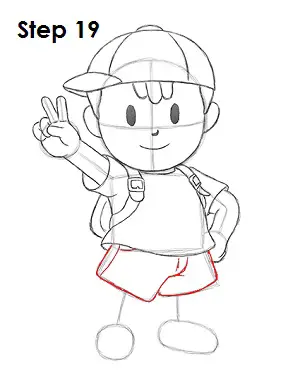
Step 19: Draw Ness's shorts under the shirt by using the angled line as a guide. Follow the basic shape of the line but make the corners rounder as you draw them. Add a few lines within the shape for the detail on the denim shorts.
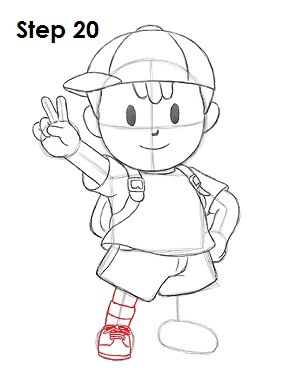
Step 20: Use the line and circle on the left as a guide to draw Ness's leg and foot. Thicken up the foot as you follow the path of the guide and add another line in the middle for the sock. Now use the circle to create the shoe. Draw a couple of curved lines at the top for the laces and a couple more within the shoe for extra detail.


