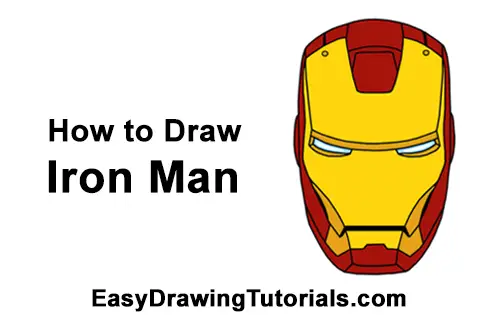
Use the videos and step-by-step drawing instructions below to learn how to draw Iron Man. Stay tooned for more tutorials!
Stay tooned for more free drawing lessons by:
- Liking us on Facebook>>
- Subscribing on YouTube.com>>
- Visit How2DrawAnimals.com for free animal drawing tutorials>>
All of the free art lessons on EasyDrawingTutorials.com are good drawing tutorials for beginners and experienced artists alike. The online tutorials are easy to follow; they teach you the how to draw basics while showing you how to draw fun cartoon characters step by step. Each cartoon character has a video drawing tutorial option, as well as step-by-step photos and written text to follow.
RELATED TUTORIALS
 |
 |
 |
To draw Iron Man step by step, follow along with the video tutorial below and pause the video after each step to go at your own pace. You may find it easier to follow the step-by-step drawings below. The new lines in each step are shown in red, and each step is explained in the text below the photo, so you'll know exactly what to draw in each step. You may want to open the video in a new tab and use both drawing methods! Take your time and draw at your own pace.
Below you can watch a NEW step-by-step tutorial with NARRATED steps:
The following is an older video tutorial:
Intro: Start drawing Tony Stark's Iron Man helmet with a pencil sketch. In the beginning stages, don't press down too hard. Use light, smooth strokes for sketching.
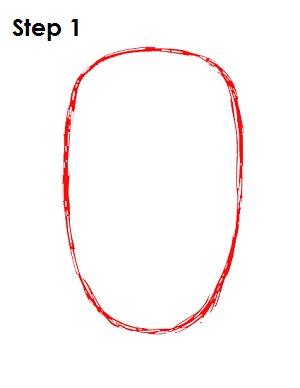
Step 1: To draw Iron Man from Marvel Comics, start with a big oval in the middle of the page. Draw the oval so it is a little flat on the top. This will be the basic shape for Iron Man's head/helmet.
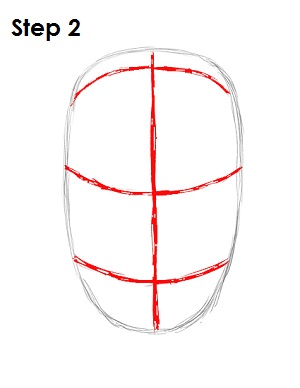
Step 2: Next, draw a vertical line that divides the oval in half. Draw a horizontal line that divides the oval in the middle but curve this line slightly upward. Draw another horizontal line near the top of the oval that curves down slightly. Draw yet another horizontal line near the bottom that curves upward. These will be construction lines that will help you place Iron Man's features later on.
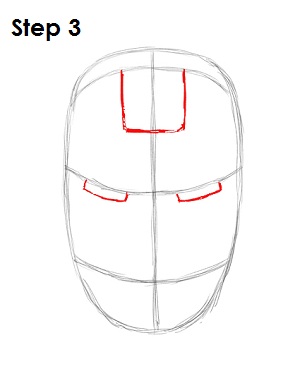
Step 3: Now draw two long rectangles under the middle horizontal construction line on either side of the vertical construction line. These will be Iron Man's eyes. Below the top horizontal construction line, draw a square that comes down about halfway between the top and middle horizontal construction lines.
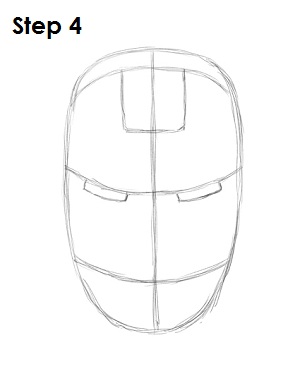
Step 4: That's it for the initial sketch of Tony Stark's Iron Man helmet! You have the basic Iron Man shape, so now go in and tighten your drawing. From this point on, press harder with your pencil in order to get darker lines and a more defined sketch.
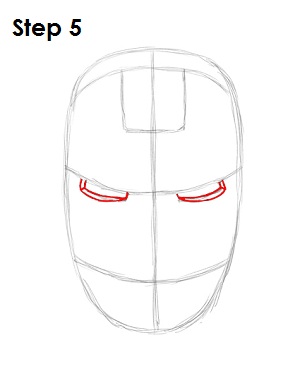
Step 5: Tighten the shape of Iron Man's eyes and make them slightly rounder. Draw a similar shape that surrounds the eyes to give them dimension. Draw two small lines to the outside corner of each eye to complete them.


