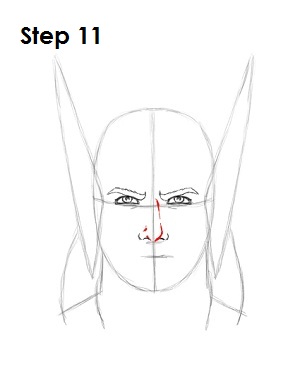
Step 11: Draw the bridge of Thor's nose as a broken vertical line that extends from in between his nostrils up to in between his eyes. Draw a couple more lines for extra detail.
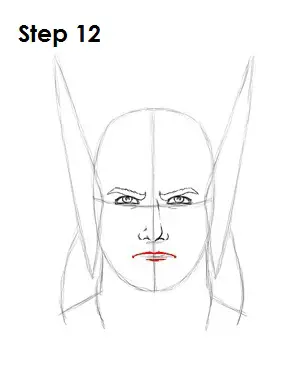
Step 12: Using the lowest of the horizontal lines as a guide for placement, draw Thor's mouth. Bend the line downward to give Thor a slight grimace and draw another small line below it for his bottom lip.
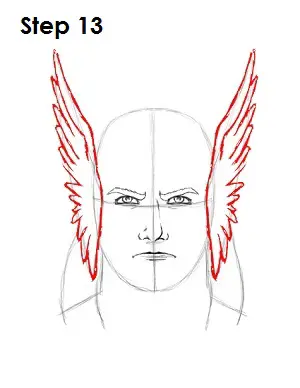
Step 13: Use the initial triangle shapes as guides to draw in the wings on the side of Thor's helmet. Simply add curved lines on the inside of the shape to form wings. The feathers point up on top and gradually change direction and end up pointing down at the bottom. These can be tricky, so use the image above for reference. There are many different variations of Thor’s helmet; this is one of them. You can draw whichever version you prefer.
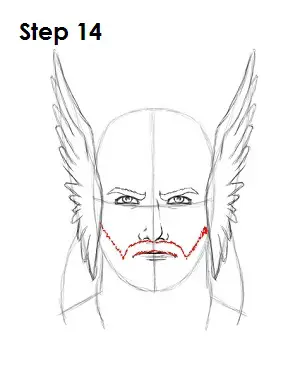
Step 14: There are many different versions of Thor. Sometimes he has a beard, and sometimes he doesn’t. The beard gives him more of a Viking look, so let’s give him a beard. Using quick, short strokes, draw a line under Thor's nose that angles up and extends to the wings on his helmet. Add another fuzzy line above his lip.
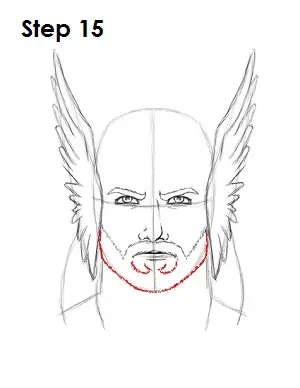
Step 15: Finish up Thor's beard by drawing another fuzzy line and using the bottom part of the main circle as a guide. Square the sides and chin a bit to enhance the shape of the jaw and don’t forget to use quick, short strokes. If you’d rather Thor not have a beard, draw the bottom portion of his jaw without the quick, short strokes to give him a clean-shaven look.


