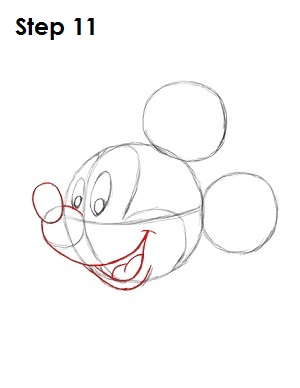
Step 11: Start by darkening in Mickey Mouse's nose, snout and mouth, and making your lines more smooth and curved. Draw a small curve on the end of Mickey Mouse's smile to indicate his laugh line.
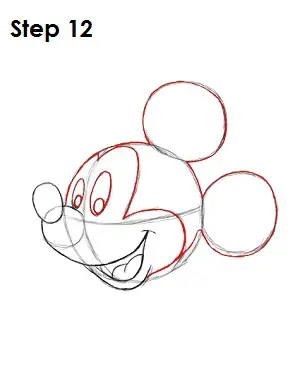
Step 12: Now darken Mickey Mouse's eyes, mask and ears, being careful to keep all the circular shapes fluid and round. Also, raise the line that connects his lower ear to his lip. This will give his head much better definition, and he won't look so round. Remember to not draw the full circle of Mickey Mouse's ears here. Leave the space open where Mickey's ears and head connect.
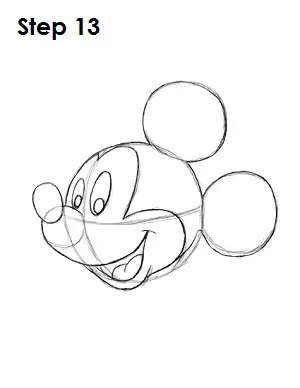
Step 13: That's it! You now have a nice sketch of Disney's Mickey Mouse. You can stop at this quick drawing for a rough, sketchy look or go for a more finished look by continuing to the step below.
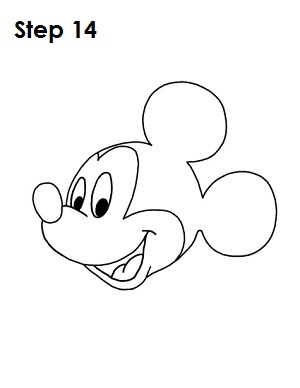
Step 14: For a more finished, inked look, carefully draw over the final sketch lines with a pen or marker. Wait for the ink to dry, and then get rid of every pencil mark with an eraser. You now have a finished inked drawing of Mickey Mouse! You can stop here or go to the final step to complete your Mickey Mouse drawing.
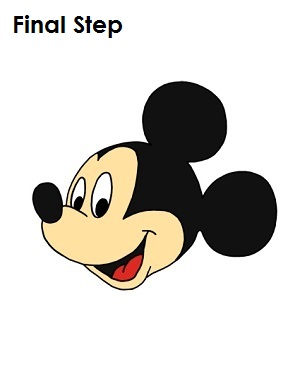
Final Step: For a completely finished Mickey Mouse drawing, you have to color it. You can use markers, color pencils or even crayons! Mickey is an easy character to color. Color his nose, pupils, mask, ears and the inside of his mouth black. Color his tongue red and his face peach. If you don't have peach, improvise! Use orange but press very lightly or use light pink. Use any color that looks good; just experiment. And that's it! You now have a complete drawing of Disney's Mickey Mouse.
Thanks for visiting! Subscribe to the EasyDrawingTutorials YouTube Channel for a new tutorial every Sunday.
To learn how to draw animals, visit How2DrawAnimals.com.
To learn how to draw Manga, visit How2DrawManga.com.
RELATED TUTORIALS
 |
 |
 |


