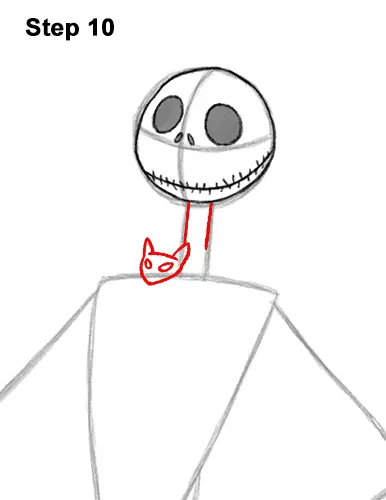
Step 10: To the left of the neck, draw a small, V-shaped line for the first part of Jack Skellington's bat-like bow tie. At the top of the V-shaped line, draw two small, triangular shapes for ears on the bow tie head. Sketch lightly at first. When you get the triangular, bat-like head on the bow tie right, darken the lines. Inside the head, draw two small, tilted ovals for the eyes.
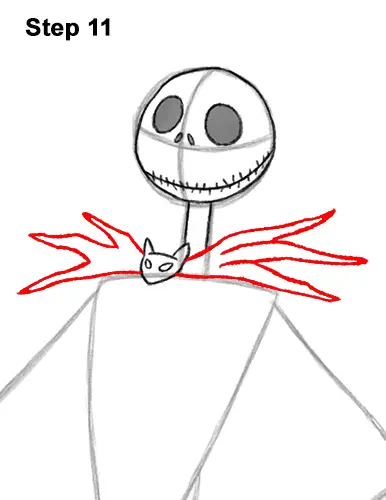
Step 11: To the left of the bow tie head, draw three, thin, long shapes for the wing-like sides of Jack Skellington's bow tie. The shapes don't have to be perfect. In fact, it's better if they're a bit irregular and wavy. Don't make the shapes too long. Draw the shapes shorter the farther up they are. On the right side, draw three more thin, long shapes for the other side of the wing-like bow tie. This side of Jack's bow tie should be bigger and longer than the left side because of the way the torso is turned. Use wavy lines as you draw the shapes and make the shapes shorter the higher up they are.
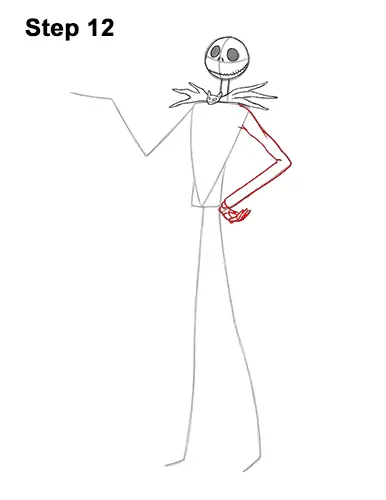
Step 12: Use the angled line on the right side of the torso as a guide to draw Jack Skellington's first arm. Darken the guide to create the left edge of the arm. Draw a short, curved line at the bottom for the cuff. Draw another angled line to left for the other edge of this Halloween Town resident's thin arm. Draw the two edges close to each other so that the arm is thin. Draw a series of thin, short shapes along the curved line at the bottom for the bony hand and fingers.
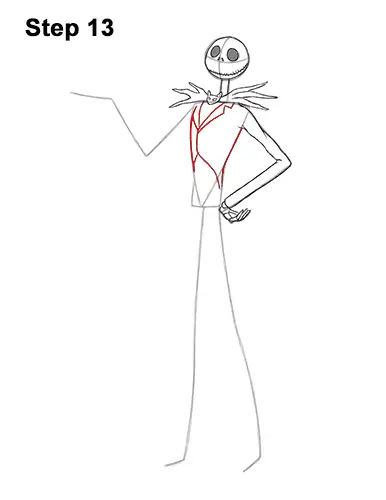
Step 13: Use the shapes in the middle as guides to draw the torso. Darken the outer edges of the guides but make the lines curvier. Inside the torso, near the left side, draw a Y-shaped line for the top part of the coat. Under the Y-shaped line, draw a line that's similar to an upside-down letter V for the rest of Jack Skellington's coat. On the top sides of the Y-shaped line, draw a couple of short, angled lines for the lapels on the coat.
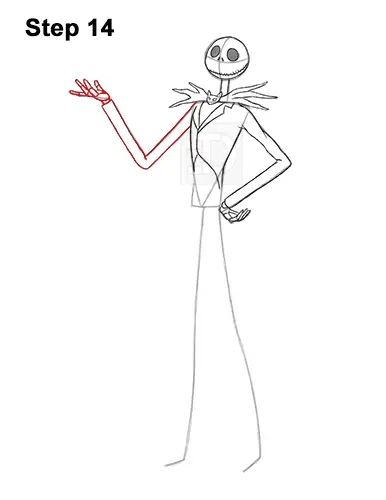
Step 14: Use the V-shaped line to the left of the body as a guide to draw the Pumpkin King's other arm the same way. Darken the guide to create the top edge of the arm. Add a small line in the middle for the crease at the joint. Add another angled line below to complete the shape of Jack Skellington's arm. Close off the shape on the top, left. Keep the lines close to each other so that the shape of the arm remains thin. Draw a couple of thin, short shapes along the small guide at the top for the hand. Draw even thinner shapes along the left side for the bony fingers.


