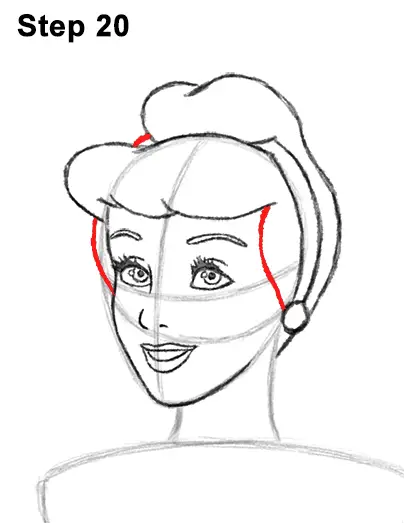
Step 20: Draw a curved line to the right of Cinderella's eyes for the side of the hair. Draw a small curved line on the top, left side of the hair and a longer line to the left of the eyes for more hair.
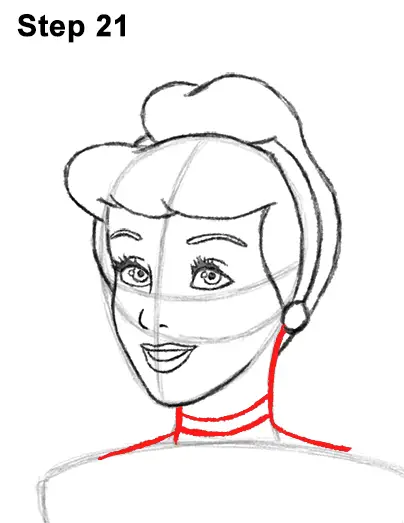
Step 21: Darken the lines under the head to create the neck. Inside the neck, draw two curved horizontal lines for Cinderella's choker.
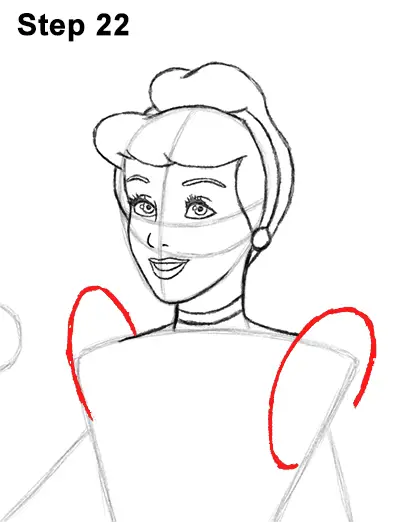
Step 22: Draw a curved line on the top, left side of the initial triangle shape for the puffy shoulder on Cinderella's dress. The shape should be similar to the top part of an oval. Now draw an oval- like shape on the top right side of the initial trangle for the other puffy shoulder. Sketch lightly at first. When you get the shape and placement right, darken the line.
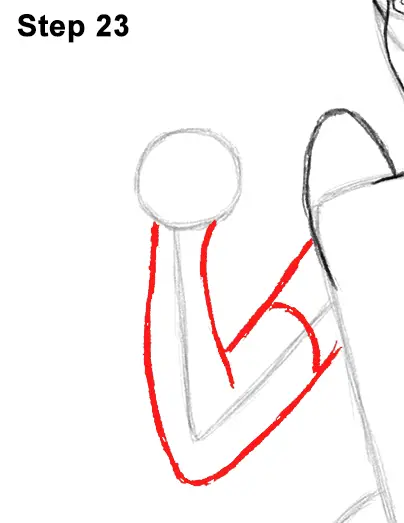
Step 23: Use the V- shaped line on the left side of the body as a guide to draw Cinderella's arm. Sketch the forearm lightly as you follow the basic path of the guide. The top should be thinner than the bottom. Add the top part of the arm as two diagonal lines that are parallel to each other. Once you get the shape of the arm right, darken the lines. Draw a short, curved line inside the arm, near the top, for the long glove.
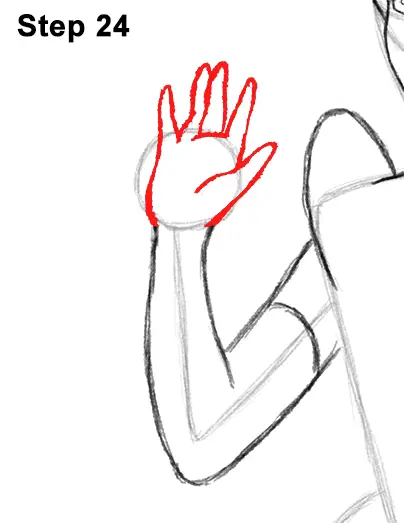
Step 24: Use the small circle as a basic guide to draw Cinderella's hand and fingers. First draw a long thin arc on the right side of the circle for the thumb. Darken the left side of the initial circle to create the other side of the hand. Sketch a longer, thin arc on the top, right side of the initial circle for the index finger. The top part of the finger should be thinner than the bottom. When you get the shape right, darken the line.
The middle finger should be a thin arc that's a tiny bit longer than the index finger. The ring finger should be right up against the middle finger. For variety, the fingers aren't spaced out evenly. The pinky should be on the upper, left side of the initial circle and should be the thinnest and shortest finger.


