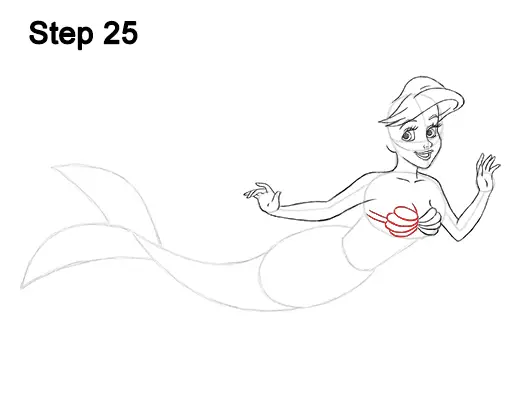
Step 25: Now draw the left side of Ariel's seashell bra using a series of curved lines near the bottom, middle section of the initial oval. The first section at the top should be a shape similar to a long, thin oval. Pay attention to the distance between this top shape and the arm on the left side. Don't draw them too close. Under this top shape, draw a series of curved lines that reach the bottom of the initial oval shape. The end result should be another shell shape that looks similar to a scallop seashell. Add two long, parallel lines on the left side for the straps.
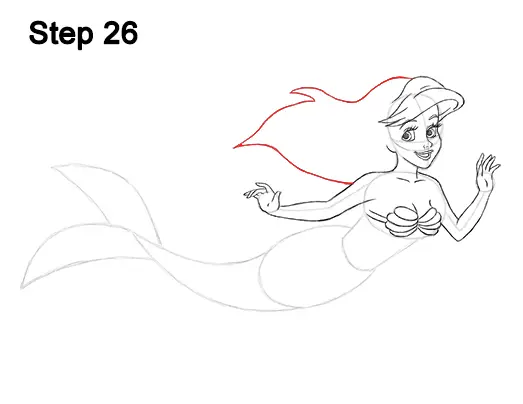
Step 26: Draw a series of wavy lines on the left side of the head for the back portion of Ariel's hair. Sketch the shape lightly at first as a single clump of hair that ends at a point on the left side. Don't draw every individual hair strand. Darken the lines when you're happy with the shape. Ariel is supposed to be under water, so her hair should flow freely. The bottom line for the hair should end above the shoulder on the left side.
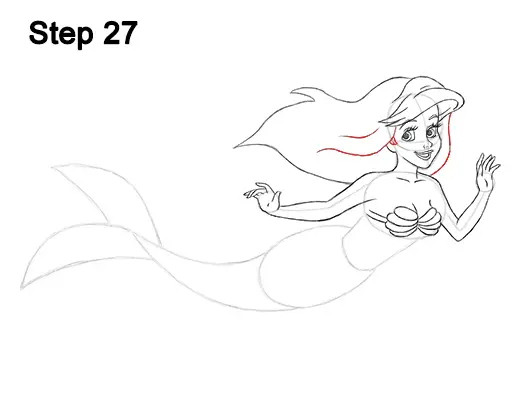
Step 27: Draw a curved line on the right side of Ariel's face for the rest of the hair. Draw another wavy line on the left side of the face, right above the ear, for the other side of the flowing hair. Add a smaller line above for extra detail and draw a small triangle-like clump of hair on the top, right side of the ear.
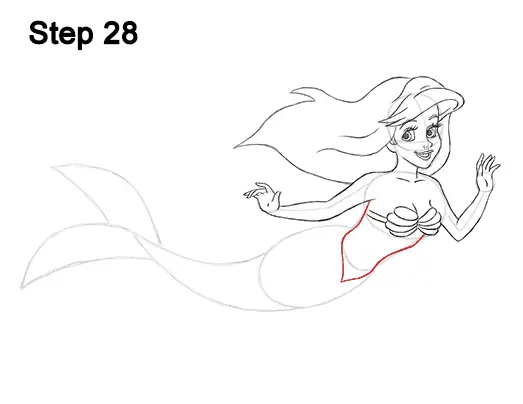
Step 28: Draw Ariel's torso using the initial lines under the seashell bra as guides. Follow the path of the guides and darken the lines to create the shape of the torso. The bottom part of the torso should extend toward the oval-like guide and end in a V-shaped point.
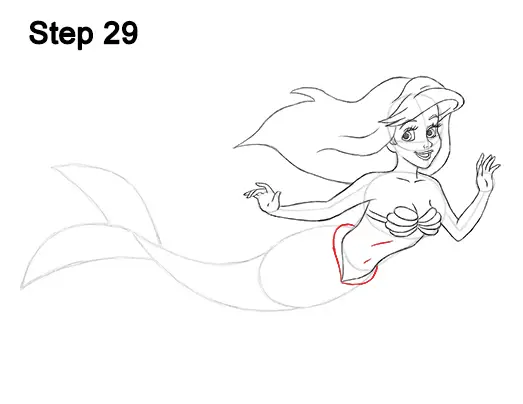
Step 29: Draw a diagonal line near the middle of the torso for detail on Ariel's ribcage and a smaller line under it for the belly button. Add a curved line on either side of the body for the fin-like sections on the base of The Little Mermaid's tail.


