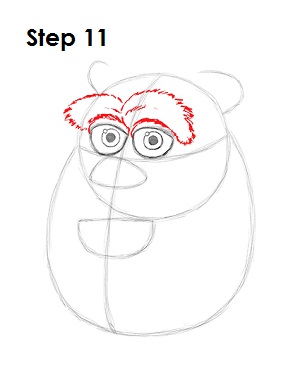
Step 11: Draw a thick shape over each eye for the eyebrows. Sulley is furry, so when you draw the shapes for the eyebrows, don't use a single smooth stroke. Use a series of quick, short strokes as you draw the shapes for a fuzzy look.
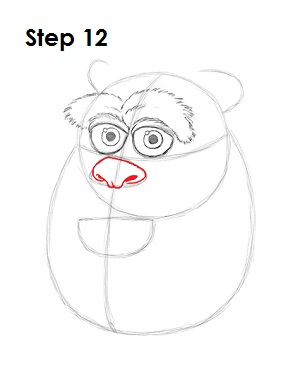
Step 12: Use the triangle-like shape as a guide to draw Sulley's nose. Make the top part pointier and the bottom corners rounder. Draw two shapes inside the nose and shade them in for the nostrils. Add a couple of curved lines at the bottom of the nose.
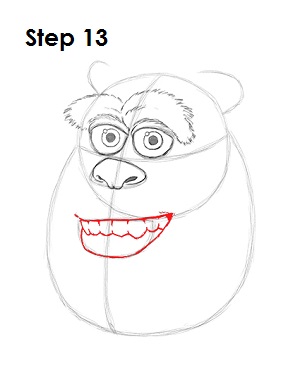
Step 13: Draw the first part of Sulley's mouth by using the sideways D shape as a guide. Follow the basic path of the shape as you darken the line, and make the top right side longer and pointier. Inside the mouth, on the top side, draw a series of pointy shapes for the top row of teeth.
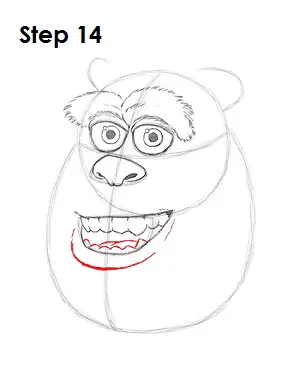
Step 14: Inside Sulley's mouth, on the bottom side, draw another series of pointy shapes for the lower row of teeth. These teeth should be smaller. Above the teeth, draw a couple of curved lines for the tongue. Draw a long, curved line under Sulley's mouth, on the outside, for the lower lip.
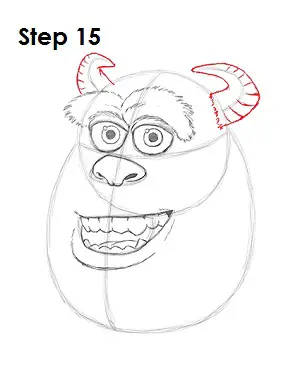
Step 15: Use the initial lines on top of Sulley's head as guides to draw the horns. Follow the basic path of the lines as you thicken up the shapes to create the horns. The base of the horns should be thick, and they should end at a point. Draw a couple of lines within each horn for extra detail.


