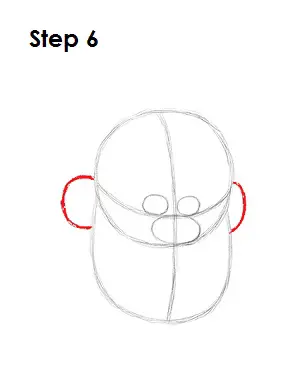
Step 6: Draw two arcs on either side of the head as a guide for Ralph's ears. The arcs should be similar to the letter C and should be placed near the ends of the horizontal construction line.
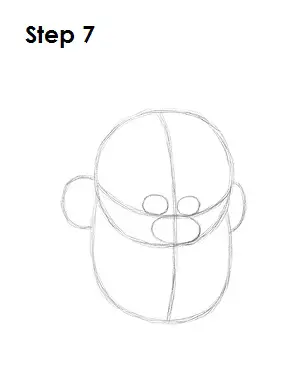
Step 7: That’s it for the initial sketch! You have the basic shape of Ralph from Walt Disney's Wreck-It Ralph. Now go in and tighten your drawing. When learning how to draw Wreck-It Ralph from this point on, press harder with your pencil in order to get darker lines and a more defined sketch.
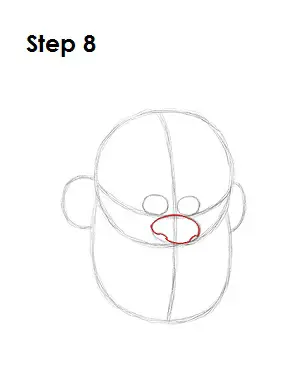
Step 8: Now learn how to draw Wreck-It Ralph's facial features. First use the big oval as a guide to draw Ralph's nose. Simply darken the edge of the oval and draw a couple of curved lines on the lower left and right for the nostrils.
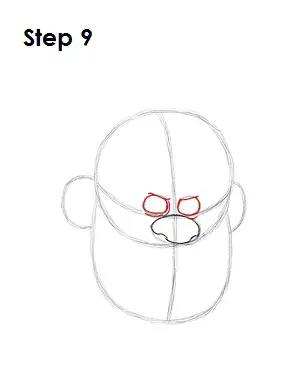
Step 9: Darken the sides of the small ovals to create Ralph's eyes. Above each oval, draw a small line for the eyelids. Draw a few lines under each eye and on the right side of the left eye for structure.
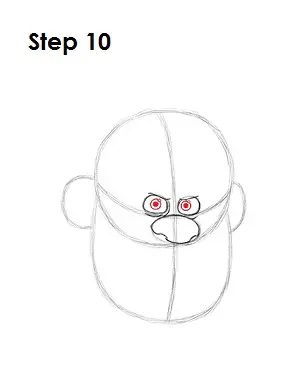
Step 10: Inside each eye, draw a small circle for Wreck-It Ralph's irises. Inside each iris, draw a dot for the pupils. On the top right side of each iris, draw a tiny circle to represent the glare in Ralph's eyes.


