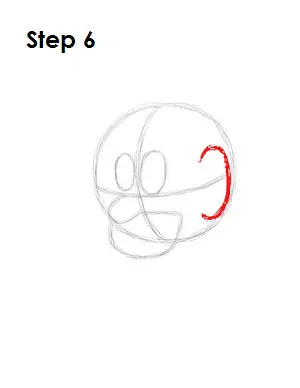
Step 6: On the right side of the Genie's head, near the edge of the main circle, draw a curved line similar to a backward letter C as a guide for this Aladdin character's ear. Draw the shape tall and skinny.
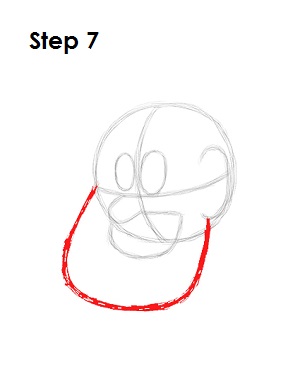
Step 7: Under the circle, draw a big arc as a guide for the Genie's jaw/chin. The line for this guide starts at the end of the horizontal construction line on the left side, then moves down and to the right before coming back up and ending at the bottom part of the ear.
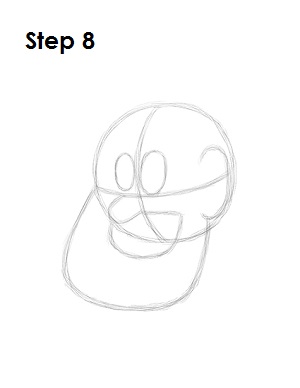
Step 8: That’s it for the initial sketch! You have learned how to draw the Genie's basic shape. Now go in and tighten your drawing. When learning how to draw the Genie from this point on, press harder with your pencil in order to get darker lines and a more defined sketch.
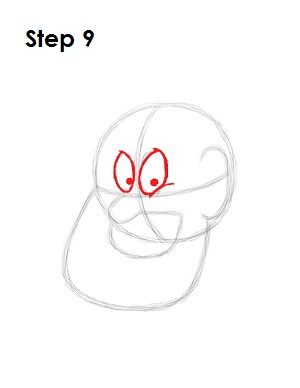
Step 9: Now learn how to draw the Genie's eyes by using the small ovals as guides. Make the tops and bottoms of the ovals a bit pointier. Draw a line on the lower right side of the eye on the right as the top of the cheek. Inside each of this Aladdin character's eyes, draw a small circle and shade it in for the pupil.
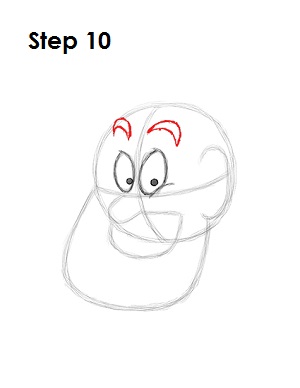
Step 10: High above each eye, draw a long curved shape for the Genie's eyebrows. The eyebrow on the left should be smaller because of perspective.


