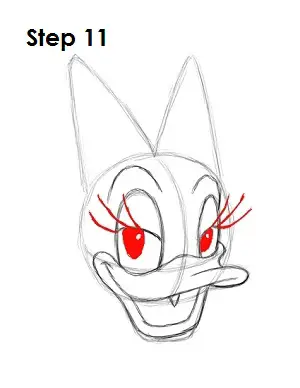
Step 11: Draw a half oval inside each eye for Daisy Duck's pupils. Shade in the ovals except for a small circle to represent glare. Draw three long curved lines from the eyelids as her eyelashes.
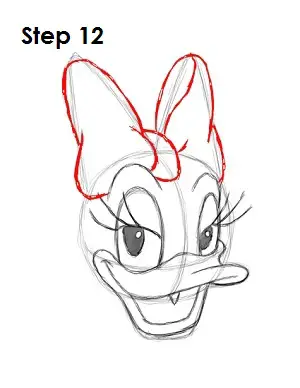
Step 12: Use the initial M-shaped line as a guide to draw Daisy Duck's bow. Make the corners rounder and draw a few curved lines for the creases. Draw a curved line between the peaks to create the bow’s knot.
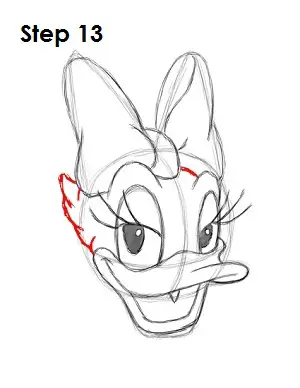
Step 13: Draw the rest of Daisy Duck's head using the main circle as a guide. Draw a few spikes on the left side to represent her feathers.
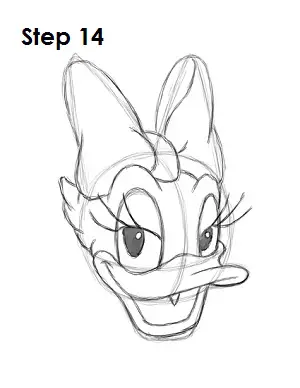
Step 14: That’s it! You now have a nice sketch of Daisy Duck. You can stop at this quick drawing for a rough, sketchy look or go for a more finished look by continuing to the step below.
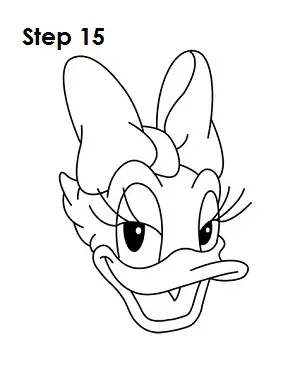
Step 15: For a more finished, inked look, carefully draw over the final sketch lines with a pen or marker. Wait for the ink to dry, and then get rid of every pencil mark with an eraser. You now have a finished inked drawing of Daisy Duck! You can stop here or go to the final step to complete your Daisy Duck drawing.
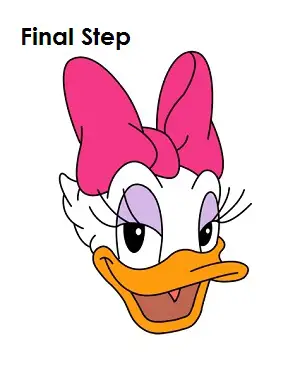
Final Step: For a completely finished Daisy Duck drawing, you have to color it. You can use markers, color pencils and even crayons! Color Daisy Duck's bow pink or any other color you’d like. Her eyelids are usually violet. Her beak is yellow-orange. The inside of Daisy Duck's mouth is light brown, and her tongue is pink. That’s it! You now have a completed drawing of Walt Disney’s Daisy Duck.
RELATED TUTORIALS
 |
 |
 |
 |
 |


