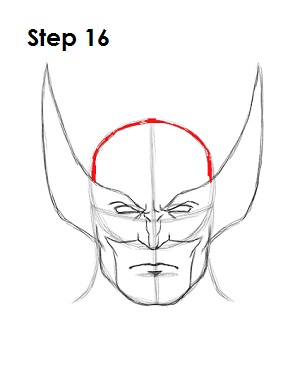
Step 16: Darken the top of the original circle to create the top part of Wolverine's mask and his head.
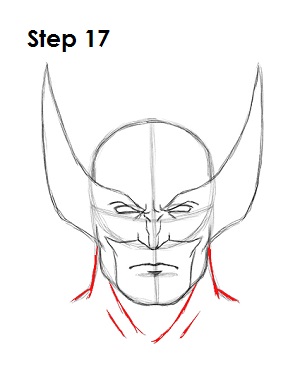
Step 17: Darken the lines that make up Wolverine's neck. Draw a few more lines under his chin for his strong neck muscles.
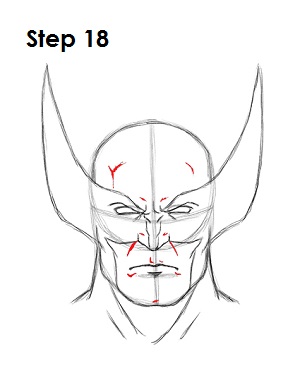
Step 18 (optional): Wolverine's healing factor has kept him young for many years, but he's still an old man. If you'd like, you can draw more lines and wrinkles throughout Wolverine's face for extra detail. This gives him character and a more rugged look.
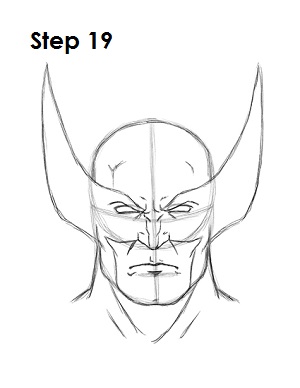
Step 19: That’s it! You now have a nice sketch of the mutant Wolverine from Marvel Comics' X-Men. You can stop at this quick drawing for a rough, sketchy look or go for a more finished look by continuing to the step below.
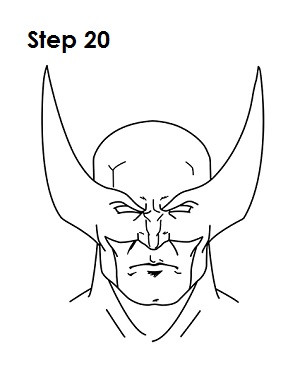
Step 20: For a more finished, inked look, carefully draw over the final sketch lines with a pen or marker. Wait for the ink to dry, and then get rid of every pencil mark with an eraser. You now have a finished inked drawing of Wolverine! You can stop here or go to the final step to complete your Wolverine drawing.
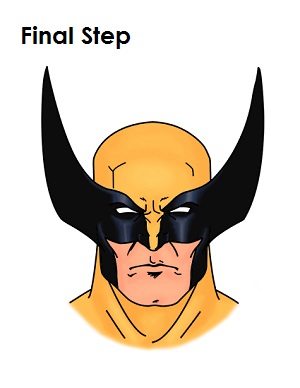
Final Step: For a completely finished Wolverine drawing, you have to color it. You can use markers, color pencils or even crayons! The top of Wolverine's head and neck are yellow. The flaps on his mask are black. You can add a bit of blue on the inside near the eyes for a sleek and shiny look. His skin is peach. If you don't have peach, improvise and use light brown or yellow-orange. Experiment! That’s it! You have now learned how to draw Wolverine from Marvel's X-Men.


