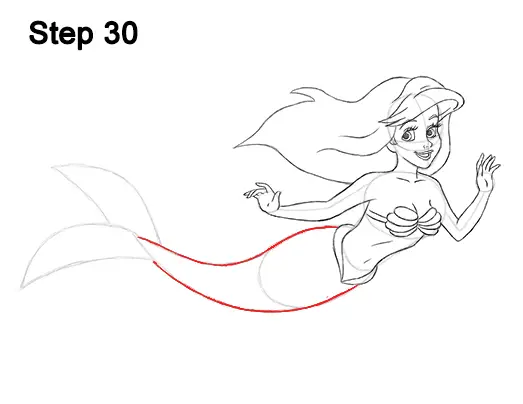
Step 30: Use the initial oval-like shape and lines as guides to draw the lower half of Ariel's body. Simply darken the outer section of the guide lines to create the shape of the lower part of the body.
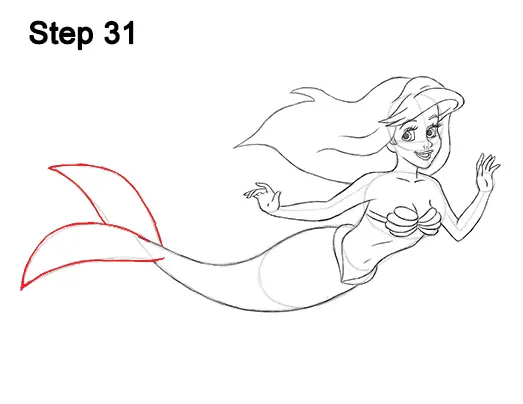
Step 31: Darken the guides on the left as well to create the shape of Ariel's fins. As you darken the lines, make the shapes a bit wavier to indicate that they're under water.
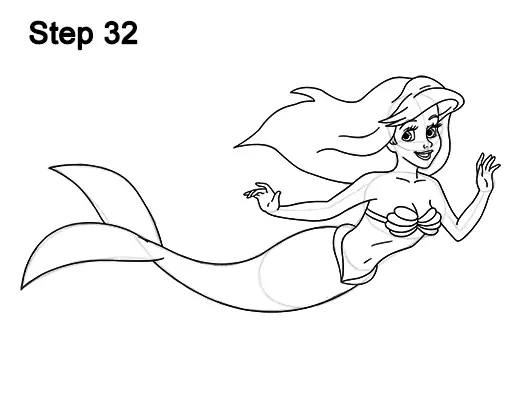
Step 32: For a more finished look, carefully go over the final sketch lines with a pen or marker.
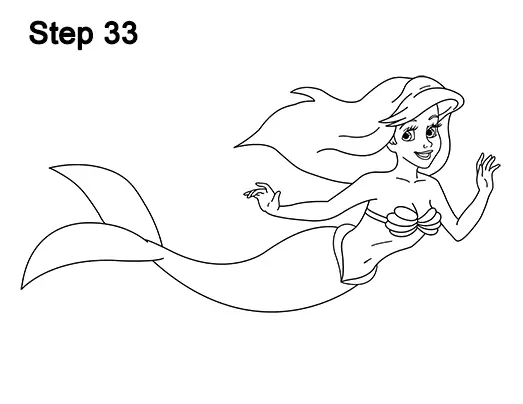
Step 33: After inking, get rid of every pencil mark with an eraser for a cleaner drawing of Ariel from Walt Disney's The Little Mermaid.
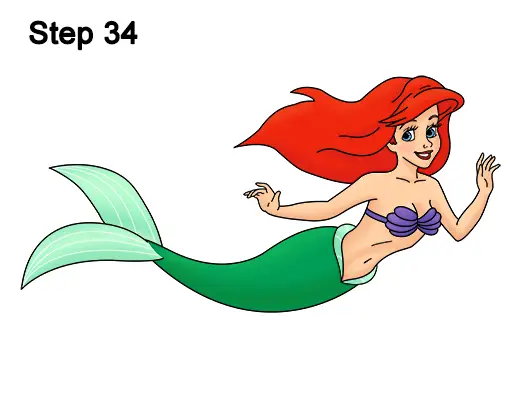
Final Step: Color your Ariel drawing using color pencils, markers or even crayons! First color Ariel's hair red. Start adding the color lightly, then add more color by pushing harder with your pencil to get to the level that you'd like. Use red for the lips and eyebrows too, and add a bit of brown to the hair to give it more volume. Use peach for the skin. If you don't have peach, improvise and use yellow-orange or light brown.
Use a bit of pink or light brown on the undersides of Ariel's body to give it more dimension. Use light blue for the eyes and give the cheeks a bit of pink too. Color her seashell bra purple or violet. Add some green as the base color of the tail. Start off lightly, then build up to the level that you want by pushing harder with your pencil. Using green, add a few stripes to Ariel's fins for extra detail. Use blue-green on top of the regular green to give the tail a richer color. You can use light blue if you don't have blue-green.
Thanks for visiting! Subscribe to the EasyDrawingTutorials YouTube Channel for a new tutorial every Sunday.
To learn how to draw animals, visit How2DrawAnimals.com.
RELATED TUTORIALS
 |
 |
 |


