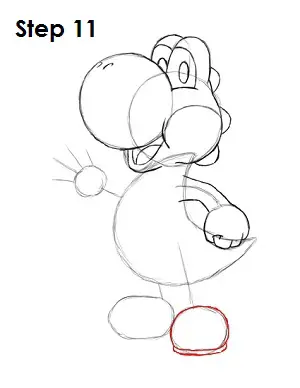
Step 11: To begin drawing Yoshi's right leg, first darken the foot circle and make it flatter on the bottom. Draw a horizontal line under it for the shoe's sole.
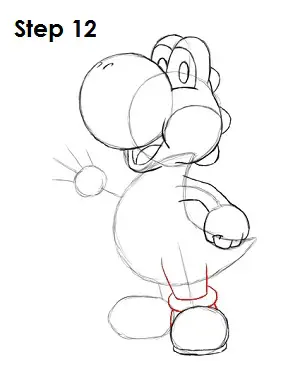
Step 12: Now draw a couple of curves on top of the original circle to create the ankle of Yoshi's shoe and attach them to the circle with two small lines on each side. Then thicken Yoshi's leg guide.
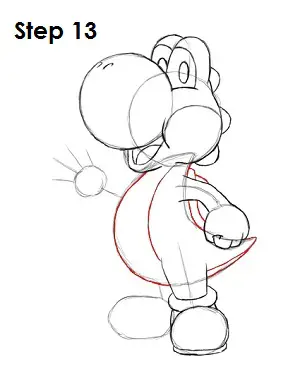
Step 13: Darken the shape of Yoshi's body and tail. Draw in a curve inside the half-moon shape that starts at his neck and ends at his right leg. Draw a line above the bottom of Yoshi's tail, which is the continuation of the curve you just drew from his neck to the leg. The shell saddle on Yoshi's back is hidden by his right hand, so just draw in a few lines to indicate it’s there.
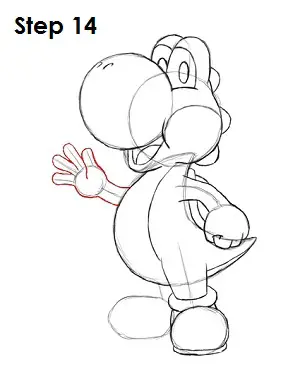
Step 14: Draw in Yoshi's left hand by thickening the shape of the guides. Round out his fingers and make sure the small curved line that makes his thumb is drawn inside the hand.
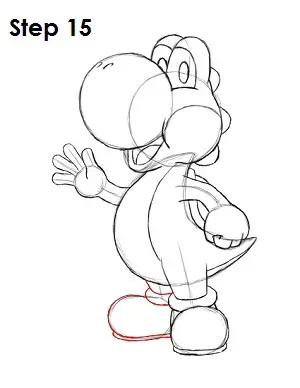
Step 15: Yoshi's left leg is a lot like his right. Flatten the bottom of the oval and draw a horizontal line below it for his shoe's sole. Draw two curves above the original oval to create the top of his shoe. Then draw a small line that connects his body to his shoe to indicate his leg.


