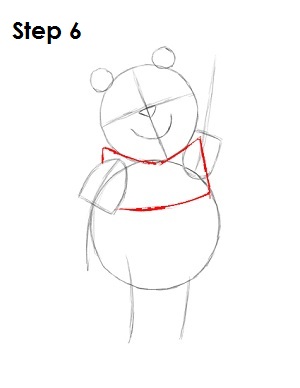
Step 6: Draw in the rest of Winnie the Pooh's shirt by drawing a curved horizontal line near the top part of the body circle just below the head, and making a wide M-shape below his head.
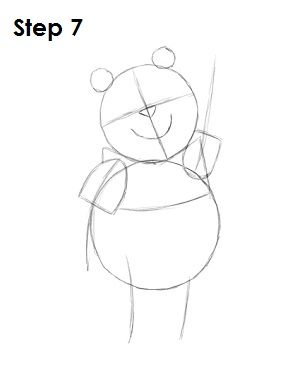
Step 7: That's it for the initial sketch of Disney's Winnie the Pooh! You have the basic Pooh shape, so now you will go in and tighten your drawing. From this point on, press harder with your pencil in order to get darker lines and a more defined sketch.
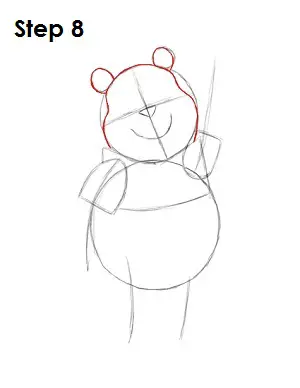
Step 8: Tighten the shape of Winnie the Pooh's head and ears. Draw his ears thinner and less round at the point they meet his head. Do the same thing for his head and taper in the sides just above the horizontal construction line to give this cartoon character his cheeks.
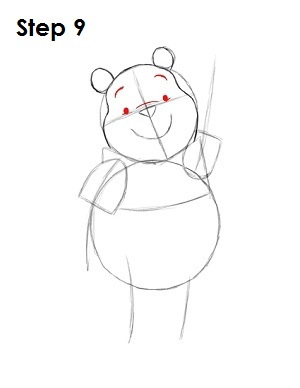
Step 9: On top of the horizontal construction line, draw two small ovals and shade them in. Draw a small straight line below each oval. These are Winnie the Pooh's eyes. Above his eyes, closer to the top of his head, draw two curves to represent his eyebrows. Draw a curve above his nose on the horizontal construction line.
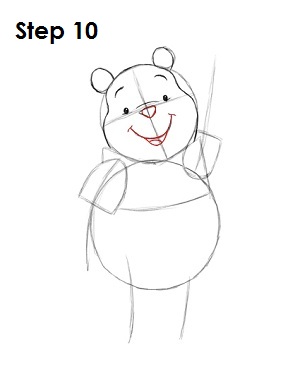
Step 10: Round the shape of Winnie the Pooh's nose to make it less pointy. Darken his mouth shape and give him smile lines at the ends of his mouth. Draw another, smaller curve below his mouth for his lower lip and a small curve inside of the mouth to create his tongue.


